Title: PSX Analog in and N64 Controller
Post by: kylejw on February 13, 2009, 06:43:31 PM
Post by: kylejw on February 13, 2009, 06:43:31 PM
Just signed up here, being a more technical forum than most I figured some of you may be interested in a project I've been working on.
I'm sick of all my N64 controllers grinding away their joysticks so I decided to try and work out a permanent fix. The PSX joystick is the stick of choice because I found a used controller at EB Games for $10 and I've always liked the feel of the PSX stick. Xbox's analog would be easy to adapt to what I've done as long as it's stick isn't for some reason really massive to the point that it won't fit in the N64 controller case.
I toyed with a few ideas that I think could all work.
1. Physically attaching the N64 quadrature encoding wheels to the PSX stick. It's tough to explain, but the two sticks have similar dimensions ' so similar that I think this is possible. The PSX even has 'nubs' that stick out of the potentiometers that rotate with the stick.
Why didn't I do this? Well frankly I think it would be very difficult to align everything perfectly, and you may lose some range of motion after all the effort in retrofitting. Not worth the hassle to me.
2. Replacing the current chip. The current chip is pretty big, and PICs today are available that are as good and better than this chip while being significantly smaller, so there would be room to solder in some jumpers. Unfortunately it has something like 84 pins (can't remember exactly, but it's a lot). Also, I hate troubleshooting interrupts as I don't really have much in terms of equipment at my disposal. The other issue with this method is the controller memory card/rumble pack port. I don't know how the signals coming out of this work and I'd need to redo the code for that myself. No fun.
3. Converting the PSX potentiometer's voltage levels to mimic the N64's quadrature encoded signal.
This is what I did. The PIC I used has a bunch of ADC's so it was easy to read in the voltage, all I had to do was determine when the stick had moved a specific amount, then send a pulse on two lines separated by a quarter wavelength. Google quadrature encoding if you're curious/confused about this part. In fact, the code I'm using was initially just to see if I could do this, but it ended up working so well that I've just kept it. I'm still leaning towards completely redoing it to give me more control over stick sensitivity.
4. Last but definitely not least, I considered intercepting the controller's output data and patching the 'stick position' bits to the position my ADC's read from the PSX analog.
Why didn't I do this? To be honest I didn't think of it until I had already started the method in 3. Otherwise, I probably would have. Maybe better I didn't though as there is a timing aspect that I'd have to adhere to with this; and my oscilloscope is just the line-in port on my sound card. Not exactly state-of-the-art. It is very inaccurate and only works for a very limited frequency range (the same range that the human ear can hear).
Now onto the good part'
Title: Re: PSX Analog in and N64 Controller
Post by: kylejw on February 13, 2009, 06:44:21 PM
Post by: kylejw on February 13, 2009, 06:44:21 PM
First up, the test rig:

After I got everything figured out, I cracked the controller I wanted to use open

Using some 60 grit sand paper I chewed through the original thumbstick case. Once upon a time I had a Dremel that would have made this part cake, but sadly it's broken.

I ferric chlorided myself a nice little PCB that I didn't end up using, so it was pretty much a big waste of time.

New idea was to retrofit the stick into the N64 module, so the Z-button mounts properly

The new stick components

Cut up the back so I can route wires through it. The white line is whiteout that I put on the ridges of the controller case, then mounted the thumbstick, so I could see where the ridges ended up and place my microcontroller accordingly.

Inside view of the stick case, I broke off some little nubs that held the original stick hardware in place

New thumbstick module taking shape, the glue around the cover is kind of sloppy due to some careless sanding, but not much I could do at this point as I planned to make two n64 controllers from one PSX

PIC attached to the back of the case, Normally I wouldn't use hot glue on electronics like this as I have read some bad things about it possibly conducting electricity a tinnnny amount (can anyone confirm?), but it's all I had :)

Routing the wires needed for programming the chip

Rest of the wired soldered on, and covered with hot glue like an amateur. Unfortunately the only suitable wire I had is 30 AWG solid core Kynar, and I hate this stuff. It ALWAYS breaks on me so I just covered it with glue. Notice I had to move the chip over to the right side so it's by the original plug. Oops.

Another view of the completed circuit

In the above picture, note the two blue wires going across the width of the thumbstick module. They go over my white line, so I need to remove part of the plastic which may cut them when I put the controller back together


Finished product. Notice how sloppy the glue around the PSX border is. Ugh. I promise the other controller won't be as bad.

Programmer doing its thang

And that's it. I will have a Youtube video for you if it ever finishes uploading. I can't go back to the old joystick now. It really was the weakness of the N64 controller. Once I get the code down it will be perfect, but as of right now it is completely playable. I'm willing to bet most people would be happy with it but I'm not.
After I got everything figured out, I cracked the controller I wanted to use open
Using some 60 grit sand paper I chewed through the original thumbstick case. Once upon a time I had a Dremel that would have made this part cake, but sadly it's broken.
I ferric chlorided myself a nice little PCB that I didn't end up using, so it was pretty much a big waste of time.
New idea was to retrofit the stick into the N64 module, so the Z-button mounts properly
The new stick components
Cut up the back so I can route wires through it. The white line is whiteout that I put on the ridges of the controller case, then mounted the thumbstick, so I could see where the ridges ended up and place my microcontroller accordingly.
Inside view of the stick case, I broke off some little nubs that held the original stick hardware in place
New thumbstick module taking shape, the glue around the cover is kind of sloppy due to some careless sanding, but not much I could do at this point as I planned to make two n64 controllers from one PSX
PIC attached to the back of the case, Normally I wouldn't use hot glue on electronics like this as I have read some bad things about it possibly conducting electricity a tinnnny amount (can anyone confirm?), but it's all I had :)
Routing the wires needed for programming the chip
Rest of the wired soldered on, and covered with hot glue like an amateur. Unfortunately the only suitable wire I had is 30 AWG solid core Kynar, and I hate this stuff. It ALWAYS breaks on me so I just covered it with glue. Notice I had to move the chip over to the right side so it's by the original plug. Oops.
Another view of the completed circuit
In the above picture, note the two blue wires going across the width of the thumbstick module. They go over my white line, so I need to remove part of the plastic which may cut them when I put the controller back together
Finished product. Notice how sloppy the glue around the PSX border is. Ugh. I promise the other controller won't be as bad.
Programmer doing its thang
And that's it. I will have a Youtube video for you if it ever finishes uploading. I can't go back to the old joystick now. It really was the weakness of the N64 controller. Once I get the code down it will be perfect, but as of right now it is completely playable. I'm willing to bet most people would be happy with it but I'm not.
Title: Re: PSX Analog in and N64 Controller
Post by: kylejw on February 13, 2009, 07:19:36 PM
Post by: kylejw on February 13, 2009, 07:19:36 PM
Video finally uploaded, it's not the greatest though.
Playing one-handed, and I wasn't paying attention and the controller drifted out of view near the end. Also would have made the video longer but my memory card is missing, so I had to make due with my old 256MB card.
http://www.youtube.com/watch?v=QFbFlmr-h2Q (http://www.youtube.com/watch?v=QFbFlmr-h2Q)
Title: Re: PSX Analog in and N64 Controller
Post by: NFG on February 13, 2009, 10:48:42 PM
Post by: NFG on February 13, 2009, 10:48:42 PM
That is seriously cool! =D
Will you be making the PIC code available?
Will you be making the PIC code available?
Title: Re: PSX Analog in and N64 Controller
Post by: ken_cinder on February 14, 2009, 04:40:32 AM
Post by: ken_cinder on February 14, 2009, 04:40:32 AM
Cool, good job, but I personally hate the Playstation analog sticks. They're far too light with too little resistance for precise control. I like sticks that require more force to move.
This is surely better than the N64 stick once it's worn though, they get pretty loose when worn.
This is surely better than the N64 stick once it's worn though, they get pretty loose when worn.
Title: Re: PSX Analog in and N64 Controller
Post by: kylejw on February 14, 2009, 02:07:54 PM
Post by: kylejw on February 14, 2009, 02:07:54 PM
Quote from: Lawrence on February 13, 2009, 10:48:42 PM
That is seriously cool! =D
Will you be making the PIC code available?
I don't really mind posting the code. Just right now it isn't very well written, at the very least I'd have to clean it all up so it's readable for someone who isn't me :p
But at the same time I'm thinking a rewrite is in order, so maybe in the future I can release something.
Quote from: IJTF_Cinder on February 14, 2009, 04:40:32 AM
Cool, good job, but I personally hate the Playstation analog sticks. They're far too light with too little resistance for precise control. I like sticks that require more force to move.
This is surely better than the N64 stick once it's worn though, they get pretty loose when worn.
I don't mind a loose stick. In the video check out how much I flick my thumb back and forth. That's just the way I use analog sticks, no smooth motions for these thumbs haha. Easily movable sticks makes it easier to do my hyper flick thing. The problem I have with loose N64 sticks though is when they get loose they lose some of their range of motion.
But I do see your point. An Xbox analog would work with this too if someone were to fit one, since they use potentiometers too. I'm also looking at using a GC stick.
Title: Re: PSX Analog in and N64 Controller
Post by: kendrick on February 14, 2009, 10:11:46 PM
Post by: kendrick on February 14, 2009, 10:11:46 PM
Welcome to GamesX, Kyle. This is excellent work, and you've made a really positive first impression. You may now get away with saying things carelessly. :)
About using a GC stick? If you're going to put in a traditional dual-pot analog stick anyway, I'm thinking the GC stick is the best option. That octagonal gate is something that's unique to Nintendo hardware, and there are some games where it's absolutely necessary to have a guide as to where the 'absolute' up position is.
About using a GC stick? If you're going to put in a traditional dual-pot analog stick anyway, I'm thinking the GC stick is the best option. That octagonal gate is something that's unique to Nintendo hardware, and there are some games where it's absolutely necessary to have a guide as to where the 'absolute' up position is.
Title: Re: PSX Analog in and N64 Controller
Post by: jk399 on March 05, 2009, 02:51:35 PM
Post by: jk399 on March 05, 2009, 02:51:35 PM
This is fantastic, I have in the past, re-cased 3rd party controllers in the original shell to swap analogue stick as most 3rd party pads are pot-based.
But the 3rd party pads have issues with the rumble pak and memory pak corruption etc. it would be great to use a gc joystick with the original n64 controller.
I would love to see a release of the code/schematic.
But the 3rd party pads have issues with the rumble pak and memory pak corruption etc. it would be great to use a gc joystick with the original n64 controller.
I would love to see a release of the code/schematic.
Title: Re: PSX Analog in and N64 Controller
Post by: micro on April 15, 2009, 02:04:00 AM
Post by: micro on April 15, 2009, 02:04:00 AM
I'm new to this forum :)
I've done exactly the same mod about a year ago. Back then I've also utilized a PSX analog stick.
Yesterday I've finished another one but this time I used the analog stick and the octagonal restrictor plate of a 3rd party Gamecube controller.
I've decided to publish my experiences with this mod as well as the source code for the MCU I've written on this forum.
The victim:

I didn't have a guilty conscience about cannibalizing a bigben controller :D
The finished N64 controller:

You can actually see the MCU in the left handle. I'm very pleased with the look and (of course) the feeling of the new stick. It's really perfect.
The hardest part by far was to perfectly fit the stick and the octagonal plate. Really! If you look at the original N64 stick from the side you'll notice that the stick is mounted in a really weird way, the lower end of the gray frame sticks out far.
So take your time mounting the stick & plate and use lots of hot glue. If it's not perfectly fit you can always use a hot air blower to heat the hot glue again (but don't melt the plastic of the controller) and then correct the angle of the stick.
As mentioned before on some threads of this forum, the original N64 analog stick consists of two wheels and a rotary encoder. If you want to know what this means and how it works you should have a look at the wikipedia entry: http://en.wikipedia.org/wiki/Rotary_encoder (http://en.wikipedia.org/wiki/Rotary_encoder)
Inside the N64 controller there is a connector that provides us with everything we need:

I didn't use a PIC like kylejw but instead an Atmel AVR MCU. Unfortunately the only one I had available with analog-to-digital converters was an ATMega8. Having 28 pins it's a little bit over the top but there's plenty of room in the controller housing so it's not really a problem.
I drew this little picture of how to wire the ATMega8:

As you can see there are only 2 inputs from the pots of the new PSX-/GC-style analog stick as well 4 outputs (XA, XB, YA, YB) that go straight into the connector on the N64 controller PCB.
For writing MCU code I'm using Bascom AVR IDE, you can get it for free at http://www.mcselec.com/ (http://www.mcselec.com/) (demo version limited to 4k of code which is MORE THAN ENOUGH for projects like this)
If your PC has a parallel printer port you can get a suitable programmer very cheap or even build one youself.
My code probably has much room for improvement and tweaking but it works great. Also, I've translated my comments into english, I hope they're understandable yet :D
After having compiled the code and flashed the ATMega8 don't forget to set the speed of the ATMega8 correctly in the fusebits settings, 8MHz internal RC.
I recommend using a socket for the MCU or even including a 10pin ISP connector inside the controller housing itself so you can re-flash the ATMega8 if something went wrong.
There are several ways how to connect VCC and GND to the pots of the new analog stick AND the stick can be mounted in 4 different angles (0°, 90°, 180°, 270°).
That means you could end up with switched X- and Y-axis and/or reversed X-axis and/or Y-axis. There are 2 ways to solve problems like that:
1.) Redo wiring, e.g. switch the VCC and GND connections on the pots.
2.) Simply switch some words in the code->
if X- and Y-axis are switched:
Go to line 22, 26, 56 & 60. Switch the ADC channel in brackets, e.g. getadc(1) -> getadc(2) ; getadc(2) -> getadc(1)
if the X-axis or Y-axis is reversed:
Go to line 75 & 78 for the X-axis and line 84 & 87 for the Y-axis. Simply switch "right" for "left" and you're set
So go try it yourself and post your finished controllers :)
I've done exactly the same mod about a year ago. Back then I've also utilized a PSX analog stick.
Yesterday I've finished another one but this time I used the analog stick and the octagonal restrictor plate of a 3rd party Gamecube controller.
I've decided to publish my experiences with this mod as well as the source code for the MCU I've written on this forum.
The victim:
I didn't have a guilty conscience about cannibalizing a bigben controller :D
The finished N64 controller:
You can actually see the MCU in the left handle. I'm very pleased with the look and (of course) the feeling of the new stick. It's really perfect.
The hardest part by far was to perfectly fit the stick and the octagonal plate. Really! If you look at the original N64 stick from the side you'll notice that the stick is mounted in a really weird way, the lower end of the gray frame sticks out far.
So take your time mounting the stick & plate and use lots of hot glue. If it's not perfectly fit you can always use a hot air blower to heat the hot glue again (but don't melt the plastic of the controller) and then correct the angle of the stick.
As mentioned before on some threads of this forum, the original N64 analog stick consists of two wheels and a rotary encoder. If you want to know what this means and how it works you should have a look at the wikipedia entry: http://en.wikipedia.org/wiki/Rotary_encoder (http://en.wikipedia.org/wiki/Rotary_encoder)
Inside the N64 controller there is a connector that provides us with everything we need:
I didn't use a PIC like kylejw but instead an Atmel AVR MCU. Unfortunately the only one I had available with analog-to-digital converters was an ATMega8. Having 28 pins it's a little bit over the top but there's plenty of room in the controller housing so it's not really a problem.
I drew this little picture of how to wire the ATMega8:
As you can see there are only 2 inputs from the pots of the new PSX-/GC-style analog stick as well 4 outputs (XA, XB, YA, YB) that go straight into the connector on the N64 controller PCB.
For writing MCU code I'm using Bascom AVR IDE, you can get it for free at http://www.mcselec.com/ (http://www.mcselec.com/) (demo version limited to 4k of code which is MORE THAN ENOUGH for projects like this)
If your PC has a parallel printer port you can get a suitable programmer very cheap or even build one youself.
My code probably has much room for improvement and tweaking but it works great. Also, I've translated my comments into english, I hope they're understandable yet :D
Code Select
$regfile = "m8def.dat"

'8MHz = highest internal frequency of the ATMega8
$crystal = 8000000

'configuring the ADC, its resolution is 10bit per channel
Config Adc = Single , Prescaler = Auto , Reference = Avcc
Start Adc

'pins for the output of the X-axis
Config Portb.1 = Output
Config Portb.2 = Output

'pins for the output of the y-axis
Config Portb.3 = Output
Config Portb.4 = Output

'variables in which the 10bit value of the ADC will be stored
Dim X As Integer , Y As Integer

'init X axis. the value is divided by 2 because otherwise it's too big
X = Getadc(1)
Shift X , Right , 2 , Signed

'init Y-axis
Y = Getadc(2)
Shift Y , Right , 2 , Signed

'variables to store the old X and Y values for comparison in the next round
Dim Oldx As Integer , Oldy As Integer
Oldx = X
Oldy = Y

'rotating the xwheel and ywheel bytes 1 step to the left or the right is the
'same as turning the optical wheels in the N64 stick 1 step clockwise or
'counter-clockwise.
'by fixating on two bits of these bytes (let's say xwheel.0 and xwheel.1) and
'then rotating the byte 1 step to the left or the right, you'll get the new
'gray code on the these two bits (e.g. xwheel.0=A , xwheel.1=B)
Dim Xwheel As Byte , Ywheel As Byte
Xwheel = &B11001100
Ywheel = &B11001100

Dim I As Byte

'in these two variables we're storing the number of steps we have to process for each axis
Dim Xsteps As Integer , Ysteps As Integer


'main loop:
'-------------
Do

'get and store X-value; resolution/2
X = Getadc(1)
Shift X , Right , 2 , Signed

'get and store X-value; resolution/2
Y = Getadc(2)
Shift Y , Right , 2 , Signed

'calculate the number of steps we have to process
Xsteps = X
Xsteps = Xsteps - Oldx
Ysteps = Y
Ysteps = Ysteps - Oldy


'stay in while-loop until all steps of the X- and Y-axis are processed
While Xsteps <> 0 Or Ysteps <> 0

   'steps of the x-axis
   If Xsteps > 0 Then
      Rotate Xwheel , Left , 1
      Xsteps = Xsteps - 1
   Elseif Xsteps < 0 Then
      Rotate Xwheel , Right , 1
      Xsteps = Xsteps + 1
   End If

   'steps of the y-axis
   If Ysteps > 0 Then
      Rotate Ywheel , Right , 1
      Ysteps = Ysteps - 1
   Elseif Ysteps < 0 Then
      Rotate Ywheel , Left , 1
      Ysteps = Ysteps + 1
   End If

   'write the new gray codes for both axis in I
   I.1 = Xwheel.1
   I.2 = Xwheel.2
   I.3 = Ywheel.1
   I.4 = Ywheel.2
   '...and then write I to port B
   Portb = I

   'we have to wait a little bit for processing the next steps because otherwise
   'it would be too fast and the IC in the N64 controller would skip some steps
   Waitus 10

Wend

'store the values of both axis for comparison in the next round
Oldx = X
Oldy = Y

Loop
End
After having compiled the code and flashed the ATMega8 don't forget to set the speed of the ATMega8 correctly in the fusebits settings, 8MHz internal RC.
I recommend using a socket for the MCU or even including a 10pin ISP connector inside the controller housing itself so you can re-flash the ATMega8 if something went wrong.
There are several ways how to connect VCC and GND to the pots of the new analog stick AND the stick can be mounted in 4 different angles (0°, 90°, 180°, 270°).
That means you could end up with switched X- and Y-axis and/or reversed X-axis and/or Y-axis. There are 2 ways to solve problems like that:
1.) Redo wiring, e.g. switch the VCC and GND connections on the pots.
2.) Simply switch some words in the code->
if X- and Y-axis are switched:
Go to line 22, 26, 56 & 60. Switch the ADC channel in brackets, e.g. getadc(1) -> getadc(2) ; getadc(2) -> getadc(1)
if the X-axis or Y-axis is reversed:
Go to line 75 & 78 for the X-axis and line 84 & 87 for the Y-axis. Simply switch "right" for "left" and you're set
So go try it yourself and post your finished controllers :)
Title: Re: PSX Analog in and N64 Controller
Post by: kendrick on April 15, 2009, 07:22:18 AM
Post by: kendrick on April 15, 2009, 07:22:18 AM
Welcome to GamesX. That's an excellent write-up of an impressive mod. I'm personally very appreciative when new members are able to contribute in this fashion. I look forward to seeing more of your posts.
Title: Re: PSX Analog in and N64 Controller
Post by: micro on April 29, 2009, 01:59:56 AM
Post by: micro on April 29, 2009, 01:59:56 AM
Thank you, thank you, kendrick :D
Title: Re: PSX Analog in and N64 Controller
Post by: Link83 on June 20, 2009, 02:04:39 AM
Post by: Link83 on June 20, 2009, 02:04:39 AM
Wow, only just noticed this thread :o
kylejw and micro - thats really awesome work ;D I especially love micro's GameCube stick in the N64 controller (No offense kylejw, you also did great work :) I would just prefer to use the GameCube's analog stick to the PlayStation's - in fact would your chip/code work with the GameCube analog stick aswell?)
micro, I dont suppose you could give anymore details on how you did it? I have a USB programmer but have not used any Atmega chips before and am guessing I will need a different programmer for the Atmega8? What would you recommend for the cheapest/easiest to use? (I cant find much info online about the pros/cons of different programmers for Atmega chips)
Im also curious how you made the stick fit in the controller without being recessed - did you really just fill it up the base with hot glue? The stick appears to be right up against the octaganal gate, yet im guessing you used the original N64 analog stick base in order to hold the Z button? Would love to see any other pictures you may have of the insides of your controller.
Oh, and should this work using an official GameCube controllers Analog stick? (I have one here with a busted C-Stick) Or are the potentiometer values different?
Thanks in advance ;D
P.S. Cant believe how neatly you managed to cut out that octagonal gate!
Title: Re: PSX Analog in and N64 Controller
Post by: l_oliveira on June 20, 2009, 02:29:37 AM
Post by: l_oliveira on June 20, 2009, 02:29:37 AM
Link83, I can program ATMEGA8 chips with only wires tied to the PC parallel port.
ATMEL has a great design for their chips with ISP (In System Programming) in mind.
So the design only requires 3 data pins and the reset signal to be connected from the MCU to the PC parallel port. You feed it also GND and 5v and "voila", you have an programmer.
I recommend "Pony PROG 2000" as programming software (http://ponyprog.sourceforge.net).
Can't get cheaper than free, right ?
Title: Re: PSX Analog in and N64 Controller
Post by: Jon8RFC on June 26, 2009, 05:17:42 AM
Post by: Jon8RFC on June 26, 2009, 05:17:42 AM
I'd love to learn how to go about swapping a gamecube stick into my N64 controllers. The part about programming a chip is confusing to me, but if there's a straight-forward way to just go through what needs to be done without customizing each chip that would be great. I've been hoping to get a few thousand CNC machined replacement sticks made from a more durable and lower-friction polymer, but it's not been easy to get all the details figured out...a DIY gamecube stick swap would be easier!
Title: Re: PSX Analog in and N64 Controller
Post by: Link83 on June 26, 2009, 11:22:16 AM
Post by: Link83 on June 26, 2009, 11:22:16 AM
Quote from: l_oliveira on June 20, 2009, 02:29:37 AMThanks l_oliveira, that sounds great :) I will have to give it a go when I get a spare parallel cable I can hack up.
Link83, I can program ATMEGA8 chips with only wires tied to the PC parallel port.
ATMEL has a great design for their chips with ISP (In System Programming) in mind.
So the design only requires 3 data pins and the reset signal to be connected from the MCU to the PC parallel port. You feed it also GND and 5v and "voila", you have an programmer.
I recommend "Pony PROG 2000" as programming software (http://ponyprog.sourceforge.net).
Can't get cheaper than free, right ?
Quote from: Jon8RFC on June 26, 2009, 05:17:42 AMCoincidentally I too had been looking into getting replacement parts made for the N64 Analog stick, but havent had much success :( Did you manage to find out how much it would cost for a production run of CNC machined parts?
I'd love to learn how to go about swapping a gamecube stick into my N64 controllers. The part about programming a chip is confusing to me, but if there's a straight-forward way to just go through what needs to be done without customizing each chip that would be great. I've been hoping to get a few thousand CNC machined replacement sticks made from a more durable and lower-friction polymer, but it's not been easy to get all the details figured out...a DIY gamecube stick swap would be easier!
As im sure you know its not just the stick that wears down, but usually the white base piece and sometimes the black 'gear' pieces aswell. I have a brand new N64 controller here which I would consider taking apart to make perfect molds or scans if we could find a company who would make replica parts for a reasonable price. I have found that a new N64 analog stick which is properly greased is quite smooth and is very nice to use - and would probably last forever if cared for correctly ;)
I think almost all the problems with the N64 analog stick stem from the poor plastic 'concentric circles' grip on the top of the stick, if it had been 'rubberised' like the GameCube stick top we would probably have had much fewer problems. The original stick is made from quite a smooth plastic and when your thumb gets sweaty during a heated gaming session you have to put downward pressure on the stick just to maintain your grip. This has the unfortunate effect of digging the bottom end of the stick into the soft white plastic surface in the base and grinding it up - the ground up pieces then act like sandpaper and erode even more plastic, and its all downhill from there...eventually the stick doesnt even rest on the white base piece and ends up putting all the pressure on the black gear pieces instead, which then wears them out aswell ::)
It would be fantastic if some Hong Kong company could take the information provided in this thread and build a pre-made replacement N64 analog stick unit using a copy of the GameCube's analog stick with a slightly redesigned casing, and of course the neccessary chip and connectors - although I think this is just wishful thinking on my part, and we will probably always have to rob analog sticks from other controllers and 'hack' them too fit :-\
P.S. Does anybody know what the insides of the analog stick used in the clone N64 controllers look like?:-
http://cgi.ebay.com/new-white-Game-Controller-For-Nintendo-64-N64-system_W0QQitemZ370218800471
Its doesnt look to be the best mold :P and im guessing that inside its redesigned and probably uses a standard potentiometer based analog stick, but i'm still curious...
Title: Re: PSX Analog in and N64 Controller
Post by: public-pervert on July 05, 2010, 10:26:30 PM
Post by: public-pervert on July 05, 2010, 10:26:30 PM
hi guys, im new to this forum too and what micro and kylejw did is my dream! i serious want to do this mod with my n64 controller.. ill love to see one step-by-step tutorial on how to do this. i do not understand how can i conect the atmega8 on my computer.. can someone answer? please :D
Title: Re: PSX Analog in and N64 Controller
Post by: micro on July 08, 2010, 03:15:56 AM
Post by: micro on July 08, 2010, 03:15:56 AM
Hi perv,
in order to program the ATMega8 you'll need a programming cable for your PC. But don't do the mod now. I've rewritten the code and I also use another microcontroller, it's much smaller now.
Just be patient, I'll explain & show everything in a few days.
in order to program the ATMega8 you'll need a programming cable for your PC. But don't do the mod now. I've rewritten the code and I also use another microcontroller, it's much smaller now.
Just be patient, I'll explain & show everything in a few days.
Title: Re: PSX Analog in and N64 Controller
Post by: public-pervert on July 08, 2010, 06:05:21 AM
Post by: public-pervert on July 08, 2010, 06:05:21 AM
serious!! wooow! please please, micro!! :D :D
by the way, yesterday i buy a psx controller just for " canniballize" him. this one is the single controller i got for buy. but i think the pots are the same one used in GC, correct? I'm anxious to do this *-*
since now, thank you very much! :D
by the way, yesterday i buy a psx controller just for " canniballize" him. this one is the single controller i got for buy. but i think the pots are the same one used in GC, correct? I'm anxious to do this *-*
since now, thank you very much! :D
Title: Re: PSX Analog in and N64 Controller
Post by: Link83 on July 22, 2010, 06:48:27 AM
Post by: Link83 on July 22, 2010, 06:48:27 AM
Quote from: micro on July 08, 2010, 03:15:56 AMHi micro, this sounds great :) I very much look forward to hearing more about it.
Hi perv,
in order to program the ATMega8 you'll need a programming cable for your PC. But don't do the mod now. I've rewritten the code and I also use another microcontroller, it's much smaller now.
Just be patient, I'll explain & show everything in a few days.
I just have two questions if you dont mind:-
- Does your code work with any analog stick, or do they have to use a certain pot value? (Really hoping to use a broken official GameCube controller)
- Is the sensitivity set to about the same level as the original N64 analog stick?
Title: Re: PSX Analog in and N64 Controller
Post by: micro on July 26, 2010, 12:44:55 AM
Post by: micro on July 26, 2010, 12:44:55 AM
Sorry I kept you guys waiting!
The discovery I made is that a PSX or Gamecube stick with my microcontroller code is TOO sensitive. It wasn't a problem in Super Mario 64 but in first person shooter like Turok or Perfect Dark it was just too fast when the stick was fully tilted.
So I took a N64 expansion cord and connecting the socket of that cord to a microcontroller I was able to read N64 Pads.
I borrowed 2 original unaltered N64 pads in very good condition, the sticks weren't worn out.
So as I read the data I was really surprised. For both X- and Y-axis the N64 controller sends 1 byte. So I was assuming the range would be 0-255 like a PSX controller.
But the resolution of original N64 Padsis only 160!
That's the reason why in first person shooter the crosshair was accelerating more and more as you pushed the stick to the edge. That's also the reason why the guy in Blast Corps would slowly walk to the right, when you pushed the stick all the way to the LEFT.
So what I did in the new code is: Sampling the analog stick with 10bit resolution (1024 steps), multiplying by 10 (=10240 steps) and finally dividing by 64 (=160 steps).
The result is that first person shooter are now much more playable, the controls are much more accurate. In Super Mario 64 there's no difference at all. It seems that game was just ignoring the extra steps or it got a way to handle it.
The new microcontroller I chose (ATTiny 13) is really small but right now it's not working perfectly. It got only 8 pins. I needed 6 pins so I had to use the /reset pin of the microcontrller as an I/O pin. Unfortunately without /reset pin I can flash the microntroller only once. It's working, but first I have to reset the N64 controller (hold L+R+Start, works with every N64 controller, even original ones). Without resetting the Y axis is fully tilted although the stick isn't touched.
The Y axis of the analog stick is sampled through the /reset pin so I'm pretty sure that's the cause of the problem.
But right now I've run out ATTiny13 and I won't release the code until that problem is fixed.
Link, a Gamecube analog stick should work!
Sorry guys, right now I'm busy. I will keep you posted!
Title: Re: PSX Analog in and N64 Controller
Post by: Link83 on July 26, 2010, 07:22:54 AM
Post by: Link83 on July 26, 2010, 07:22:54 AM
Hmm...so the N64 analog stick actually has 160 degrees/positions?
Over the years I have read quite a bit of conflicting information about the N64 analog sticks resolution, for instance:-
N64 USB Adaptoid
http://www.adaptoid.com/info.html (http://www.adaptoid.com/info.html)
N64 Controller Software FAQ:-
http://www.eurasia.nu/wiki/index.php/N64ControllerSoftwareFaq (http://www.eurasia.nu/wiki/index.php/N64ControllerSoftwareFaq)
Nintendo 64 to PS/2 Mouse Translator
http://courses.cit.cornell.edu/ee476/FinalProjects/s2002/jew17/lld.html (http://courses.cit.cornell.edu/ee476/FinalProjects/s2002/jew17/lld.html)
Nintendo 64 Controller Information
http://www.mixdown.ca/n64dev/ (http://www.mixdown.ca/n64dev/)
Some other interesting sites:-
http://svn.navi.cx/misc/trunk/wasabi/devices/cube64/notes/n64-observations (http://svn.navi.cx/misc/trunk/wasabi/devices/cube64/notes/n64-observations)
http://www.cs.duke.edu/~brownan/n642gc.html (http://www.cs.duke.edu/~brownan/n642gc.html)
http://web.archive.org/web/20020602053950/http://www.ihl.t.u-tokyo.ac.jp/~yamada/CABIN/device/N64RS.htm (http://web.archive.org/web/20020602053950/http://www.ihl.t.u-tokyo.ac.jp/~yamada/CABIN/device/N64RS.htm)
Also, these Nintendo patents may be of help/interest:-
Pages 13-15 of this pdf:-
http://www.google.com/patents?id=rVUIAAAAEBAJ&printsec=abstract&zoom=4&source=gbs_overview_r&cad=0 (http://www.google.com/patents?id=rVUIAAAAEBAJ&printsec=abstract&zoom=4&source=gbs_overview_r&cad=0)
Pages 27-35 of this pdf:-
http://www.google.com/patents?id=XjoYAAAAEBAJ&printsec=abstract&zoom=4&source=gbs_overview_r&cad=0 (http://www.google.com/patents?id=XjoYAAAAEBAJ&printsec=abstract&zoom=4&source=gbs_overview_r&cad=0)
Are there any other microcontrollers that would have enough I/O pins so you would not have to use the /reset pin as an I/O?
Please keep up the great work micro :)
Over the years I have read quite a bit of conflicting information about the N64 analog sticks resolution, for instance:-
N64 USB Adaptoid
http://www.adaptoid.com/info.html (http://www.adaptoid.com/info.html)
Quote from: N64 USB AdaptoidAnalog joystick resolution of 150 positions on each axis.
N64 Controller Software FAQ:-
http://www.eurasia.nu/wiki/index.php/N64ControllerSoftwareFaq (http://www.eurasia.nu/wiki/index.php/N64ControllerSoftwareFaq)
Quote from: N64 Controller Software FAQbit 16 -> 23 - X axis reading, 2's compliment
-128 = full left
0 = center
+128 = full right
bit 24 -> 31 - Y axis reading, 2's compliment
+128 = full top
0 = center
-128 = full bottom
Nintendo 64 to PS/2 Mouse Translator
http://courses.cit.cornell.edu/ee476/FinalProjects/s2002/jew17/lld.html (http://courses.cit.cornell.edu/ee476/FinalProjects/s2002/jew17/lld.html)
Quote from: Nintendo 64 to PS/2 Mouse TranslatorThe last 16 bits are two 8 bit 2's-complement segments showing the position of the analog stick along the X and Y axis. The controller then enters a 'quiet' state for about 200 microseconds where it will not respond to further poll requests.
Nintendo 64 Controller Information
http://www.mixdown.ca/n64dev/ (http://www.mixdown.ca/n64dev/)
Quote from: Nintendo 64 Controller InformationThe analog joystick is an optical module and operates very much the same as most mice. If I recall correctly, it has 24 'positions' in each direction from center, with center returning 0.
Some other interesting sites:-
http://svn.navi.cx/misc/trunk/wasabi/devices/cube64/notes/n64-observations (http://svn.navi.cx/misc/trunk/wasabi/devices/cube64/notes/n64-observations)
http://www.cs.duke.edu/~brownan/n642gc.html (http://www.cs.duke.edu/~brownan/n642gc.html)
http://web.archive.org/web/20020602053950/http://www.ihl.t.u-tokyo.ac.jp/~yamada/CABIN/device/N64RS.htm (http://web.archive.org/web/20020602053950/http://www.ihl.t.u-tokyo.ac.jp/~yamada/CABIN/device/N64RS.htm)
Also, these Nintendo patents may be of help/interest:-
Pages 13-15 of this pdf:-
http://www.google.com/patents?id=rVUIAAAAEBAJ&printsec=abstract&zoom=4&source=gbs_overview_r&cad=0 (http://www.google.com/patents?id=rVUIAAAAEBAJ&printsec=abstract&zoom=4&source=gbs_overview_r&cad=0)
Pages 27-35 of this pdf:-
http://www.google.com/patents?id=XjoYAAAAEBAJ&printsec=abstract&zoom=4&source=gbs_overview_r&cad=0 (http://www.google.com/patents?id=XjoYAAAAEBAJ&printsec=abstract&zoom=4&source=gbs_overview_r&cad=0)
Are there any other microcontrollers that would have enough I/O pins so you would not have to use the /reset pin as an I/O?
Please keep up the great work micro :)
Title: Re: PSX Analog in and N64 Controller
Post by: micro on July 27, 2010, 06:43:20 AM
Post by: micro on July 27, 2010, 06:43:20 AM
It really has to be around 160 steps. 256 steps per axis definitely are too much as you will run into problems in Blast Corps, that's for sure.
On the other hand, 150 steps are not enough. Is I said before I borrowed 2 N64 pads from my sister. They were purple & green transparent. One of them was really like new and it gave my -80/+80 per axis; it was -90/+90 when I pushed the stick with brute force against the edge, the plastic was squeaking :D
The other controller was also in good condition but it had a little bit of dead zone. It gave me about -78/+78, with brute force about +-83 or +-85, I don't remember. But that's not the way it was designed to be played.
Link, you got really some good sources, but this one's not right:
I attached the improved source code & hex file for the ATMega8, you can use it for non commercial use. The pinout is just the same as on the pictures above.
But I'd really love to get the ATTiny13 working properly without having to reset the controller with L+R+start. As you can see the ATTiny13 fits on the right half of stick unit, it's very neat:
 (http://img204.imageshack.us/i/dsc01311k.jpg/)
On the other hand, 150 steps are not enough. Is I said before I borrowed 2 N64 pads from my sister. They were purple & green transparent. One of them was really like new and it gave my -80/+80 per axis; it was -90/+90 when I pushed the stick with brute force against the edge, the plastic was squeaking :D
The other controller was also in good condition but it had a little bit of dead zone. It gave me about -78/+78, with brute force about +-83 or +-85, I don't remember. But that's not the way it was designed to be played.
Link, you got really some good sources, but this one's not right:
Quotebit 16 -> 23 - X axis reading, 2's complimentIt IS true that center = 0, but there is no way you can store -128 to +128 in one byte ^^
-128 = full left
0 = center
+128 = full right
bit 24 -> 31 - Y axis reading, 2's compliment
+128 = full top
0 = center
-128 = full bottom
QuoteAre there any other microcontrollers that would have enough I/O pins so you would not have to use the /reset pin as an I/O?Of course! The first thing I did when I found out about the 160 steps was fixing the code for the ATMega8 (the microcontroller I used on the pics above). It worked like a charm and it still does. But I thought it would be nice to have a smaller IC.
I attached the improved source code & hex file for the ATMega8, you can use it for non commercial use. The pinout is just the same as on the pictures above.
But I'd really love to get the ATTiny13 working properly without having to reset the controller with L+R+start. As you can see the ATTiny13 fits on the right half of stick unit, it's very neat:
(http://img204.imageshack.us/i/dsc01311k.jpg/)
Title: Re: PSX Analog in and N64 Controller
Post by: public-pervert on July 27, 2010, 09:18:04 PM
Post by: public-pervert on July 27, 2010, 09:18:04 PM
i dont have the knowledge enough :-X , and i really wanna do this mod. so i need a step by step tutorial.. please, micro.. of course, if you're not much busy ;D
thankss
thankss
Title: Re: PSX Analog in and N64 Controller
Post by: micro on July 28, 2010, 12:48:37 AM
Post by: micro on July 28, 2010, 12:48:37 AM
Ok public-pervert, first of all you'll need the ATMega8. I've got 2 or 3 of them left, I could send you a preprogrammed one. Just send me a private message.
You said you wanted to use the stick of a Playstation controller, right? Open the PSX controller and cut out one stick from the pcb. You'll end up getting something like this:
 (http://img186.imageshack.us/i/dsc01365e.jpg/)
  (http://img225.imageshack.us/i/dsc01369l.jpg/)
On the back side, solder 4 wires to the stick: VCC, GND, X-Pot & Y-Pot.
Now it's time to open the N64 controller and remove the stick unit. Just look at the kylejw's pictures. Once you removed the stick unit, open it and throw everthing out of it. You'll just need the housing of the stick unit. Also you'll need to make some space, take a dremel, knife, plier and/or sand paper to remove the bits of plastic in the stick unit housing that are in your way.
Now comes the difficult part. Take your PSX stick with the 4 wires and attach it into the stick unit. Route the 4 wires out of the unit, on the backside there should be an opening through which you can put the 4 wires.
I used hot glue to position the stick. Getting the stick fitting right takes VERY long. You always have to put the stick unit into the N64 controller and make sure the stick is centered right. If it's not, use a heat blower gun to make the hot glue liquid again and reposition the stick, again and again until the stick sits right.
There is no easy fool-proof way, it's all about trial & error. And because of that it's important to use hot glue and a heat gun :)
Here you see a picture of my Gamecube stick:
 (http://img828.imageshack.us/i/dsc01371k.jpg/)
Yes, it looks like a mess!
To make things worse you'll also have to think about the bezel for the stick. The bezel also has to be fitted right so it won't be in the way of the stick.
For my Gamecube stick I glued the octagonal shaped bezel to the controller and I didn't use the top half of the stick housing at all, it wasn't needed.
Kylejw on the other hand glued the bezel directly onto the stick unit housing. You see, you'll have to try for yourself :D
But once the stick sits right in the stick unit, just wire up the stick with the ATMega8 and the N64 controller PCB. Just look at the 3 pin outs, it's straight forward:
 (http://img153.imageshack.us/i/n64avr.png/)
  (http://img299.imageshack.us/i/n64controllerconnector.jpg/) (http://img225.imageshack.us/i/dsc01369l.jpg/)
The only extra components you'll need is a 10kOhm resistor and a 100nF ceramic cap. Both are very common & cheap, I got plenty of them. As I said send me a private message if you'd like me to send you the components.
@Link83:
Sensitivity now is about the same level but of course it feels different.
The original N64 stick was always a little hard to move, these days analog sticks are much easier to move.
Link, have you ever played Ocarina of Time on the Gamecube? It was on the bonus disc of Wind Waker. When I played it back in '03 or '04 I was really stunned by the improved visuals. But then I had serious problems aiming with the bow and the slingshot. I almost couldn't win the bow mini game in the city. N64 and Gamecube stick just aren't the same.
I had similar experience with N64 Ocarina of Time and my N64 Hori Mini Pad.
 (http://img517.imageshack.us/i/dsc00569ve.jpg/)
The Mini Pad featured a GC-style stick. The pad was ok, but really small. If I hadn't sold it a year ago I could check how many steps it had for the X- and Y-axis :(
You said you wanted to use the stick of a Playstation controller, right? Open the PSX controller and cut out one stick from the pcb. You'll end up getting something like this:
(http://img186.imageshack.us/i/dsc01365e.jpg/) (http://img225.imageshack.us/i/dsc01369l.jpg/)On the back side, solder 4 wires to the stick: VCC, GND, X-Pot & Y-Pot.
Now it's time to open the N64 controller and remove the stick unit. Just look at the kylejw's pictures. Once you removed the stick unit, open it and throw everthing out of it. You'll just need the housing of the stick unit. Also you'll need to make some space, take a dremel, knife, plier and/or sand paper to remove the bits of plastic in the stick unit housing that are in your way.
Now comes the difficult part. Take your PSX stick with the 4 wires and attach it into the stick unit. Route the 4 wires out of the unit, on the backside there should be an opening through which you can put the 4 wires.
I used hot glue to position the stick. Getting the stick fitting right takes VERY long. You always have to put the stick unit into the N64 controller and make sure the stick is centered right. If it's not, use a heat blower gun to make the hot glue liquid again and reposition the stick, again and again until the stick sits right.
There is no easy fool-proof way, it's all about trial & error. And because of that it's important to use hot glue and a heat gun :)
Here you see a picture of my Gamecube stick:
(http://img828.imageshack.us/i/dsc01371k.jpg/)Yes, it looks like a mess!
To make things worse you'll also have to think about the bezel for the stick. The bezel also has to be fitted right so it won't be in the way of the stick.
For my Gamecube stick I glued the octagonal shaped bezel to the controller and I didn't use the top half of the stick housing at all, it wasn't needed.
Kylejw on the other hand glued the bezel directly onto the stick unit housing. You see, you'll have to try for yourself :D
But once the stick sits right in the stick unit, just wire up the stick with the ATMega8 and the N64 controller PCB. Just look at the 3 pin outs, it's straight forward:
(http://img153.imageshack.us/i/n64avr.png/) (http://img299.imageshack.us/i/n64controllerconnector.jpg/) (http://img225.imageshack.us/i/dsc01369l.jpg/)The only extra components you'll need is a 10kOhm resistor and a 100nF ceramic cap. Both are very common & cheap, I got plenty of them. As I said send me a private message if you'd like me to send you the components.
@Link83:
QuoteI just have two questions if you dont mind:-I think the pot value isn't THAT critical, I assume they're all 10k (?)
- Does your code work with any analog stick, or do they have to use a certain pot value? (Really hoping to use a broken official GameCube controller)
- Is the sensitivity set to about the same level as the original N64 analog stick?
Sensitivity now is about the same level but of course it feels different.
The original N64 stick was always a little hard to move, these days analog sticks are much easier to move.
Link, have you ever played Ocarina of Time on the Gamecube? It was on the bonus disc of Wind Waker. When I played it back in '03 or '04 I was really stunned by the improved visuals. But then I had serious problems aiming with the bow and the slingshot. I almost couldn't win the bow mini game in the city. N64 and Gamecube stick just aren't the same.
I had similar experience with N64 Ocarina of Time and my N64 Hori Mini Pad.
(http://img517.imageshack.us/i/dsc00569ve.jpg/)The Mini Pad featured a GC-style stick. The pad was ok, but really small. If I hadn't sold it a year ago I could check how many steps it had for the X- and Y-axis :(
Title: Re: PSX Analog in and N64 Controller
Post by: public-pervert on July 28, 2010, 04:37:10 AM
Post by: public-pervert on July 28, 2010, 04:37:10 AM
thank you very very much, micro! ;D ;D ;D ;D im very exited to do this mod!! it shoud be pretty nice if you send the components. but theres just one problem.. i live in brazil :-X. is it possible to you send me anyway?
Title: Re: PSX Analog in and N64 Controller
Post by: Link83 on July 29, 2010, 05:00:48 AM
Post by: Link83 on July 29, 2010, 05:00:48 AM
Thanks for the new ATMega8 code and the great writeup micro ;D
http://www.atmel.com/dyn/products/param_table.asp?family_id=607&OrderBy=1214&Direction=ASC#791 (http://www.atmel.com/dyn/products/param_table.asp?family_id=607&OrderBy=1214&Direction=ASC#791)
Of course if you can get around the /RESET problem on the ATTiny13 it would be perfect.
 (http://img818.imageshack.us/img818/5489/horipadmini012.jpg)
It looks like Hori might have used a secondary chip to convert the potentiometer signals into quadrature encoded signals, exactly like we are doing - I cant think of any other reason for Hori using two chips when other Hori N64 controllers used just one chip?
I have a few more questions if you dont mind!
How exactly did you glue the octagonal restrictor to the top of the N64 controller without using the top half of the analog stick case?
When melting the hot glue repeatedly to adjust the sticks position is there a risk of heating the analog stick or plastic casing too much? and would a hair dryer be suitable? (Dont have a heat gun)
I have a USB programmer that apparently supports an AVR ISP connection and is capable of programming an ATMega8:-
http://www.mcumall.com/forum/topic.asp?TOPIC_ID=1691 (http://www.mcumall.com/forum/topic.asp?TOPIC_ID=1691)
However its not clear to me exactly what needs to be connected to the ATMega8 in order to program it. I looked at quite a few datasheets and they didn't seem to explain a lot. Is it just a direct connection to the pins on the ATMega8, or do you need any resistors/capacitors in the programming schematic? I believe you need to connect the following five signals to these ATMega8 pins:-
SIGNAL - PIN
RST - 1
MISO - 18
SCK - 19
MOSI - 17
GND - 8 & 22
VCC - 7, 20 & 21?
I came across this tutorial:-
http://www.sparkfun.com/commerce/tutorial_info.php?tutorials_id=93 (http://www.sparkfun.com/commerce/tutorial_info.php?tutorials_id=93)
Which seems to suggest that pin 21 should be left unconnected, and pin 20 should be connected to VCC - is that just for programming or should that be the case in the actual circuit?
Sorry for so many questions micro! Your input and hard work is very much appreciated :)
Quote from: micro on July 27, 2010, 06:43:20 AMSorry, I probably wasnt very clear - I was curious if there are any other (common) suitable Atmel chips that are smaller than the ATMega8 and have less pins, but still have more pins that than the ATTiny13, which doesnt really have enough? Maybe there is a suitable ATTiny chip on this list?:-Quote from: Link83Are there any other microcontrollers that would have enough I/O pins so you would not have to use the /reset pin as an I/O?Of course! The first thing I did when I found out about the 160 steps was fixing the code for the ATMega8 (the microcontroller I used on the pics above). It worked like a charm and it still does. But I thought it would be nice to have a smaller IC.
http://www.atmel.com/dyn/products/param_table.asp?family_id=607&OrderBy=1214&Direction=ASC#791 (http://www.atmel.com/dyn/products/param_table.asp?family_id=607&OrderBy=1214&Direction=ASC#791)
Of course if you can get around the /RESET problem on the ATTiny13 it would be perfect.
Quote from: micro on July 27, 2010, 06:43:20 AMIt does look great, really nice and compact :)
But I'd really love to get the ATTiny13 working properly without having to reset the controller with L+R+start. As you can see the ATTiny13 fits on the right half of stick unit, it's very neat:
Quote from: micro on July 28, 2010, 12:48:37 AMOn my official GameCube controller each potentiometer is marked as "4K", so I assume they are both 4 kiloohm? Would that make any difference?
I think the pot value isn't THAT critical, I assume they're all 10k (?)
Quote from: micro on July 28, 2010, 12:48:37 AMI know exactly what you mean, but I got used to the difference over time. I didn't find the analog stick sensitivity a problem in Wind Waker, so I think the emulation may have been part of the problem as well (Although I realise the GameCube analog stick has more 'steps' than the N64 controller so has greater precision)
The original N64 stick was always a little hard to move, these days analog sticks are much easier to move.
Link, have you ever played Ocarina of Time on the Gamecube? It was on the bonus disc of Wind Waker. When I played it back in '03 or '04 I was really stunned by the improved visuals. But then I had serious problems aiming with the bow and the slingshot. I almost couldn't win the bow mini game in the city. N64 and Gamecube stick just aren't the same.
Quote from: micro on July 28, 2010, 12:48:37 AMI always wanted a Hori N64 Mini Pad but never managed to find one available for a reasonable price. A while ago I found this picture showing the insides:-
I had similar experience with N64 Ocarina of Time and my N64 Hori Mini Pad.
The Mini Pad featured a GC-style stick. The pad was ok, but really small. If I hadn't sold it a year ago I could check how many steps it had for the X- and Y-axis :(
(http://img818.imageshack.us/img818/5489/horipadmini012.jpg)It looks like Hori might have used a secondary chip to convert the potentiometer signals into quadrature encoded signals, exactly like we are doing - I cant think of any other reason for Hori using two chips when other Hori N64 controllers used just one chip?
I have a few more questions if you dont mind!
How exactly did you glue the octagonal restrictor to the top of the N64 controller without using the top half of the analog stick case?
When melting the hot glue repeatedly to adjust the sticks position is there a risk of heating the analog stick or plastic casing too much? and would a hair dryer be suitable? (Dont have a heat gun)
I have a USB programmer that apparently supports an AVR ISP connection and is capable of programming an ATMega8:-
http://www.mcumall.com/forum/topic.asp?TOPIC_ID=1691 (http://www.mcumall.com/forum/topic.asp?TOPIC_ID=1691)
However its not clear to me exactly what needs to be connected to the ATMega8 in order to program it. I looked at quite a few datasheets and they didn't seem to explain a lot. Is it just a direct connection to the pins on the ATMega8, or do you need any resistors/capacitors in the programming schematic? I believe you need to connect the following five signals to these ATMega8 pins:-
SIGNAL - PIN
RST - 1
MISO - 18
SCK - 19
MOSI - 17
GND - 8 & 22
VCC - 7, 20 & 21?
I came across this tutorial:-
http://www.sparkfun.com/commerce/tutorial_info.php?tutorials_id=93 (http://www.sparkfun.com/commerce/tutorial_info.php?tutorials_id=93)
Which seems to suggest that pin 21 should be left unconnected, and pin 20 should be connected to VCC - is that just for programming or should that be the case in the actual circuit?
Sorry for so many questions micro! Your input and hard work is very much appreciated :)
Title: Re: PSX Analog in and N64 Controller
Post by: micro on July 30, 2010, 02:37:06 AM
Post by: micro on July 30, 2010, 02:37:06 AM
QuoteYes I think the ATtiny24 (http://www.atmel.com/dyn/products/product_card.asp?part_id=4448) would be most suitable. It got enough I/O pins (but not too much), A/D converter, internal 8MHz clock, runs perfectly with 3,3V VCC. And of course you wouldn't have to touch /reset so further programming through ISP would be possible. My favourite electronics shop got them in stock and they're cheaper than ATmega8's.
Sorry, I probably wasnt very clear - I was curious if there are any other (common) suitable Atmel chips that are smaller than the ATMega8 and have less pins, but still have more pins that than the ATTiny13, which doesnt really have enough? Maybe there is a suitable ATTiny chip on this list?:-
http://www.atmel.com/dyn/products/param_table.asp?family_id=607&OrderBy=1214&Direction=ASC#791 (http://www.atmel.com/dyn/products/param_table.asp?family_id=607&OrderBy=1214&Direction=ASC#791)
Of course if you can get around the /RESET problem on the ATTiny13 it would be perfect.
But for me they're not an option as I only got 2 N64 controllers and now both are equipped with ATMega8's (again ;)). My experiment with the ATtiny13's was a waste of time & money after all.
But I encourage you to try the ATtiny24! Only the input and output pins have to be changed in the source code, everything else should be the same.
QuoteIt does look great, really nice and compactIt turned out that this is the ideal place to attach the ATmega8 or even the ATtiny24 as well. As long as you don't cross the middle line you got plenty of space:
 (http://img690.imageshack.us/i/dsc01381y.jpg/)
QuoteI have a USB programmer that apparently supports an AVR ISP connection and is capable of programming an ATMega8:-ISP means in-system programming. So normally when the AVR is in the system /reset is held high through a pull-up resistor connected to VCC. So I guess to program the AVR with your USB programmer you'll need to put a 10k resistor between VCC and /reset as you will need to do later anyway. So for in-system programming you'll need to power the ATmega8 (VCC 7 & GND 8+22 are enough for programming) and connect RST, MOSI, MISO & SCK.
http://www.mcumall.com/forum/topic.asp?TOPIC_ID=1691 (http://www.mcumall.com/forum/topic.asp?TOPIC_ID=1691)
However its not clear to me exactly what needs to be connected to the ATMega8 in order to program it. I looked at quite a few datasheets and they didn't seem to explain a lot. Is it just a direct connection to the pins on the ATMega8, or do you need any resistors/capacitors in the programming schematic? I believe you need to connect the following five signals to these ATMega8 pins:-
SIGNAL - PIN
RST - 1
MISO - 18
SCK - 19
MOSI - 17
GND - 8 & 22
VCC - 7, 20 & 21?
Personally I'm using a simple ISP programming adaptor for the parallel port. You can get these for about 10$ on ebay (http://shop.ebay.com/?_from=R40&_nkw=avr+parallel&_sacat=See-All-Categories).
All you need to do then is connecting a 10pin connector to your AVR (only need VCC, GND, RST, MOSI, MISO & SCK) and you can reprogram the AVR without removing it :)
This is how the ATtiny13 programming device that I built looks like, veeery small:
 (http://img97.imageshack.us/i/dsc01385iq.jpg/)
  (http://img827.imageshack.us/i/dsc01322p.jpg/)
QuoteOn my official GameCube controller each potentiometer is marked as "4K", so I assume they are both 4 kiloohm? Would that make any difference?No, I don't think that will make a difference.
QuoteIt looks like Hori might have used a secondary chip to convert the potentiometer signals into quadrature encoded signals, exactly like we are doing - I cant think of any other reason for Hori using two chips when other Hori N64 controllers used just one chip?You could be right as it seems that most pins of the MAD IC are unconnected. I've never seen the insides of a Hori Mini but I'm pretty sure the analog stick of mine had a switch - just like XBox or Playstation controller (without a real function of course). Obviously the stick of this red Hori Mini doesn't has a switch...
QuoteHow exactly did you glue the octagonal restrictor to the top of the N64 controller without using the top half of the analog stick case?That's easy! Using a dremel and sand paper/file I made the octagonal gate perfectly round. It had just the ideal diameter. I put it through the hole from the inside of the N64 controller. I didn't fell through the hole as it was still bigger than the hole. But the dome-shaped part of it sticked through the hole.
So I put some hot glue on it and that's it :) Here you can see how it looks from the inside of the controller:
 (http://img69.imageshack.us/i/dsc01375a.jpg/)
Maybe it would be best to glue the bezel first and THEN attach the analog stick. (I think that's the way I did anyway :))
QuoteWhen melting the hot glue repeatedly to adjust the sticks position is there a risk of heating the analog stick or plastic casing too much? and would a hair dryer be suitable? (Dont have a heat gun)I think that's possible. I mean my heat gun is able to melt solder, so you really have be careful. Pay extra attention to those 2 clips that are holding the Z-button. You don't wanna melt them down :)
I really don't know if a hair dryer has enough power to make hot glue liquid again. Just try it. You don't have to make the hot glue highly fluid, you can reposition the stick if the glue is gooey. The best would be if you don't let the glue totally cool down.
Nevertheless it will take some time until the stick is on the right spot.
Fortunately the Gamecube controller has 2 analog sticks, right? So you can melt down one, haha! (I actually used the C-stick as it was already on a small daughterboard)
QuoteI came across this tutorial:-Pin 21 is AREF and we need it for A/D conversion. But you're right about pin 20. I took a brief look into the datasheet. Pin 20 is AVCC and it should be connected to VCC, especially when using the A/D converters as we do. In that case a low pass filter is also recommended.
http://www.sparkfun.com/commerce/tutorial_info.php?tutorials_id=93 (http://www.sparkfun.com/commerce/tutorial_info.php?tutorials_id=93)
Which seems to suggest that pin 21 should be left unconnected, and pin 20 should be connected to VCC - is that just for programming or should that be the case in the actual circuit?
All I can say is that the ATmega8 works perfectly with Pin 20 unconnected. But I will try to find out what filter should be used and then we can add it to schematic.
Title: Re: PSX Analog in and N64 Controller
Post by: micro on July 30, 2010, 08:16:01 AM
Post by: micro on July 30, 2010, 08:16:01 AM
I'd also like to mention that it's possible to build your own AVR ISP programmer for the parallel port with very few components.
You'll only need:
1x male SUB-D 25 connector
1x 74HC244 IC
1x 100kOhm resistor
1x 100nF ceramic cap
1x 1N4148 diode
The schematics can be seen on:
http://www.rn-wissen.de/index.php/AVR-ISP_Programmierkabel (http://www.rn-wissen.de/index.php/AVR-ISP_Programmierkabel)
http://www.mikrocontroller.net/articles/STK200 (http://www.mikrocontroller.net/articles/STK200)
That's also the same stuff that's in my programmer (http://img844.imageshack.us/img844/5369/dsc01386v.jpg) except for the 2 LEDs + resistors which you don't need anyway.
Title: Re: PSX Analog in and N64 Controller
Post by: kylejw on July 30, 2010, 12:51:24 PM
Post by: kylejw on July 30, 2010, 12:51:24 PM
Hey I'm back! Can't post any pictures right now since I'm not home at the moment.
I know I was gone for quite a while, I was pretty busy with work and school, but lately have gotten back into this. Trying to transition into some PS3 work, so hoping to finally give everyone that's messaged me on Youtube a little closure.
I've gotten some professionally made PCBs (don't get too excited, they're pretty barebones) and revamped the code a lot.
Very glad I logged in today to see the post about 160 steps. That's actually a bit surprising, I thought I was much closer to the end of the potentiometer... around 230ish for full swing. When I get a chance, I'll experiment with my cap a bit.
My Gamecube stick is a bit loose so for games like Goldeneye I've noticed the crosshair is a little jumpy, so I've implemented a software deadzone that has actually added a fair bit of complexity to the code. I will of course be posting the source this time (sorry :p). Be aware though that it's pretty messy.
And another thing I thought I'd mention, someone on Youtube suggested replacing the C-pad on the controller with another joystick, for games like Goldeneye which allowed you to use two controllers to control one player (so one analog would be slide left, slide right, forward, backward, and the other analog would look around). I've began to implement this just for the coolness factor so hopefully I'll have pics up soon.
Until next time,
Kyle
Title: Re: PSX Analog in and N64 Controller
Post by: micro on July 31, 2010, 01:44:55 AM
Post by: micro on July 31, 2010, 01:44:55 AM
Welcome back :)
QuoteI've gotten some professionally made PCBs (don't get too excited, they're pretty barebones) and revamped the code a lot.That's cool. With those PCBs I wonder if the annoying aligning of the analog stick is no longer required.
QuoteAnd another thing I thought I'd mention, someone on Youtube suggested replacing the C-pad on the controller with another joystick, for games like Goldeneye which allowed you to use two controllers to control one player (so one analog would be slide left, slide right, forward, backward, and the other analog would look around). I've began to implement this just for the coolness factor so hopefully I'll have pics up soonWow, didn't know that. So you're building a N64 controller with 2 cords? I'm curious for the pics :D
QuoteVery glad I logged in today to see the post about 160 steps. That's actually a bit surprising, I thought I was much closer to the end of the potentiometer... around 230ish for full swing. When I get a chance, I'll experiment with my cap a bit.You should really try it with 160 steps. It even may make the dead zone unnecessary.
My Gamecube stick is a bit loose so for games like Goldeneye I've noticed the crosshair is a little jumpy, so I've implemented a software deadzone that has actually added a fair bit of complexity to the code. I will of course be posting the source this time (sorry :p). Be aware though that it's pretty messy.
Title: Re: PSX Analog in and N64 Controller
Post by: kylejw on August 01, 2010, 11:42:43 AM
Post by: kylejw on August 01, 2010, 11:42:43 AM
Unfortunately the PCBs don't help with alignment. They're simply for cleaner install.
I rewrote the code mostly from scratch, and ended up with great results. I'll post it below then describe the functionality.
main.c:
movement.c:
movement.h
I rewrote the code mostly from scratch, and ended up with great results. I'll post it below then describe the functionality.
main.c:
Code Select
/*
	File contains main functionality of the gray code simulator

	Author:  Kyle Wagner 2010

	main.c

	Code may be changed and distributed FREELY, but please give credit to the author.
*/

#include <system.h>

#include "movement.h"

//#define DEADZONE 15
#define MAX_SWING_PER_DIRECTION 80

#pragma DATA _CONFIG, _BOR_OFF & _IOSCFS_8MHZ & _CP_OFF & _MCLRE_OFF & _PWRTE_OFF & _WDT_OFF & _INTOSCIO

void initPorts(void);
void makeHorizEqual( long target );
void makeVertEqual( long target );
char setDeadzone( long *horizDeadzone, long *vertDeadzone );

/* 	The next two globals contain the positions of the vertical and horizontal movement ports
	in each of their respective state machines */
char stateVert=0;
char stateHoriz=0;

/* 	These are global because I code with poor style.  Sue me.
	Contain the current ADC sample of each potentiometer */
long horizCurrent = 0;
long vertCurrent = 0;


int main(void)
{

	/* 	Since I'm greedy and inefficient, I'll use longs everywhere.
		From what I understant, PICs are much faster with unsigned ints, but I don't
		want to deal with correcting everything to 0-255... */
	long horizNew = 0;
	long vertNew = 0;

	/* 	I've tried to make the deadzone as transparent as possible if it is not needed
	If the user plugs the controller in with the joystick centered, most of the deadzone code is
	skipped over, though the memory is of course allocated */
	long horizDeadzone = 0;
	long vertDeadzone = 0;

	/* Hold the upper and lower limits of the deadzone */
	long horizDeadLower = 0;
	long horizDeadUpper = 0;
	long vertDeadLower = 0;
	long vertDeadUpper = 0;

	char useDeadzone = 0;

	/* Init I/O and ADCs */
	initPorts();

	/* First decide if the user wants to use a deadzone, and if so, set up the related variables. */
	useDeadzone = setDeadzone(&horizDeadzone, &vertDeadzone);

	/* Grab initial potentiometer values */
	horizCurrent = returnHorizAvg();
	vertCurrent = returnVertAvg();

	/* Set up deadzone ranges.  For example if the joystick center is at
	100 counts, and the user selects a deadzone of 3, the limits of the deadzone will be 97-103
	both horizontally and vertically */
	horizDeadLower = horizCurrent - horizDeadzone;
	horizDeadUpper = horizCurrent + horizDeadzone;
	vertDeadLower = vertCurrent - vertDeadzone;
	vertDeadUpper = vertCurrent + vertDeadzone;


	while(1) {
		horizNew = returnHorizAvg();
		if( horizNew > horizDeadUpper ){
			/* Horizontal is greater than the old value, and outside the deadzone, move it! */
			makeHorizEqual( horizNew - horizDeadzone );
		} else if( horizNew < horizDeadLower ) {
			/* Horizontal is less than the old value, and outside the deadzone, move it! */
			makeHorizEqual( horizNew + horizDeadzone );
		} else if( useDeadzone == 1 ) {
			/* 	Need to handle the casewhere we've switched from one side of the deadzone
				to the other, so simply zero out the position */
			makeHorizEqual( 0 );
		}

		vertNew = returnVertAvg();
		if( vertNew > vertDeadUpper ){
			/* Vertical is greater than the old value, and outside the deadzone, move it! */
			makeVertEqual( vertNew - vertDeadzone );
		} else if( vertNew < vertDeadLower ) {
			/* Vertical is less than the old value, and outside the deadzone, move it! */
			makeVertEqual( vertNew + vertDeadzone );
		} else if( useDeadzone == 1 ) {
			/* 	Need to handle the casewhere we've switched from one side of the deadzone
				to the other, so simply zero out the position */
			makeVertEqual( 0 );
		}

	}

	return 0;
}

/* Our desired value is different from the current position index, so move in the direction of the desired value! */
void makeHorizEqual( long target ){
	if( horizCurrent == target ){
		return;
	} else if( (horizCurrent > target) && (horizCurrent > -MAX_SWING_PER_DIRECTION) ) {
		moveLeft();
		horizCurrent--;
	} else if( horizCurrent < MAX_SWING_PER_DIRECTION ){
		moveRight();
		horizCurrent++;
	}
	return;
}

/* Our desired value is different from the current position index, so move in the direction of the desired value! */
void makeVertEqual( long target ){
	if( vertCurrent == target ){
		return;
	} else if( (vertCurrent > target) && (vertCurrent > -MAX_SWING_PER_DIRECTION) ) {
		moveDown();
		vertCurrent--;
	} else if(vertCurrent < MAX_SWING_PER_DIRECTION){
		moveUp();
		vertCurrent++;
	}
	return;
}

/*  Set the deadzone to one of 5 possible presets
	It would be trivial to increase this to nine presets (utilize the diagonal)
	I just didn't so I could reduce complexity */
char setDeadzone( long *horizDeadzone, long *vertDeadzone )
{
	/* 	To activate deadzone, hold the joystick in one direction while plugging it in (or turning the system on)
		Wait approximately a second and release the joystick to the center position and wait three seconds before moving it */

	/* Hold the stick all the way to the right to get medium deadzone horizontally, and slight deadzone vertically */
	while( returnHorizAvg() < -50 ){
		*horizDeadzone = 8;
		*vertDeadzone = 3;
	}
	/* Hold the stick all the way to the left to add a slight deadzone to the horizontal axis */
	while( returnHorizAvg() > 50 ){
		*horizDeadzone = 5;
		*vertDeadzone = 0;
	}
	/* Hold the stick all the way down to add a slight deadzone */
	while( returnVertAvg() > 50 ){
		*horizDeadzone = 3;
		*vertDeadzone = 3;
	}
	/* Hold the stick all the way up to add a medium deadzone */
	while( returnVertAvg() < -50 ){
		*horizDeadzone = 8;
		*vertDeadzone = 8;
	}

	if( (horizDeadzone > 0) || (vertDeadzone > 0)){
		/* Delay for a second to allow the joystick to return to center */
		delay_ms(3000);
		return 1;
	} else {
		/* Without holding the analog in any direction, the default is 0 deadzone */
		return 0;
	}
}

/* Initialize the I/O and set up the ADCs */
void initPorts(void){
    trisa = 0b00010100;

	trisc = 0x00;
	adcon1 = 0x10;
	ansel = 0b00001010;

    trisc = 0;
	porta = 0;

	/* For no reason... */
	delay(100);

	return;
}
movement.c:
Code Select
/*
	File contains movement related functions.

	Author:  Kyle Wagner 2010

	movement.c

	Code may be changed and distributed FREELY, but please give credit to the author.
*/

#include <system.h>
#include "movement.h"

/* 	The next two globals contain the positions of the vertical and horizontal movement ports
	in each of their respective state machines */
extern char stateVert;
extern char stateHoriz;

/* 	Really random delay function. I use it to add a delay for the ADCs
	but can't remember how it got all ugly like this...  Probably has
	something to do with keeping it from being optimized out.  Should probably use some nop()s... */
void delay(unsigned char d) {
  unsigned int n;
  while (d--)
    for (n=0; n<1; n++) ;
}

/* 	Movement involves reading the ADC value, then moving within a state machine
	appropriately.
	Counting up, the output ports should read:
	00
	01
	11
	10
	...

	Counting down:
	00
	10
	11
	01

	Counting up 3 then down 2:
	00
	10
	11
	10
	00
*/

void moveLeft(void) {
	switch(stateVert) {
		case 0:
			clear_bit(portc,3);
			stateVert = 1;
			break;
		case 1:
			clear_bit(portc,2);
			stateVert = 3;
			break;
		case 2:
			set_bit(portc,2);
			stateVert = 0;
			break;
		case 3:
			set_bit(portc,3);
			stateVert = 2;
			break;
	}
	return;
}

void moveRight(void) {
	switch(stateVert) {
		case 0:
			clear_bit(portc,2);
			stateVert = 2;
			break;
		case 1:
			set_bit(portc,3);
			stateVert = 0;
			break;
		case 2:
			clear_bit(portc,3);
			stateVert = 3;
			break;
		case 3:
			set_bit(portc,2);
			stateVert = 1;
			break;
	}
	return;
}

void moveDown(void) {
	switch(stateHoriz) {
		case 0:
			clear_bit(portc,0);
			stateHoriz = 2;
			break;
		case 1:
			set_bit(portc,1);
			stateHoriz = 0;
			break;
		case 2:
			clear_bit(portc,1);
			stateHoriz = 3;
			break;
		case 3:
			set_bit(portc,0);
			stateHoriz = 1;
			break;
	}
	return;
}

void moveUp(void) {
	switch(stateHoriz) {
		case 0:
			clear_bit(portc,1);
			stateHoriz = 1;
			break;
		case 1:
			clear_bit(portc,0);
			stateHoriz = 3;
			break;
		case 2:
			set_bit(portc,0);
			stateHoriz = 0;
			break;
		case 3:
			set_bit(portc,1);
			stateHoriz = 2;
			break;
	}
	return;
}

/*  Poll the ADC on the horizontal potentiometer port,
	summing twice then shifting (dividing) to get an average of two values
	due to stability issues.  May be able to drop the second poll and shift,
	to speed execution */
long returnHorizAvg(void){
	long horizAvg=0;
	adcon0 = 0b00001001;

	adcon0 = adcon0 | 0b00000010;
	delay(1);
	horizAvg += adresh;
	adcon0 = adcon0 | 0b00000010;
	delay(1);
	horizAvg += adresh;

	/* Subtract 127 to center the result around 0 (theoretically) -- pot may not be at the exact middle */
	return (horizAvg >> 1) - 127;
}

/*  Poll the ADC on the vertical potentiometer port,
	summing twice then shifting (dividing) to get an average of two values
	due to stability issues.  May be able to drop the second poll and shift,
	to speed execution */
long returnVertAvg(void){
	long vertAvg=0;
	adcon0 = 0b00001101;

	adcon0 = adcon0 | 0b00000010;
	delay(1);
	vertAvg += adresh;
	adcon0 = adcon0 | 0b00000010;
	delay(1);
	vertAvg += adresh;

	/* Subtract 127 to center the result around 0 (theoretically) -- pot may not be at the exact middle */
	return (vertAvg >> 1) - 127;
}
movement.h
Code Select
/*
	File contains headers for movement related functions.

	Author:  Kyle Wagner 2010

	movement.h

	Code may be changed and distributed FREELY, but please give credit to the author.
*/

void delay(unsigned char d);

void moveUp(void);
void moveDown(void);
void moveLeft(void);
void moveRight(void);

long returnHorizAvg(void);
long returnVertAvg(void);
Title: Re: PSX Analog in and N64 Controller
Post by: kylejw on August 01, 2010, 11:45:25 AM
Post by: kylejw on August 01, 2010, 11:45:25 AM
So in most cases the following happens:
1. User Plugs in controller
2. User turns on machine
3. My chip continually samples the potentiometers and translates it to quadrature output
And nobody knows anything funky is going on.
However, since I wanted this to be an adaptive solution, you also have the following optional functionality:
OPTIONAL 1. User holds the joystick up/down/left/right
2. User Plugs in controller / User turns on machine
IF STEP 1 EXECUTED:3. My chip reads the initial position and sets one of the following deadzones:
Down: Slight deadzone in both directions
Up: Medium deadzone in both directions
Left: No vertical deadzone, slight horizontal deadzone
Right: Slight vertical deadzone, medium horizontal deadzone
IF STEP 1 EXECUTED: 4. User releases joystick
IF STEP 1 EXECUTED: 5. My chip initializes itself like normal, but with the selected deadzone
6. My chip continually samples the potentiometers and translates it to quadrature output
If the user leaves the joystick in the neutral position (as happens normally), there is no difference to their experience.
The reason I went with the staggered deadzones for left and right is I notice on a widescreen TV I always move horizontally too much, so this kind of delays my movement. I prefer it, but most people may not...
It seems like the 160 steps is true too. I suspect that it would be acceptable to use the full range of 0-255 though, since I believe the issues of 'down turning to up' and other anomalies are a result of 3rd party controllers not monitoring for overflow.
Title: Re: PSX Analog in and N64 Controller
Post by: kylejw on August 01, 2010, 12:12:31 PM
Post by: kylejw on August 01, 2010, 12:12:31 PM
PIC16F616:
Code Select
                 __________
       Gray(4) -|          |- Gray(3)
               -|          |-
      Vertical -|          |-
               -|          |- Horizontal
               -|          |- White
               -|          |- Gray(1)
      Gray(2)  -|__________|- Gray(5)
Where the whites and grays are the connector from the original stick
White | Gray(1) | Gray(2) | Gray(3) | Gray(4) | Gray(5)
Title: Re: PSX Analog in and N64 Controller
Post by: micro on August 05, 2010, 12:30:30 AM
Post by: micro on August 05, 2010, 12:30:30 AM
That's great, now people can choose between PIC and AVR :)
You put some great effort into the implementation of dead-zones.
Even original N64 controllers by Nintendo don't care if the stick exceeds 160 steps / axis. It seems it's up to the game to interpret the value of the x- and y-axis. Mari0 64 does a perfect job, Turok is moving too fast & too far and Blast Corps is failing when using 256 steps.
I guess there are many more games that can't handle 256 steps.
I made a video showing the resolution of orignal N64 controllers:
resolution of the N64 analog stick (http://www.youtube.com/watch?v=sGbzKzpL9gY#)
You put some great effort into the implementation of dead-zones.
Quote
It seems like the 160 steps is true too. I suspect that it would be acceptable to use the full range of 0-255 though, since I believe the issues of 'down turning to up' and other anomalies are a result of 3rd party controllers not monitoring for overflow.
Even original N64 controllers by Nintendo don't care if the stick exceeds 160 steps / axis. It seems it's up to the game to interpret the value of the x- and y-axis. Mari0 64 does a perfect job, Turok is moving too fast & too far and Blast Corps is failing when using 256 steps.
I guess there are many more games that can't handle 256 steps.
I made a video showing the resolution of orignal N64 controllers:
resolution of the N64 analog stick (http://www.youtube.com/watch?v=sGbzKzpL9gY#)
Title: Re: PSX Analog in and N64 Controller
Post by: Link83 on August 05, 2010, 01:00:15 AM
Post by: Link83 on August 05, 2010, 01:00:15 AM
Its great to see you back kylejw and thanks for all your awesome work, its great that people now have more options ;) (Especially since not everyone has the correct programmer for one particular chip)
I am curious about the software dead zone you mentioned, have you tried your code without it? and could it be removed? (Down to personal preference of course)
Also looking forward to hearing more about your dual analog N64 controller mod for GoldenEye :)
micro, thanks for the great video - that very nicely demostrates the difference. I am curious though, are your measurements being made between the analog stick and the controller PCB, or from the actual controller plug? I only ask as I have been reading Nintendo's patent:-
http://www.google.com/patents?id=XjoYAAAAEBAJ&printsec=abstract&zoom=4&source=gbs_overview_r&cad=0 (http://www.google.com/patents?id=XjoYAAAAEBAJ&printsec=abstract&zoom=4&source=gbs_overview_r&cad=0)
and on page 45 it says:-
Quote from: Nintendo Patent 5963196With referring to FIG. 32 and FIG. 33, a first center correction method will be described. A method shown in FIG. 32 is a method that when the data Xa and Ya of the X counter 444X and the Y counter 444Y respectively exist within a predetermined range defined by oblique lines in FIG. 32, data outputted from the analog joystick 45 (hereinafter called as "joystick data") X and Y are regarded as "0", respectively. Specifically, if the counter data Xa exists in a range from "+16" to "-16", the joystick data X is outputted as "0". Similarly, if the counter data Ya exists in a range from "+16" to "-16", the joystick data Y of "0" is outputted. In addition, these specific numeral values "16" and "-16" are values determined through a laboratory work by the inventors et al.; however, it is needless to say that other arbitrary numeral values may be set. That is, in the laboratory work by the inventors et al., the deviation of the data at the neutral position of the lever 474 is approximately within the range from "16" to "-16", and therefore, the above described numeral values are utilized; however, if it is considered that other numeral values are preferable, the other numeral values may be used.So its likely that Nintendo choose +/-16 steps as the dead zone for the N64 analog stick, but it doesnt seem clear to me what is actually deciding this dead zone, is it the controllers CNT-NUS chip, the PIF-NUS chip in the N64, or the game software itself? What i'm wondering is if the range is actually +/-96 with +/-16 already 'ignored' as the dead zone, in which case the sensitivity would be slightly different (i.e. The actual N64 analog stick range might be 192 steps but the controller only outputs data for 160 steps, which when we match this number to the 256 steps of the GameCube analog stick might make the sensitivity feel different) Maybe I dont know what im talking about though!
Title: Re: PSX Analog in and N64 Controller
Post by: micro on August 05, 2010, 01:47:47 AM
Post by: micro on August 05, 2010, 01:47:47 AM
I was using the socket of an extension cord, so the first 2 controllers have never been opened or tampered with.
I got really a hard time reading and understanding patents, but I'm pretty sure dead-zones as described in the patent are handled by the N64 itself. But I don't know if the PIF-NUS or the game corrects the analog stick data, but I guess it's up to the game.
No, the range transmitted by the N64 controller to the N64 console probably isn't +/-96. The Gamecube stick of the 4th controller in the video has a range of exactly 160 steps and that's also the same range that you'll get when reading the whole controller via controller cord. :) Otherwise you'd only get +/-64 steps. (which is the resolution the N64 games are using after the dead-zone correction in the end)
Title: Re: PSX Analog in and N64 Controller
Post by: micro on August 06, 2010, 02:27:33 PM
Post by: micro on August 06, 2010, 02:27:33 PM
Now my code is also available for ATtiny24's. 50% smaller, 30% less expensive.
Many thanks to Link83 who provided me with some free ATtiny24's :)
The latest source code for both AVR microcontrollers as well as instructions and schematics are included in one zip file (1.7MB). Go grab it!
http://www.mediafire.com/file/q4232gx1w2q2w0s/GC_PSX_stick_in_N64_controller_v1.2.zip (http://www.mediafire.com/file/q4232gx1w2q2w0s/GC_PSX_stick_in_N64_controller_v1.2.zip) (v1.2 corrected ISP pinout)
Obligatory youtube vid: 8)
Gamecube analog stick in N64 controller mod (http://www.youtube.com/watch?v=ga8rLSz64XQ#)
Title: Re: PSX Analog in and N64 Controller
Post by: Link83 on August 07, 2010, 02:11:25 AM
Post by: Link83 on August 07, 2010, 02:11:25 AM
Thats great micro :) I expecially like the pdf explaining how to program the ATmega8/ATtiny24, I was a bit concerned about setting the fuse bits correctly.
I also like the range modifier, that extra 5% might help in certain games 8) Do you mind if I ask what calculation you used to get 168 steps?
I have ordered all the parts and cant wait for them to arrive so I can try this out!
btw, I have a brand new and unused N64 controller which I could try and measure the range on if your interested? I am sure we are already at the maximum range, but thought i'd mention it just in case.
Title: Re: PSX Analog in and N64 Controller
Post by: micro on August 07, 2010, 03:42:51 PM
Post by: micro on August 07, 2010, 03:42:51 PM
QuoteI also like the range modifier, that extra 5% might help in certain games Cool Do you mind if I ask what calculation you used to get 168 steps?
The formula is quite simple. Both ATmega8 and ATtiny24 got 10bit A/D converters, so when sampling X Pot and Y Pot you'll get 1024 steps (0-1023). In the source code, there is the variable called "R". Default value of R is 20, if range modifier pin is low during power up then R=21.
Formula: range = 1024 * R / 128 steps
So when R=20 you get 1024*20/128=160 steps and for R=21 you get 1024*21/128=168 steps. :)
It would be nice to know the range of a brand new N64 controller but for the program I wrote you would need some more components for RS232 communication to your PC as well as a extension cord...
QuoteI have ordered all the parts and cant wait for them to arrive so I can try this out!And I'm curious for your finished controller and your experience with the games :D
Title: Re: PSX Analog in and N64 Controller
Post by: Link83 on August 07, 2010, 09:46:01 PM
Post by: Link83 on August 07, 2010, 09:46:01 PM
Quote from: micro on August 07, 2010, 03:42:51 PMI do have an RS232 port and an extension cord I can hack up, so I guess I just need the other components?
It would be nice to know the range of a brand new N64 controller but for the program I wrote you would need some more components for RS232 communication to your PC as well as a extension cord...
Alternatively I came across this thread for an "N64 Controller Demo":-
http://retroactive.be/64dev/forum/viewtopic.php?t=75 (http://retroactive.be/64dev/forum/viewtopic.php?t=75)
I have an N64 backup unit (I'm not a pirate, I just like playing unreleased N64 games such as Zelda Master Quest or 40 Winks on a real N64) so thought if I could run that demo on a real N64 I might be able to get the measurements that way, although obviously I would have to add +/-16 to account for the dead zone.
Unfortunately the download link in the above thread is dead :( but I have emailed Cyanide in the hope that they can send me the file for testing.
Quote from: micro on August 07, 2010, 03:42:51 PMI will post pictures when its finished :) I think the programmer will take the longest to arrive since its coming from Taiwan.
And I'm curious for your finished controller and your experience with the games :D
Title: Re: PSX Analog in and N64 Controller
Post by: kylejw on August 08, 2010, 12:09:12 PM
Post by: kylejw on August 08, 2010, 12:09:12 PM
Wrote up a little document, haven't gotten a chance to review it so I hope theres no mistakes. Schematics for the board will follow since this doc is sort of useless without them...
https://docs.google.com/fileview?id=0B7p93-ZUliqWNzdiZGQ0ZjctMjVhMC00ZGFmLWI2ODEtNDdhNTlkZGMxZTk1&hl=en (https://docs.google.com/fileview?id=0B7p93-ZUliqWNzdiZGQ0ZjctMjVhMC00ZGFmLWI2ODEtNDdhNTlkZGMxZTk1&hl=en)
https://docs.google.com/fileview?id=0B7p93-ZUliqWNzdiZGQ0ZjctMjVhMC00ZGFmLWI2ODEtNDdhNTlkZGMxZTk1&hl=en (https://docs.google.com/fileview?id=0B7p93-ZUliqWNzdiZGQ0ZjctMjVhMC00ZGFmLWI2ODEtNDdhNTlkZGMxZTk1&hl=en)
Title: Re: PSX Analog in and N64 Controller
Post by: Link83 on August 10, 2010, 04:01:12 AM
Post by: Link83 on August 10, 2010, 04:01:12 AM
Very nice pdf guide kylejw :)
I considered using the Wii Classic Controller but didnt think the octagonal gates would fit correctly in an N64 controller, but nice to see I was wrong! How do the Wii Classic Controller's analog sticks compare to the GameCube Controllers analog sticks? and what about the difference between the raised/flat octagonal gates?
I like the little PCB you used, do you mind if I ask where you got them manufactured?
Also looking forward to hearing more about your dual analog N64 controller ideas/plans ;)
Title: Re: PSX Analog in and N64 Controller
Post by: kylejw on August 11, 2010, 01:03:18 PM
Post by: kylejw on August 11, 2010, 01:03:18 PM
I'm pretty sure the gamecube sticks are the exact same part. They feel identical.
The gate I can't provide a good comparison... If you look at the grey/orange controller in the PDF it uses an original gamecube stick, but if you look close you can see I didn't make it flush. I made a controller with a third party stick that was flush and didn't like the feel. I prefer the stick lower down, so the Wii gate actually works perfect for me.
The dual analog... I did it but had to salvage the chips. I used third party sticks in it and they ended up being really sensitive and 'springy'. You can probably tell I'm really a fan of the authentic sticks :).
Also, GoldenEye's control settings arent perfect... if I were to redo this, I'd probably have to swap the horizontal axis of stick A with the one from B, or the verticals. Some combination would work, but it would take some tweaking to get it like XBox/PS games are.
Here's a pic anyways, I had to cut some plastic off the bottom to fit it.
Title: Re: PSX Analog in and N64 Controller
Post by: kylejw on August 11, 2010, 01:11:53 PM
Post by: kylejw on August 11, 2010, 01:11:53 PM
Oh and the PCBs are from BatchPCB. They take a while (5 weeks for these) because they wait to fill up a panel with orders, so it's like a group order that they get made in China. The silk screening, solder mask, individual cutting is all included in the price.
Title: Re: PSX Analog in and N64 Controller
Post by: micro on August 16, 2010, 10:00:29 AM
Post by: micro on August 16, 2010, 10:00:29 AM
Wow, that dual stick controller looks awesome :D
@Link83: To connect a AVR to the serial port of a PC you'd need some more components like max232 level shifter, 3.3V voltage regulator...
But it would be great if you could get hold of that N64 controller demo.
@Link83: To connect a AVR to the serial port of a PC you'd need some more components like max232 level shifter, 3.3V voltage regulator...
But it would be great if you could get hold of that N64 controller demo.
Title: Re: PSX Analog in and N64 Controller
Post by: public-pervert on August 20, 2010, 10:39:17 PM
Post by: public-pervert on August 20, 2010, 10:39:17 PM
right now im waiting for the stk200 cable, gamecube controllers and some atmega8 ^^.
ill post pictures when my is finished too ^^
ill post pictures when my is finished too ^^
Title: Re: PSX Analog in and N64 Controller
Post by: duivert on August 25, 2010, 05:40:13 PM
Post by: duivert on August 25, 2010, 05:40:13 PM
hello,
question (especially for micro) the GC sticks are 2k ohm, can i use a 10 kohm stick, with your attiny24 program ???
so i can order them instead of destroying a GC controller...
thanx in advance!
question (especially for micro) the GC sticks are 2k ohm, can i use a 10 kohm stick, with your attiny24 program ???
so i can order them instead of destroying a GC controller...
thanx in advance!
Title: Re: PSX Analog in and N64 Controller
Post by: micro on August 25, 2010, 11:11:05 PM
Post by: micro on August 25, 2010, 11:11:05 PM
Yep, sticks up to 10kOhm should work fine.
Title: Re: PSX Analog in and N64 Controller
Post by: duivert on August 25, 2010, 11:56:33 PM
Post by: duivert on August 25, 2010, 11:56:33 PM
thanx!
i'm going to try it, ill post if it works!
i'm going to try it, ill post if it works!
Title: Re: PSX Analog in and N64 Controller
Post by: lucidPerspective on August 26, 2010, 12:27:23 AM
Post by: lucidPerspective on August 26, 2010, 12:27:23 AM
Hey kylejw, nice work! I'm just wondering if you had any of the PCB's you made for this mod and/or pre-programmed chips you'd want to sell? I'd be interested in buying a few if you do. Otherwise would you please be able to provide the schematics for the board you made? I signed up to this forum specifically for this post! your amazing :D
Title: Re: PSX Analog in and N64 Controller
Post by: kylejw on August 26, 2010, 11:40:52 AM
Post by: kylejw on August 26, 2010, 11:40:52 AM
Quote from: lucidPerspective on August 26, 2010, 12:27:23 AM
Hey kylejw, nice work! I'm just wondering if you had any of the PCB's you made for this mod and/or pre-programmed chips you'd want to sell? I'd be interested in buying a few if you do. Otherwise would you please be able to provide the schematics for the board you made? I signed up to this forum specifically for this post! your amazing :D
You have a PM.
Title: Re: PSX Analog in and N64 Controller
Post by: kylejw on August 26, 2010, 01:16:50 PM
Post by: kylejw on August 26, 2010, 01:16:50 PM
Rough webpage here containing the source, precompiled binary and schematic
http://kylejw.heliohost.org/index.shtml (http://kylejw.heliohost.org/index.shtml)
http://kylejw.heliohost.org/index.shtml (http://kylejw.heliohost.org/index.shtml)
Title: Re: PSX Analog in and N64 Controller
Post by: public-pervert on August 26, 2010, 10:04:11 PM
Post by: public-pervert on August 26, 2010, 10:04:11 PM
nice site, kyle! and nice to see you selling those pcb's, but right now i have the GC sticks and some atmega8 in hands ;) but if i want to upgrade more controllers ill certainlly buy some of those pcbs :)
Title: Re: PSX Analog in and N64 Controller
Post by: micro on September 08, 2010, 10:33:05 PM
Post by: micro on September 08, 2010, 10:33:05 PM
Sorry guys, I can't believe I messed up the pinout of the ISP socket. :-\
wrong:
pin 3 = reset
pin 5 = not connected
right:
pin 3 = not connected
pin 5 = reset
I also corrected the pdf guide: http://www.mediafire.com/file/q4232gx1w2q2w0s/GC_PSX_stick_in_N64_controller_v1.2.zip (http://www.mediafire.com/file/q4232gx1w2q2w0s/GC_PSX_stick_in_N64_controller_v1.2.zip)
@public pervert: I hope it works now!
Title: Re: PSX Analog in and N64 Controller
Post by: public-pervert on September 08, 2010, 11:49:39 PM
Post by: public-pervert on September 08, 2010, 11:49:39 PM
thanks micro! ill try today and post my experience here! thanks a lot =)
Title: Re: PSX Analog in and N64 Controller
Post by: TrekkiesUnite118 on September 19, 2010, 02:24:49 AM
Post by: TrekkiesUnite118 on September 19, 2010, 02:24:49 AM
Just so people know, you don't have to do this mod if you want a Gamecube or PS1 style analog stick on your N64. NintendoRepairShop has "New" N64 analog sticks for $10 and I bought one. When I recieved it I found it was not like an N64 analog stick but was actually more like a Gamecube one. It hooks right in like an original though and works. I popped it open and found that it actually has the same mechanism as the Gamecube/PS1/PS2/Xbox/360 analog stick. So if you want that feel this could be an easier option.
Title: Re: PSX Analog in and N64 Controller
Post by: micro on September 19, 2010, 11:07:02 PM
Post by: micro on September 19, 2010, 11:07:02 PM
Wow that's interesting, can you post some pictures?
Title: Re: PSX Analog in and N64 Controller
Post by: lucidPerspective on September 20, 2010, 07:02:59 AM
Post by: lucidPerspective on September 20, 2010, 07:02:59 AM
What's the bet some chinese company saw this thread, and implemented your guys code + PIC chips inside the analog stick :o
Title: Re: PSX Analog in and N64 Controller
Post by: kylejw on September 20, 2010, 10:08:52 AM
Post by: kylejw on September 20, 2010, 10:08:52 AM
+1 on the pics, very curious what pot they used... Seems like normal pots are too high to keep the 'deep' look of the original stick.
Title: Re: PSX Analog in and N64 Controller
Post by: TrekkiesUnite118 on September 20, 2010, 11:13:16 AM
Post by: TrekkiesUnite118 on September 20, 2010, 11:13:16 AM
I barely could get it open really. They didn't use screws the glued it shut. I had to use a scratch awl to break the seal and pop it open and I still couldn't get it to open very far (like half a centimeter) with out the fear of breaking it. From what I could tell it looked like the same kind of pot used in the 360 and Gamecube style controllers and it just came out with wires that connects directly into the N64 controller board.
Here are some pictures from the outside though:
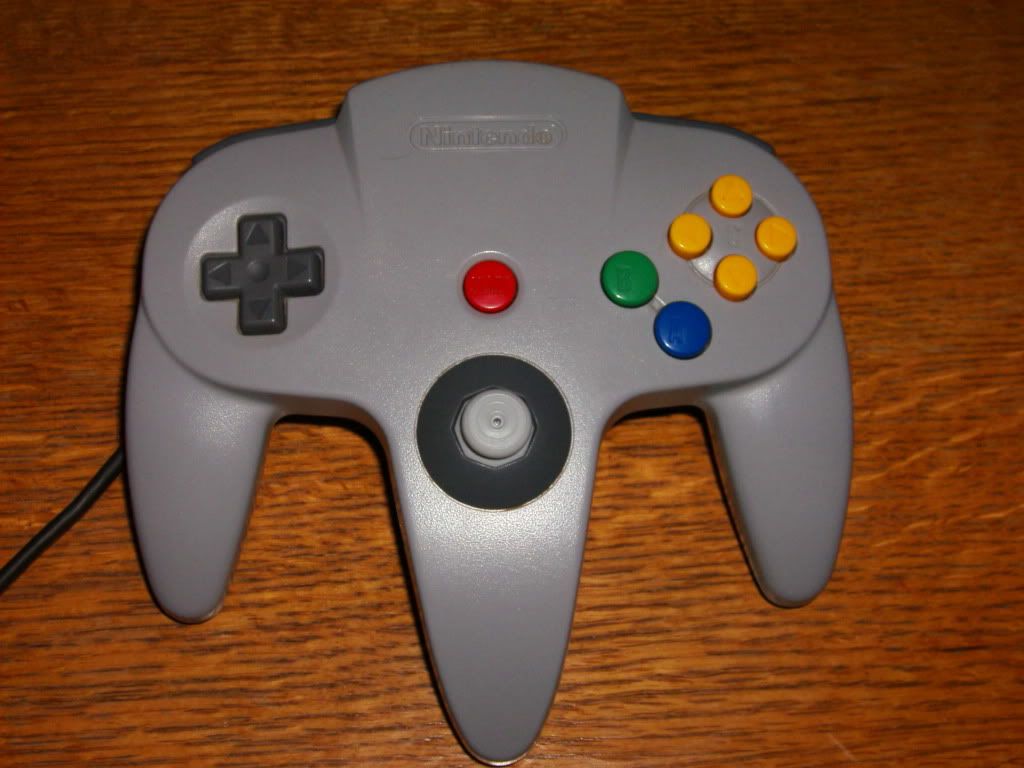
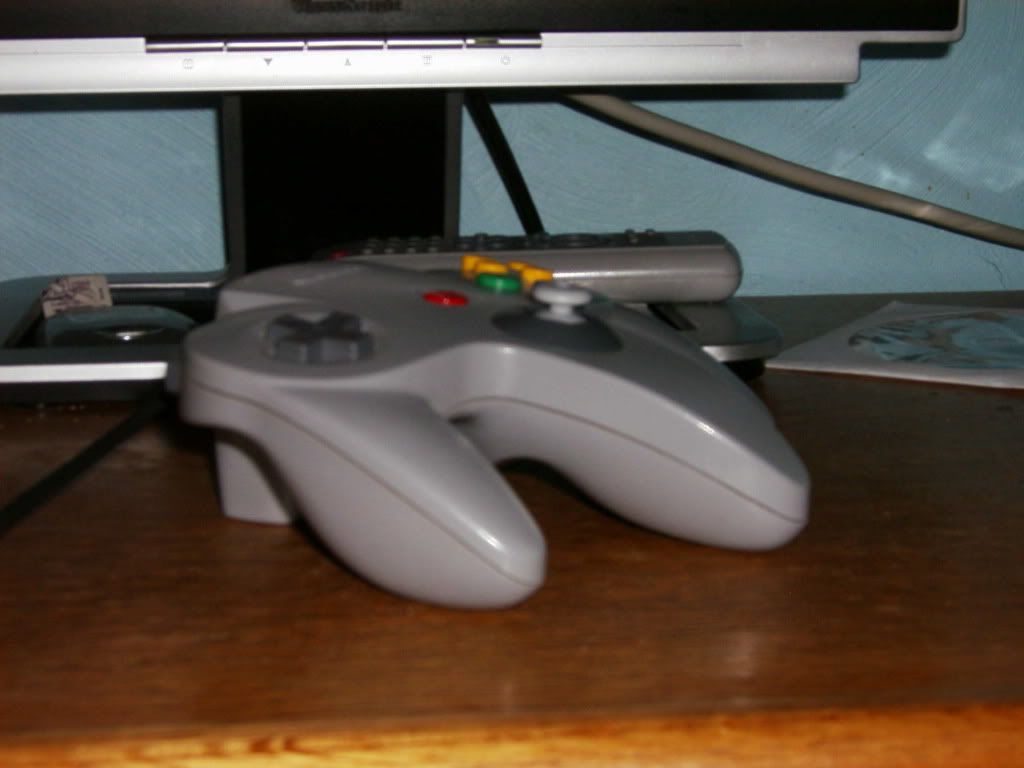

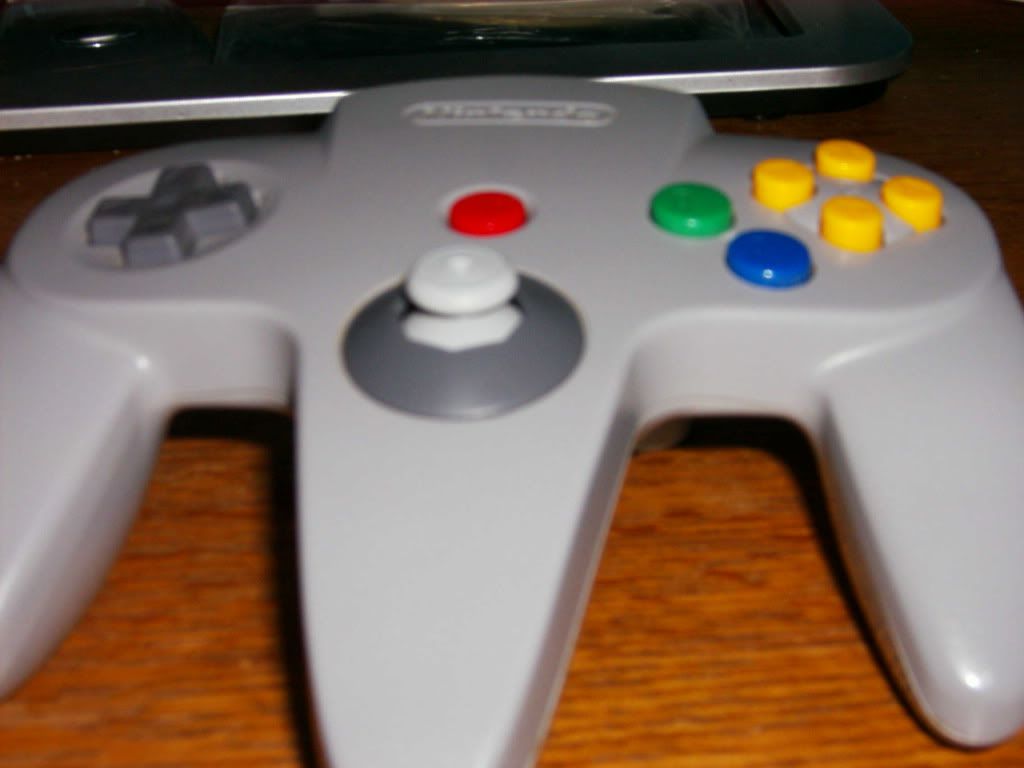
If I can get it open better I'll take some internal pics.
Here are some pictures from the outside though:
If I can get it open better I'll take some internal pics.
Title: Re: PSX Analog in and N64 Controller
Post by: kylejw on September 20, 2010, 03:23:17 PM
Post by: kylejw on September 20, 2010, 03:23:17 PM
Very curious for internal pics... may buy one myself just to see what's going on in there.
One of my controllers is up on eBay if anyone's interested:
http://cgi.ebay.com/ws/eBayISAPI.dll?ViewItem&item=300470345614&ssPageName=STRK:MESELX:IT#ht_500wt_1154 (http://cgi.ebay.com/ws/eBayISAPI.dll?ViewItem&item=300470345614&ssPageName=STRK:MESELX:IT#ht_500wt_1154)
One of my controllers is up on eBay if anyone's interested:
http://cgi.ebay.com/ws/eBayISAPI.dll?ViewItem&item=300470345614&ssPageName=STRK:MESELX:IT#ht_500wt_1154 (http://cgi.ebay.com/ws/eBayISAPI.dll?ViewItem&item=300470345614&ssPageName=STRK:MESELX:IT#ht_500wt_1154)
Title: Re: PSX Analog in and N64 Controller
Post by: viletim on September 20, 2010, 05:58:30 PM
Post by: viletim on September 20, 2010, 05:58:30 PM
Quote from: lucidPerspective on September 20, 2010, 07:02:59 AM
What's the bet some chinese company saw this thread, and implemented your guys code + PIC chips inside the analog stick :o
That's not likely. It's probably a part from the knock-off N64 controllers which NintendoRepairShop.com have for sale (link on the main page to the right).
Title: Re: PSX Analog in and N64 Controller
Post by: SaMusPriMe on September 23, 2010, 04:29:48 AM
Post by: SaMusPriMe on September 23, 2010, 04:29:48 AM
Quote from: micro on July 28, 2010, 12:48:37 AM
Ok public-pervert, first of all you'll need the ATMega8. I've got 2 or 3 of them left, I could send you a preprogrammed one. Just send me a private message.
You said you wanted to use the stick of a Playstation controller, right? Open the PSX controller and cut out one stick from the pcb. You'll end up getting something like this:
On the back side, solder 4 wires to the stick: VCC, GND, X-Pot & Y-Pot.
Now it's time to open the N64 controller and remove the stick unit. Just look at the kylejw's pictures. Once you removed the stick unit, open it and throw everthing out of it. You'll just need the housing of the stick unit. Also you'll need to make some space, take a dremel, knife, plier and/or sand paper to remove the bits of plastic in the stick unit housing that are in your way.
Now comes the difficult part. Take your PSX stick with the 4 wires and attach it into the stick unit. Route the 4 wires out of the unit, on the backside there should be an opening through which you can put the 4 wires.
I used hot glue to position the stick. Getting the stick fitting right takes VERY long. You always have to put the stick unit into the N64 controller and make sure the stick is centered right. If it's not, use a heat blower gun to make the hot glue liquid again and reposition the stick, again and again until the stick sits right.
There is no easy fool-proof way, it's all about trial & error. And because of that it's important to use hot glue and a heat gun :)
Here you see a picture of my Gamecube stick:
Yes, it looks like a mess!
To make things worse you'll also have to think about the bezel for the stick. The bezel also has to be fitted right so it won't be in the way of the stick.
For my Gamecube stick I glued the octagonal shaped bezel to the controller and I didn't use the top half of the stick housing at all, it wasn't needed.
Kylejw on the other hand glued the bezel directly onto the stick unit housing. You see, you'll have to try for yourself :D
But once the stick sits right in the stick unit, just wire up the stick with the ATMega8 and the N64 controller PCB. Just look at the 3 pin outs, it's straight forward:
The only extra components you'll need is a 10kOhm resistor and a 100nF ceramic cap. Both are very common & cheap, I got plenty of them. As I said send me a private message if you'd like me to send you the components.
@Link83:QuoteI just have two questions if you dont mind:-I think the pot value isn't THAT critical, I assume they're all 10k (?)
- Does your code work with any analog stick, or do they have to use a certain pot value? (Really hoping to use a broken official GameCube controller)
- Is the sensitivity set to about the same level as the original N64 analog stick?
Sensitivity now is about the same level but of course it feels different.
The original N64 stick was always a little hard to move, these days analog sticks are much easier to move.
Link, have you ever played Ocarina of Time on the Gamecube? It was on the bonus disc of Wind Waker. When I played it back in '03 or '04 I was really stunned by the improved visuals. But then I had serious problems aiming with the bow and the slingshot. I almost couldn't win the bow mini game in the city. N64 and Gamecube stick just aren't the same.
I had similar experience with N64 Ocarina of Time and my N64 Hori Mini Pad.
The Mini Pad featured a GC-style stick. The pad was ok, but really small. If I hadn't sold it a year ago I could check how many steps it had for the X- and Y-axis :(
Hello, you can post again the pinout from AVR, ty
br samusprime
Title: Re: PSX Analog in and N64 Controller
Post by: micro on September 23, 2010, 05:55:55 AM
Post by: micro on September 23, 2010, 05:55:55 AM
@Samusprime: Hmm, I don't understand what you mean... Why are you quoting the whole text & pics? :P All the pinouts & schematics are included in this file: GC_PSX_stick_in_N64_controller_v1.1 (http://ul.to/37m7j6)
The Nintendorepairshop stick looks very good. Although it seems the stick is entirely made of plastic without rubber on the top. IMO that was also a problem of the original N64 and Dreamcast stick, the sticks could get pretty slippery during the battle :D
So what's your conclusion, are those sticks worth 10$?
Title: Re: PSX Analog in and N64 Controller
Post by: blaze3927 on October 01, 2010, 12:18:46 AM
Post by: blaze3927 on October 01, 2010, 12:18:46 AM
anyone else got micro's method working yet?
i cant get the stick to respond at all, however i finally managed to program/flash the attiny's 24's
i cant get the stick to respond at all, however i finally managed to program/flash the attiny's 24's
Title: Re: PSX Analog in and N64 Controller
Post by: micro on October 01, 2010, 12:52:18 AM
Post by: micro on October 01, 2010, 12:52:18 AM
So what was the problem with the programming?
If you can post some (good) pictures maybe I can see if there's something wrong with the wiring.
If you can post some (good) pictures maybe I can see if there's something wrong with the wiring.
Title: Re: PSX Analog in and N64 Controller
Post by: blaze3927 on October 02, 2010, 02:08:24 PM
Post by: blaze3927 on October 02, 2010, 02:08:24 PM
Still no idea what the problem is with the programming, i ended up buying this
http://cgi.ebay.com.au/ws/eBayISAPI.dll?ViewItem&item=250670056425 (http://cgi.ebay.com.au/ws/eBayISAPI.dll?ViewItem&item=250670056425)
and hard wiring the pin appropriate pins.
worked fine after that
ok picture of analog wiring:
 (http://img831.imageshack.us/i/pa020969.jpg/)
Uploaded with ImageShack.us (http://imageshack.us)
does the potentiometer/analog stick used have to be a specific resistance, i've tried three with no luck.
http://cgi.ebay.com.au/ws/eBayISAPI.dll?ViewItem&item=250670056425 (http://cgi.ebay.com.au/ws/eBayISAPI.dll?ViewItem&item=250670056425)
and hard wiring the pin appropriate pins.
worked fine after that
ok picture of analog wiring:
(http://img831.imageshack.us/i/pa020969.jpg/)Uploaded with ImageShack.us (http://imageshack.us)
does the potentiometer/analog stick used have to be a specific resistance, i've tried three with no luck.
Title: Re: PSX Analog in and N64 Controller
Post by: micro on October 02, 2010, 03:16:35 PM
Post by: micro on October 02, 2010, 03:16:35 PM
Potentiometers up to 10k should be fine.
So you get absolutely no movement? The picture isn't very sharp... The cap betweeen GND and VCC looks kinda strange. Is it a ceramic cap? Remove the cap and look if there's any difference.
I can see that your stick is still attached to the pcb. Make sure that pin 1 and 3 of X and Y pot are connected to GND & VCC (or vice versa). The pic is really blurry but it seems the traces that connect pin 1 and 3 for both pots are cut so you really have to make sure you got GND & VCC on pin 1 & 3....
Title: Re: PSX Analog in and N64 Controller
Post by: blaze3927 on October 02, 2010, 05:04:42 PM
Post by: blaze3927 on October 02, 2010, 05:04:42 PM
absolutely no movement
checked all the connections, everything is going where they should be, no shorts,
however once power is provided to the system my multimeter tells met that all pins are connected to each other. wierd.
that green thing is the capacitor, not a ceramic cap one, tried ceramic caps also.
removing the capacitor had no effect
i noticed just now that the programmer board (url above) doesnt appear to have 10kohms between pin 1 and pin4, however bascom identifies and seems to program the microchip fine
Title: Re: PSX Analog in and N64 Controller
Post by: micro on October 03, 2010, 01:46:15 AM
Post by: micro on October 03, 2010, 01:46:15 AM
This is getting REALLY ridiculous now! I wanted to program another ATtiny24 using my own guide and then I found ANOTHER error in the programming schematic. And this time it's a pretty big mistake, MOSI was going to the reset pin and reset to MOSI. I guess this was the reason why you couldn't program yur ATtiny24's. I can't explain how that could have happened...
Anyway, here's the corrected guide, I've also deleted the old one. http://www.mediafire.com/file/q4232gx1w2q2w0s/GC_PSX_stick_in_N64_controller_v1.2.zip (http://www.mediafire.com/file/q4232gx1w2q2w0s/GC_PSX_stick_in_N64_controller_v1.2.zip)
Blaze, so you got a different problem as your AVRs are already programmed. So I'm gonna tell you how you can test if the AVR is working right:
First provide power to your AVR. Leave out the cap for now but you need the 10k resistor between VCC and reset. If the reset pin isn't held high, the AVR won't run.
You can use a 3V battery or you take the 3.3V from the N64 controller, doesn't matter.
Next you provide VCC & GND to only one pot of the stick. Now you can take your multimeter and check the voltage of the middle pin of the pot. When the stick is in neutral position you should get roughly half the voltage of VCC. If you don't get any voltage at all then there's something wrong with the pcb of the stick.
Then you connect a wire from the middle pin of the pot to pin 8 of the ATtiny24. When you're moving the stick now pin 9&10 of the AVR will constantly toggle between logic 0 and 1. So now you take a simple LED and connect the short wire to GND and the long wire to either pin 9 or pin 10, it doesn't matter. But you'll also need a resistor for the LED as 3.3V is too much for a regular LED. Take a 75 or 82Ohm resistor.
Now the whole setup should look like this:
 (http://img839.imageshack.us/i/dsc01507a.jpg/)
  (http://img641.imageshack.us/i/dsc01512p.jpg/)
When you move the stick now you will see the LED blink. The slower you move the stick the slower the LED blinks. So if you see the LED blink, everything should be fine.
BTW, Super Mario 64 is great game to test the stick as you can see the cursor moving.
Anyway, here's the corrected guide, I've also deleted the old one. http://www.mediafire.com/file/q4232gx1w2q2w0s/GC_PSX_stick_in_N64_controller_v1.2.zip (http://www.mediafire.com/file/q4232gx1w2q2w0s/GC_PSX_stick_in_N64_controller_v1.2.zip)
Blaze, so you got a different problem as your AVRs are already programmed. So I'm gonna tell you how you can test if the AVR is working right:
First provide power to your AVR. Leave out the cap for now but you need the 10k resistor between VCC and reset. If the reset pin isn't held high, the AVR won't run.
You can use a 3V battery or you take the 3.3V from the N64 controller, doesn't matter.
Next you provide VCC & GND to only one pot of the stick. Now you can take your multimeter and check the voltage of the middle pin of the pot. When the stick is in neutral position you should get roughly half the voltage of VCC. If you don't get any voltage at all then there's something wrong with the pcb of the stick.
Then you connect a wire from the middle pin of the pot to pin 8 of the ATtiny24. When you're moving the stick now pin 9&10 of the AVR will constantly toggle between logic 0 and 1. So now you take a simple LED and connect the short wire to GND and the long wire to either pin 9 or pin 10, it doesn't matter. But you'll also need a resistor for the LED as 3.3V is too much for a regular LED. Take a 75 or 82Ohm resistor.
Now the whole setup should look like this:
(http://img839.imageshack.us/i/dsc01507a.jpg/) (http://img641.imageshack.us/i/dsc01512p.jpg/)When you move the stick now you will see the LED blink. The slower you move the stick the slower the LED blinks. So if you see the LED blink, everything should be fine.
BTW, Super Mario 64 is great game to test the stick as you can see the cursor moving.
Title: Re: PSX Analog in and N64 Controller
Post by: blaze3927 on October 03, 2010, 05:42:40 PM
Post by: blaze3927 on October 03, 2010, 05:42:40 PM
hmm tried the testing, the voltage between the middle pin of the pot is fine.
however no blinking led, i tried another microchip, freshly programmed. and like the other one it appears that pins 9&10 are both shorted to ground.
more chips should be arriving this week to test on.
thanks very much for all your work
however no blinking led, i tried another microchip, freshly programmed. and like the other one it appears that pins 9&10 are both shorted to ground.
more chips should be arriving this week to test on.
thanks very much for all your work
Title: Re: PSX Analog in and N64 Controller
Post by: micro on October 03, 2010, 08:30:39 PM
Post by: micro on October 03, 2010, 08:30:39 PM
Hmm, why do you think pin 9 & 10 are shorted to ground? Did you measure the resistance between GND and 9 & 10 or did you just read the voltage on pin 9 & 10?
Title: Re: PSX Analog in and N64 Controller
Post by: blaze3927 on October 03, 2010, 10:15:19 PM
Post by: blaze3927 on October 03, 2010, 10:15:19 PM
i used the multimeters short tester , also pins 5 & 6 are shorted to ground
Title: Re: PSX Analog in and N64 Controller
Post by: SaMusPriMe on October 05, 2010, 04:13:09 AM
Post by: SaMusPriMe on October 05, 2010, 04:13:09 AM
Quote from: kylejw on August 08, 2010, 12:09:12 PM
Wrote up a little document, haven't gotten a chance to review it so I hope theres no mistakes. Schematics for the board will follow since this doc is sort of useless without them...
https://docs.google.com/fileview?id=0B7p93-ZUliqWNzdiZGQ0ZjctMjVhMC00ZGFmLWI2ODEtNDdhNTlkZGMxZTk1&hl=en (https://docs.google.com/fileview?id=0B7p93-ZUliqWNzdiZGQ0ZjctMjVhMC00ZGFmLWI2ODEtNDdhNTlkZGMxZTk1&hl=en)
hello, where i can buy the printed circuit????
Title: Re: PSX Analog in and N64 Controller
Post by: kylejw on October 05, 2010, 09:26:37 AM
Post by: kylejw on October 05, 2010, 09:26:37 AM
kylejw.heliohost.org
Title: Re: PSX Analog in and N64 Controller
Post by: micro on October 05, 2010, 11:33:25 AM
Post by: micro on October 05, 2010, 11:33:25 AM
Quote from: blaze3927 on October 03, 2010, 10:15:19 PM
i used the multimeters short tester , also pins 5 & 6 are shorted to ground
So you did use the continuity test function of your multimeter? Did you test continuity when the AVR was still running? Afaik you should test continuity only when the device to be tested is turned off.
Pins 5&6 and 9&10 are the 2 output pins for each axis. The pins constantly toggle between GND and VCC voltage as you move the stick and at some point both pins are at GND level, that would be normal.
You said the voltage on the middle pin of the pot is fine. So I guess the voltage rises and falls as you move the stick, right? If not, then there's something wrong with the wiring of the pot.
Quotemore chips should be arriving this week to test on.
That won't help I'm afraid. I mean you said you programmed the 3 ATtiny24's with Bascom successfully. So Bascom verified the code and if you didn't get a error message during the flashing process you got the right program running on your ATtiny24's. I also don't think that all of your three AVRs are broken...
I see you got the SOIC version of the ATtiny24. I guess you didn't buy used ones, did you ;) You could check again the fusebits, they should look exactly like the ones on my screenshot (especially clock and watchdog timer fusebits)
Blaze, you're so close, you're gonna make it :D
Title: Re: PSX Analog in and N64 Controller
Post by: blaze3927 on October 05, 2010, 01:52:26 PM
Post by: blaze3927 on October 05, 2010, 01:52:26 PM
Okay when moving the pot voltage does change, will check fuse bits and will try for that blinking led again 8)
**edit**
Read the chips rom, and this is a print screen of the fusebits:
 (http://img805.imageshack.us/i/prntscr.png/)
Uploaded with ImageShack.us (http://imageshack.us)
it looks like im using a slightly different program to you and that the only other difference i notice is the calibration number, yours is 4c whereas mine is 54.
any problem there?
**edit**
tried again, still no blinking LED
**edit**
Read the chips rom, and this is a print screen of the fusebits:
(http://img805.imageshack.us/i/prntscr.png/)Uploaded with ImageShack.us (http://imageshack.us)
it looks like im using a slightly different program to you and that the only other difference i notice is the calibration number, yours is 4c whereas mine is 54.
any problem there?
**edit**
tried again, still no blinking LED
Title: Re: PSX Analog in and N64 Controller
Post by: micro on October 05, 2010, 09:54:45 PM
Post by: micro on October 05, 2010, 09:54:45 PM
Your fusebits look fine. Different calibration is normal, too.
I'm really clueless...
So you have the 10k pullup resistor between pin 1 and 4, I could see that on your pic. So if your LED isn't busted and you paid attention to the polarity and the LED resistor, your LED should really blink when you're moving the stick.
Of course, your ATtiny24's could be broken, but all three of them...?
Title: Re: PSX Analog in and N64 Controller
Post by: Sharn on October 08, 2010, 04:55:30 AM
Post by: Sharn on October 08, 2010, 04:55:30 AM
(Yay first post! :D) I have a n64 controller here with a nearly dead joystick, and this sounds like an awesome idea. I have no experience with AVR or raw PIC controllers, but I have a PICaxe 18X sitting here that I think will do the job. The technical faq says it can read 10-bit adc (or 8-bit), and the minimum operating voltage is 3volts. I haven't tried the thing at 3 volts, so I have no idea if it will work.
So, a couple questions:
You'll have to forgive me for being such a noob... I have very little experience with microcontrollers and pretty stone-age tools to work with.
I also don't have a donor joystick at the moment, so that will have to wait until I can find one at the thrift store or make my way out to a gamestop. (Don't want/can't afford to buy a brand new controller) I'll release my code and schematics when I am finished here also. :)
EDIT:
Ok... looking through your code, it looks like I will have to create a "rotate" function using shifts. Also: I am assuming "Portb.1 = Xwheel.1" is setting that pin to the right-most bit on Xwheel? (Or LSB)
Sorry... this is my first time actually trying to make my PICaxe do anything and I'm completely new to working with bits and bytes on this level. Just hang with me on this one. :P
So, a couple questions:
- Is there a minimum frequency I need to hit to sample the joystick frequently enough? This picaxe defaults to 4mhz, but I think I can get 8 or 16 also.
What is the general flow of the program? (In english for my non-programmer-trained brain :P)Nevermind... I can read your code well enough to tell. Thanks for all the comments. :)
You'll have to forgive me for being such a noob... I have very little experience with microcontrollers and pretty stone-age tools to work with.
I also don't have a donor joystick at the moment, so that will have to wait until I can find one at the thrift store or make my way out to a gamestop. (Don't want/can't afford to buy a brand new controller) I'll release my code and schematics when I am finished here also. :)
EDIT:
Ok... looking through your code, it looks like I will have to create a "rotate" function using shifts. Also: I am assuming "Portb.1 = Xwheel.1" is setting that pin to the right-most bit on Xwheel? (Or LSB)
Sorry... this is my first time actually trying to make my PICaxe do anything and I'm completely new to working with bits and bytes on this level. Just hang with me on this one. :P
Title: Re: PSX Analog in and N64 Controller
Post by: kylejw on October 08, 2010, 10:04:10 AM
Post by: kylejw on October 08, 2010, 10:04:10 AM
A PIC 18F should be able to do this project many times over :) It has more than enough resources.
Since it appears you're using micro's code I'll let him answer your questions, but with regards to the sample rate, I run at 8MHz clock and it samples plenty fast enough. I never did any measurements due to lack of proper instruments, just assumed that my thumb would be slower than a thousand samples per second :)
Since it appears you're using micro's code I'll let him answer your questions, but with regards to the sample rate, I run at 8MHz clock and it samples plenty fast enough. I never did any measurements due to lack of proper instruments, just assumed that my thumb would be slower than a thousand samples per second :)
Title: Re: PSX Analog in and N64 Controller
Post by: micro on October 09, 2010, 12:28:36 AM
Post by: micro on October 09, 2010, 12:28:36 AM
Quote from: Sharn on October 08, 2010, 04:55:30 AM
EDIT:
Ok... looking through your code, it looks like I will have to create a "rotate" function using shifts. Also: I am assuming "Portb.1 = Xwheel.1" is setting that pin to the right-most bit on Xwheel? (Or LSB)
Sorry... this is my first time actually trying to make my PICaxe do anything and I'm completely new to working with bits and bytes on this level. Just hang with me on this one. :P
Actually xwheel.1 is the 2nd bit, xwheel.0 would be the LSB ;D But it doesn't matter, you just have to take 2 neighbored bits on the xwheel byte ike 0&1 or 1&2, 3&4 or even 7&0.
I agree with kylejw. My AVR's run at 8MHz too, more than fast enough for that job. :)
Title: Re: PSX Analog in and N64 Controller
Post by: Sharn on October 11, 2010, 11:52:18 AM
Post by: Sharn on October 11, 2010, 11:52:18 AM
Alright guys... an update. I've been slaving away at this for a bit, and I have some code that should, theoretically, work. I cannot test it yet, because I am lacking a joystick, and I need to re-make my serial cable for my picaxe and use a more advanced version to get more stable ADC readings while testing.
Thanks micro and kylejw, I used pieces from both. I first attempted to use the virtual wheel micro used, but with rather limited ram (14 bytes...), and no shift function, and certainly no rotate, not to mention extreme lack of experience, kylejw's "state machine" seemed much more simple. I have the "extended range" by having the joystick pressed far one direction horiz.
Like I say, without actually field testing it, I have no idea if it will work. If you guys could take a quick run-through and bug check it for me mentally, I would appreciate it. I also might mention that I think this project could get on hackaday if we tried. ;)
Title: Re: PSX Analog in and N64 Controller
Post by: kylejw on October 11, 2010, 12:55:06 PM
Post by: kylejw on October 11, 2010, 12:55:06 PM
Just looked at it very briefly, looks like you used Xread and Yread in sendpulses(), when it should be Xsteps and Ysteps?
Otherwise it looks good to me
Otherwise it looks good to me
Title: Re: PSX Analog in and N64 Controller
Post by: micro on October 11, 2010, 10:38:24 PM
Post by: micro on October 11, 2010, 10:38:24 PM
I noticed two things ;D
1.)
In main: you got xsteps and ysteps and you calculate how much steps you gonna have to go. But in sendpulses: you don't pay any regards to the amount of steps. I guess in line 56 you actually confused xread & yread with xsteps & ysteps. But then you still have to in- or decrease xsteps&ysteps after each step made.
2.)
If I got it right then you want to activate the extended range if the analog stick is moved to the right during power up. Well, you can't do it that way because then you would have a wrong initial value for your stick. You want the stick to be in neutral position when you sample it for the first time.
I understand that you only got 4 input pins on your picaxe. So I'd recommend to forget about the extended range for now.
I'm no PIC guy, but it seems your picaxe 18x actually is a PIC 16F88, right? If I were you I would forget about the whole picaxe thing and get a decent BASIC compiler for PICs to use the full potential of the 16F88.
Then you would have additional input pins and you could also use the rotate function which is a lot faster than working with states and using a ton of "if..then..." conditions.
At first I also did it that way until a had the sudden inspiration to simply rotate the wheel left or right :) It's just so much faster and simpler.
Title: Re: PSX Analog in and N64 Controller
Post by: Sharn on October 12, 2010, 10:01:53 AM
Post by: Sharn on October 12, 2010, 10:01:53 AM
Hey micro.. thanks for the post. kylejw also mentioned the point where I confused read and steps, which I have now fixed in the code. I actually have 1 more ADC/digital and 2 digital inputs unused, so I'm not really concerned about inputs... I actually could use one for the extended range if I wanted to.
I may be misunderstanding how the ADC works. I set X/Yold values in my main loop, so the only values I use to check if extended range is desired are X/Yread, which get over-written every loop anyhow. Unless you mean that ADC will take the first value that is read and use it as the middle or reference value..?
Does the pot in the joystick give the uC a full voltage range from 0-3.3 volts, or is it just a small range in there somewhere?
You're right that I didn't in/decrease X/YSteps, fixed that. If I had a joystick, I would probably be using trial and error to work out the last of the bugs; it's the only thing holding me back now.
Also: I probably could have implemented the wheel, but I was low on ram (I think), and I would have had to shift manually, and ensure that I didn't lose the digit that got shifted out. Too much work for now. My code is fairly modular, so it shouldn't be hard to change later if I figure out a way to do it easily.
I would have used a raw chip but:
A. I already had this picAXE from past tinkering
B. I don't want to buy any software or hardware to program chips (For the moment, out of a job :P)
C. picAXE basic is fairly well-documented
D. Finally, I think the more ways there are to do something, the better.
Sorry for such a long and boring post, and thank you for all the help. I've attached my latest code here. I think I took care of the bugs you both pointed out. (Until you can clarify a little on pushing the joystick right at startup...)
Title: Re: PSX Analog in and N64 Controller
Post by: micro on October 12, 2010, 12:07:45 PM
Post by: micro on October 12, 2010, 12:07:45 PM
Sharn, no problem. I fully understand that you want to work with the stuff you already got :)
The middle pin (wiper) of a potentiometer actually touches the GND and VCC pins as you turn the pot all the way left or right. So the pot will give you the full range of voltage from GND upt VCC.
And yes, at the very beginning you should read x and y pot and store the value as Xold and Yold. You can't just set the initial value to 80 or 79. You always have to read these values. It may be possible that the stick will give you 76 or 83 even though it's in neutral position. And with the years the stick gradually gets worn out too...
The only way you could do it without an additional input pin is to read the stick, check if the stick is pushed right, activate extended range if so, then wait 2 seconds or so and read the stick again for the initial neutral values.
I think kyle also did something like that to choose different deadzones iirc.
Another thing you should pay attention to are the different data types you've chosen for your variables.
In my code I've used integer variables because with signed numbers it's easy to calculate the steps you have to make (negative and positive).
But you're using bytes and words for your x and y variables. I don't know a thing about the picaxe compiler but if the bytes and words aren't signed then you'll run into problems when you're calculating your steps that way.
One thing about the rotate function again: http://ww1.microchip.com/downloads/en/devicedoc/30487c.pdf (http://ww1.microchip.com/downloads/en/devicedoc/30487c.pdf)
According to the datasheet (page 157) the 16F88 has the instruction for rotating a byte left or right, single cycle execution. If you allowed to use asm in your picaxe code then you can implement the rotate function too. But I do agree with you that that's something to work on later maybe :)
I'd say it's time to get yourself an analog stick and try out your code 8)
Title: Re: PSX Analog in and N64 Controller
Post by: Sharn on October 12, 2010, 12:21:06 PM
Post by: Sharn on October 12, 2010, 12:21:06 PM
Alright... I understand that now. I also see what you mean with data types also. I forgot that X/Ysteps must be negative, so a byte will not satisfy that.. I'll have to come up with some sort of solution. Lemme think on that one.
A friend just gave me an old wireless xbox controller that died on him, so I'll take a pair of wire cutters to the board and see what damage I can do. I'll let you guys know my results.
Thanks again for all the help. -crosses fingers-
A friend just gave me an old wireless xbox controller that died on him, so I'll take a pair of wire cutters to the board and see what damage I can do. I'll let you guys know my results.
Thanks again for all the help. -crosses fingers-
Title: Re: PSX Analog in and N64 Controller
Post by: micro on October 12, 2010, 12:25:53 PM
Post by: micro on October 12, 2010, 12:25:53 PM
Good luck! :)
But one more thing: if the default values of Xstate & Ystate is 2 then you should also set Xoa&Xob/Yoa&Yob to the according levels at the beginning.
But one more thing: if the default values of Xstate & Ystate is 2 then you should also set Xoa&Xob/Yoa&Yob to the according levels at the beginning.
Title: Re: PSX Analog in and N64 Controller
Post by: Sharn on October 12, 2010, 01:31:43 PM
Post by: Sharn on October 12, 2010, 01:31:43 PM
Thanks for another reply. The picaxe automatically sets all outputs to low upon startup, so state 2 is where it should be at... however, I realized my code only allows for one-way movement right now... Ugh. I may try to find a way to use a wheel as you did. You're very much right that it would be much more simple and clean.
Now... my problem is, it seems, that two legs of my potentiometer are shorted together for some reason. (On all of them... O_o) I don't fully understand how it's supposed to be used, but that doesn't seem right. Between either leg and the third there's a stable 9.34K when centered... (10K pot) I guess I'll unsolder the whole thing and check what's up.... (I think for some reason the two legs are held together on the board.. they wouldn't read resistance to check the location, would they? The "third leg" seems to go to the little black blob processor on the board.)
Now... my problem is, it seems, that two legs of my potentiometer are shorted together for some reason. (On all of them... O_o) I don't fully understand how it's supposed to be used, but that doesn't seem right. Between either leg and the third there's a stable 9.34K when centered... (10K pot) I guess I'll unsolder the whole thing and check what's up.... (I think for some reason the two legs are held together on the board.. they wouldn't read resistance to check the location, would they? The "third leg" seems to go to the little black blob processor on the board.)
Title: Re: PSX Analog in and N64 Controller
Post by: micro on October 13, 2010, 02:45:47 AM
Post by: micro on October 13, 2010, 02:45:47 AM
Maybe there's another easy way for you without rotation. Let's take a look again at the gray codes for moving up:
So if you want to make 1 step forward you could check if both outputs A and B are the same (00 or 11). If that's the case then you want to toggle B.
If A and B are not the same (01 or 10), then just toggle A.
If you want to make a step backward you just toggle A if A=B or toggle B if A!=B. That's very simple too. 8)
About your stick: That's kinda strange, usually the pots of your stick should look like this:
 (http://img842.imageshack.us/i/pots.jpg/)
Usually pin 1 and 3 of both pots are connected (pin 1 with pin 1 and 3 with 3) but not 2 pins on the same pot. But you're right it's probably best to unsolder the stick and check again.
| phase | A | B |
| 1 | 0 | 0 |
| 2 | 0 | 1 |
| 3 | 1 | 1 |
| 4 | 1 | 0 |
So if you want to make 1 step forward you could check if both outputs A and B are the same (00 or 11). If that's the case then you want to toggle B.
If A and B are not the same (01 or 10), then just toggle A.
If you want to make a step backward you just toggle A if A=B or toggle B if A!=B. That's very simple too. 8)
About your stick: That's kinda strange, usually the pots of your stick should look like this:
(http://img842.imageshack.us/i/pots.jpg/)Usually pin 1 and 3 of both pots are connected (pin 1 with pin 1 and 3 with 3) but not 2 pins on the same pot. But you're right it's probably best to unsolder the stick and check again.
Title: Re: PSX Analog in and N64 Controller
Post by: Sharn on October 13, 2010, 10:56:35 AM
Post by: Sharn on October 13, 2010, 10:56:35 AM
Ok... another roadblock. I finally got a joystick unsoldered (Let's just say... I either need more practice with solder wick or to buy a solder pump..), and have it hooked up. With my picaxe in debug, and the joystick centered, I get a good steady reading at 500 or so, roughly 79-80 after the range conversion. I have a full good range up to 160 pushing the stick one way, which increases the voltage. The other way, however, has about 10 degrees or less of movement before it's shorted to ground and I get a reading of ~0... Measuring it with my meter, the voltage drops to mA barely pushing the stick that way.
I'm almost certain I have everything hooked up properly now, and my DMM shows it's most likely not a software problem. Could it just be the way this joystick is designed? (Since it was hooked up weird on the board...) Here is a picture of my setup:
 (http://imgur.com/NcE0Z.jpg)
Ignore all the caps.. I salvaged a few and had nothing better to do with them. XD Could I try a voltage divider with only one pole of the potentiometer maybe?
I'm almost certain I have everything hooked up properly now, and my DMM shows it's most likely not a software problem. Could it just be the way this joystick is designed? (Since it was hooked up weird on the board...) Here is a picture of my setup:
(http://imgur.com/NcE0Z.jpg)Ignore all the caps.. I salvaged a few and had nothing better to do with them. XD Could I try a voltage divider with only one pole of the potentiometer maybe?
Title: Re: PSX Analog in and N64 Controller
Post by: micro on October 13, 2010, 03:02:21 PM
Post by: micro on October 13, 2010, 03:02:21 PM
That's strange. Normally that's the way to wire a potentiometer as voltage divider. You could try the other axis, maybe there's dirt or something like that inside that pot.
Before the conversion from 1024 to 160 steps, do you also have only 10 degrees before you already reach 0?
Before the conversion from 1024 to 160 steps, do you also have only 10 degrees before you already reach 0?
Title: Re: PSX Analog in and N64 Controller
Post by: blaze3927 on October 13, 2010, 07:16:02 PM
Post by: blaze3927 on October 13, 2010, 07:16:02 PM
new microchips arrived,
programmed, locked and fused, installed, double checked pinouts/connections
still nothing, tried a different analog/controllers/potentiometers aswell/, however now the controller stick on the n64 seems to drift down, as opposed to the old just staying still.
will try the led test tomorrow
programmed, locked and fused, installed, double checked pinouts/connections
still nothing, tried a different analog/controllers/potentiometers aswell/, however now the controller stick on the n64 seems to drift down, as opposed to the old just staying still.
will try the led test tomorrow
Title: Re: PSX Analog in and N64 Controller
Post by: micro on October 14, 2010, 01:25:01 AM
Post by: micro on October 14, 2010, 01:25:01 AM
Blaze, you're really making me insecure :D
I also tried my code again. I programmed the ATtiny24 again, checked the fuses, even took a different stick (http://img88.imageshack.us/img88/1847/dsc01574d.jpg) and hooked up everything exactly as described in my pdf guide. I took Mario64, plugged in the controller and the stick worked instantly!
So the program is definitely allright.
I also don't know what you might have done wrong. If your sticks are still on the PCB you could unsolder them and try again without the PCB...
Title: Re: PSX Analog in and N64 Controller
Post by: Sharn on October 14, 2010, 03:01:05 AM
Post by: Sharn on October 14, 2010, 03:01:05 AM
@blaze: I don't know how hard it is with AVRs, but with my picaxe, it's super easy to return serial info to the computer. I would be completely lost if I couldn't. I would suggest finding a way to do that so you can see what's going on in the uC step by step.
In other news, my joystick is still being stupid... very little range one way. I'll try the other axis sometime today hopefully, but I'm not going to get my hopes up. This was a cheap madcatz mini wireless, so maybe it's just a junk joystick... I took the pot off the joystick because I could and then just got completely sporadic readings... I'm guessing these pots need some consistent external pressure on the "wiper." (If that's the correct term)
EDIT: Alright... just tested the other axis, and it works perfect.. full 0-160 range. I'm pretty excited :D I'm going to attempt to transplant one of the pots off of the other joystick and see if it works also.. Then I can un-cripple my code, and give it a try hooked up to the console :)
EDIT 2: Two pots hooked up with seemingly good readings... Gonna mess with the code a bit more and make sure everything is working as it should, then I'll interface it to the controller and give it a try.
EDIT... 3!: Well... going to have to re-think how I calculate steps, as it seems picaxe is really terrible at working with negative numbers. I have a (really simple) solution in mind though... (Use Xold and Xread directly, rather than subtracting first.)
Title: Re: PSX Analog in and N64 Controller
Post by: kylejw on October 14, 2010, 09:04:51 AM
Post by: kylejw on October 14, 2010, 09:04:51 AM
Wow a lot of action since I last checked in.
I'm liking the rotate function, didn't know PICs had that (I guess that's what I get for not reading the datasheet). I think I'll leave my code alone though, works just fine as it is.
One thing I left out of my design is filtering caps, I decided the controller probably cleans up the power good enough :p I do wonder if a simple low pass filter might give any benefit though, maybe something to look at with an FFT.
As for the joystick having bridged legs, this likely means that there is only a ground point, or only a power point on the joystick board, and the rest of the circuitry is back on the controllers board. That way, you can have a dual axis joystick connected with only three wires. The idea is to turn each pot into a variable resistor. I believe this is required when people put new joysticks in 3rd party N64 controllers (such as the Horipad?).
Title: Re: PSX Analog in and N64 Controller
Post by: blaze3927 on October 18, 2010, 07:33:18 PM
Post by: blaze3927 on October 18, 2010, 07:33:18 PM
@sharn, i am very new/noobish at microchips, im not sure if it would make it any easier for me :P thanks anyway
@micro- i reinstalled bascom and tried programming, what i forget to mention that happens in the programming process is that after writing the program to the chip it reads it/verifies it and then says difference at 0000. but i thought that was due just to the lock and fuse bits, as once i turn divide clock by 8 off then reprogram it doesnt come up.
@micro- i reinstalled bascom and tried programming, what i forget to mention that happens in the programming process is that after writing the program to the chip it reads it/verifies it and then says difference at 0000. but i thought that was due just to the lock and fuse bits, as once i turn divide clock by 8 off then reprogram it doesnt come up.
Title: Re: PSX Analog in and N64 Controller
Post by: micro on October 18, 2010, 10:53:53 PM
Post by: micro on October 18, 2010, 10:53:53 PM
@kylejw: Ah I see. But personally I haven't seen a controller with stick pots used as variable resistors yet.
@blaze: If bascom says that there's a difference then you immediately program the chip again until you don't get a error message. Writing the fusebits doesn't flash the AVR with the program.
@blaze: If bascom says that there's a difference then you immediately program the chip again until you don't get a error message. Writing the fusebits doesn't flash the AVR with the program.
Title: Re: PSX Analog in and N64 Controller
Post by: Sharn on October 19, 2010, 01:40:31 PM
Post by: Sharn on October 19, 2010, 01:40:31 PM
EDIT: Well... turns out the the code is too slow even with the pause completely gone. I guess I'll be looking into a much more efficient method here, as going from one side of an axis to the other still takes well over half a second. =\ Maybe this processor just doesn't have the oomph... I'll see what I can do though. I'm fully open to suggestions. /EDIT
Mine is nearly all together now, and (mostly) functioning. I put a pause 10 in though, which is far too long. (10,000us, compared to 10) Turns out the picaxe 18x I'm using doesn't have the pauseus command that the newer models do.. So, I'm curious... did you (micro specifically) test this code without the short pause between pins changing? I'll try without a pause at all, and if that doesn't work I'll throw in a simple equation to slow it down or try 4Mhz. Here's my code if you guys would like to look: (I hard-coded the pins as it should be slightly more efficient)
Mine is nearly all together now, and (mostly) functioning. I put a pause 10 in though, which is far too long. (10,000us, compared to 10) Turns out the picaxe 18x I'm using doesn't have the pauseus command that the newer models do.. So, I'm curious... did you (micro specifically) test this code without the short pause between pins changing? I'll try without a pause at all, and if that doesn't work I'll throw in a simple equation to slow it down or try 4Mhz. Here's my code if you guys would like to look: (I hard-coded the pins as it should be slightly more efficient)
Code Select
#rem
Beta code by Brandon Hartshorn to use a resistance-based joystick
in an OEM Nintendo 64 controller.

Ver0.4
#endrem

setfreq m8
symbol Xjoy = 0
symbol Yjoy = 1
symbol Function = pin2
symbol Xoa = 7
symbol Xob = 6
symbol Yoa = 5
symbol Yob = 4
;add symbols for outputs
symbol Xstate = b0
symbol Ystate = b1
symbol Xread = w3
symbol Yread = w4
symbol Range = b11
symbol Xolder = b12
symbol Yolder = b13
symbol Xold = w1
symbol Yold = w2

goto setup

main:
	let Xold = Xolder ;set (soon to be) old values
	let Yold = Yolder
	gosub curjoy ;read joystick and convert to 0-160
	let Xolder = Xread
	let Yolder = Yread
	gosub sendpulses ;send pulses for both axes
	if Function = 1 then: goto togglefunc: endif
	goto main

setup:
	let Range = 20
	let Xolder = Xread
	let Yolder = Yread
	let Xstate = 2
	let Ystate = 2
	do
		wait 1
		gosub curjoy
		let Xolder = Xread
		let Yolder = Yread
	loop until Xolder <> 0 and Yolder <> 0
	goto main

togglefunc:
	pause 100
	if Range = 20 then
		let Range = 21
	elseif Range = 21 then
		let Range = 19
	else
		let Range = 20
	endif
	return

curjoy:
	readadc10 Xjoy, Xread
	readadc10 Yjoy, Yread
	let Xread = Xread * Range / 128
	let Yread = Yread * Range / 128
	return

sendpulses:
	do
		if Xread > Xold then
			if Xstate = 0 then
				high Xoa
			elseif Xstate = 1 then
				low Xob
			elseif Xstate = 2 then
				low Xoa
			elseif Xstate = 3 then
				high Xob
			endif
			if Xstate >= 3 then
				Xstate = 0
			else
				let Xstate = Xstate + 1
			endif
			let Xread = Xread - 1
		elseif Xread < Xold then
			if Xstate = 0 then
				high Xob
			elseif Xstate = 1 then
				high Xoa
			elseif Xstate = 2 then
				low Xob
			elseif Xstate = 3 then
				low Xoa
			endif
			if Xstate <= 0 then
				Xstate = 3
			else
				let Xstate = Xstate - 1
			endif
			let Xread = Xread + 1
		endif

		if Yread > Yold then
			if Ystate = 0 then
				high Yoa
			elseif Ystate = 1 then
				low Yob
			elseif Ystate = 2 then
				low Yoa
			elseif Ystate = 3 then
				high Yob
			endif
			if Ystate >= 3 then
				Ystate = 0
			else
				let Ystate = Ystate + 1
			endif
			let Yread = Yread - 1
		elseif Yread < Yold then
			if Ystate = 0 then
				high Yob
			elseif Ystate = 1 then
				high Yoa
			elseif Ystate = 2 then
				low Yob
			elseif Ystate = 3 then
				low Yoa
			endif
			if Ystate <= 0 then
				Ystate = 3
			else
				let Ystate = Ystate - 1
			endif
			let Yread = Yread + 1
		endif
	loop until Xread = Xold and Yread = Yold
	return
Title: Re: PSX Analog in and N64 Controller
Post by: micro on October 20, 2010, 07:26:31 AM
Post by: micro on October 20, 2010, 07:26:31 AM
Well done!
It's a shame that it's too slow right now.
In the beginning I had no 10us pause. But after wiggling the stick like a madman Mario would still walk slowly although the stick was in neutral position again. I guess the n64 controller missed some steps. So I introduced the 10us pause.
Right now it takes 248 cycles to process a step on the x- and the y-axis (including the pause). When running at 8MHz 248 cycles mean 31us. So going from on side to the other (160 steps) takes under 5ms. This is faster than you can move the stick with your thumb so there's no lag.
Are you still running your picaxe with the serial debug cable? You could try to disable debugging because it could slow down your picaxe.
Title: Re: PSX Analog in and N64 Controller
Post by: Sharn on October 31, 2010, 01:33:36 AM
Post by: Sharn on October 31, 2010, 01:33:36 AM
Well.. hello again guys. It's been a while, so I'll stop by and tell you what's up. Turns out, my picaxe 18x is just too slow. Picaxe are conservatively 1/50th the speed of a raw PIC at comparable clock speeds, according to one picaxe forum user, so I'm amazed I got it to do much at all. Realistically, if I bought a 20X2, and propped it up at 64Mhz, it would probably be fast enough. I don't want to mess with it though... I have a few AVRs and a programmer on the way in the mail... should be fun. Learning C.. yay! I'll repurpose this picaxe as a clock or something and learn some about AVRs for this application.
I'll be writing in C as bascom is Windows-only, and I am a proud and stingy Linux user. XD
For educational purposes, here is the latest and fastest revision of my code:
I'll be writing in C as bascom is Windows-only, and I am a proud and stingy Linux user. XD
For educational purposes, here is the latest and fastest revision of my code:
Code Select
#rem
Beta code by Brandon Hartshorn to use a resistance-based joystick
in an OEM Nintendo 64 controller.

Ver0.4
#endrem

setfreq m8
symbol Xjoy = 0
symbol Yjoy = 1
symbol Function = pin2
symbol Xoa = 7
symbol Xob = 6
symbol Yoa = 5
symbol Yob = 4
;add symbols for outputs
symbol Xstate = b0
symbol Ystate = b1
symbol Xold = b2
symbol Yold = b3
symbol Xread = w3
symbol Xsread = b6
symbol Yread = w4
symbol Ysread = b8
symbol Range = b11
symbol Xolder = b12
symbol Yolder = b13

goto setup

main:
	do
		let Xold = Xolder ;set (soon to be) old values
		let Yold = Yolder
		gosub curjoy ;read joystick and convert to 0-160
		let Xolder = Xsread
		let Yolder = Ysread
		gosub sendpulses ;send pulses for both axes
		;if Function = 1 then: goto togglefunc: endif
	loop

setup:
	let Range = 18
	let Xstate = 2
	let Ystate = 2
	do
		wait 1
		gosub curjoy
		let Xolder = Xread
		let Yolder = Yread
	loop until Xolder <> 0 and Yolder <> 0
	goto main

togglefunc:
	pause 100
	if Range = 20 then
		let Range = 21
	elseif Range = 21 then
		let Range = 19
	else
		let Range = 20
	endif
	return

curjoy:
	readadc10 Xjoy, Xread
	readadc10 Yjoy, Yread
	let Xsread = Xread * Range / 128
	let Ysread = Yread * Range / 128
	return

sendpulses:
	do while Xsread != Xold or Ysread != Yold
		if Xsread > Xold then
		Xstate = Xstate + 1 AND 1
			if Xstate = 0 then
				toggle Xoa
			else
				toggle Xob
			endif
			Xsread = Xsread - 1

		elseif Xsread < Xold then
		Xstate = Xstate + 1 AND 1
			if Xstate = 0 then
				toggle Xob
			else
				toggle Xoa
			endif
			Xsread = Xsread + 1
		endif
		if Ysread > Yold then
		Ystate = Ystate + 1 AND 1
			if Ystate = 0 then
				toggle Yoa
			else
				toggle Yob
			endif
			Ysread = Ysread - 1

		elseif Ysread < Yold then
		Ystate = Ystate + 1 AND 1
			if Ystate = 0 then
				toggle Yob
			else
				toggle Yoa
			endif
			Ysread = Ysread + 1
		endif
	loop
	return
Title: Re: PSX Analog in and N64 Controller
Post by: blaze3927 on November 04, 2010, 05:30:00 PM
Post by: blaze3927 on November 04, 2010, 05:30:00 PM
Sigh i still cannot get this to work. at all.
any chance i Can buy a pre set up/wired attiny24 and ps1/2 analog stick off you micro?
any chance i Can buy a pre set up/wired attiny24 and ps1/2 analog stick off you micro?
Title: Re: PSX Analog in and N64 Controller
Post by: public-pervert on November 09, 2010, 05:31:55 AM
Post by: public-pervert on November 09, 2010, 05:31:55 AM
me too =)
Title: Re: PSX Analog in and N64 Controller
Post by: micro on November 10, 2010, 01:56:03 AM
Post by: micro on November 10, 2010, 01:56:03 AM
Quote from: SharnOuch! ;D
Picaxe are conservatively 1/50th the speed of a raw PIC at comparable clock speeds
I'm sure you won't have any speed problems with your AVR. Which AVR did you choose?
@blaze:
I got 1 ATTiny24 left and also a PSX stick, but no top.
Are you still getting "difference" errors when flashing the AVR?
Title: Re: PSX Analog in and N64 Controller
Post by: blaze3927 on November 11, 2010, 10:01:36 PM
Post by: blaze3927 on November 11, 2010, 10:01:36 PM
occasionally ill get a difference error, but reprogramming always does the trick, the chips im using atm are the 150mil (lot smaller) version of the attiny24 *shouldnt make a difference) however still no joy with the bigger ones.
if you dont min d parting with your last chip/analog i would be interested in buying it off you, just so can
1- use it x)
2- compare your circuit/chip to what im doing atm.
on a completely different note, (dont mean to hijack this thread but your the only one i know pf whose good with microchips xD) is it possible to convert this code for attiny13
http://code.google.com/p/modavr/ (http://code.google.com/p/modavr/)
to work with attiny24?
or are they completely dfferent languages/setups ?
Title: Re: PSX Analog in and N64 Controller
Post by: micro on November 28, 2010, 11:07:50 PM
Post by: micro on November 28, 2010, 11:07:50 PM
Blaze, as you didn't answer my last message I guess you're not longer interested in buying a microcontroller+stick from me.
I've read on the smashboard forum (http://www.smashboards.com/showthread.php?t=291100&page=3) that you managed to get the attiny to work apparently. So what was the problem? :)
I've read on the smashboard forum (http://www.smashboards.com/showthread.php?t=291100&page=3) that you managed to get the attiny to work apparently. So what was the problem? :)
Title: Re: PSX Analog in and N64 Controller
Post by: Richter on December 24, 2010, 12:30:53 PM
Post by: Richter on December 24, 2010, 12:30:53 PM
Hello :), I am new here and I am interested in this, but the PIC that use I cannot find it where I live, it will be that somebody could use the PIC16F876 or in any event the PIC16F877 that are those that if there is with ADC. Thank you :D
Title: Re: PSX Analog in and N64 Controller
Post by: public-pervert on January 18, 2011, 11:09:16 PM
Post by: public-pervert on January 18, 2011, 11:09:16 PM
yaaaaaaaaaaaaaaaaaaaaaaaaaaaay! this controler mod is pperfect!! ;D
i used the micro's code for atmega8 and it works perfectly. right now i'm not at home, but will post pictures soon!
i'll use the same mod at my portable too. amazing! thank you guys! ;D
i used the micro's code for atmega8 and it works perfectly. right now i'm not at home, but will post pictures soon!
i'll use the same mod at my portable too. amazing! thank you guys! ;D
Title: Re: PSX Analog in and N64 Controller
Post by: public-pervert on January 20, 2011, 08:53:33 AM
Post by: public-pervert on January 20, 2011, 08:53:33 AM
hey guys! some pictures from my new controller \o/
first i cut the octagonal gate from unoficiall gamecube controller
http://img233.imageshack.us/img233/2189/img0246bw.jpg (http://img233.imageshack.us/img233/2189/img0246bw.jpg)
the sanded octagonal gate
http://img340.imageshack.us/img340/63/img0247hk.jpg (http://img340.imageshack.us/img340/63/img0247hk.jpg)
marked the pot board and cutted an exact circle around the pot. much more simple than the micro's techique to align the pot =)
http://img832.imageshack.us/img832/2235/img0249ex.jpg (http://img832.imageshack.us/img832/2235/img0249ex.jpg)
and the first view of the work
http://img26.imageshack.us/img26/7867/img0250pv.jpg (http://img26.imageshack.us/img26/7867/img0250pv.jpg)
http://img408.imageshack.us/img408/1663/img0251v.jpg (http://img408.imageshack.us/img408/1663/img0251v.jpg)
and the complete work =D
http://img709.imageshack.us/img709/4728/img0254u.jpg (http://img709.imageshack.us/img709/4728/img0254u.jpg)
you can see the atmega at the left hand
http://img130.imageshack.us/img130/1836/img0255vb.jpg (http://img130.imageshack.us/img130/1836/img0255vb.jpg)
and a lot of wires at the backside xD
http://img200.imageshack.us/img200/3141/img0259ye.jpg (http://img200.imageshack.us/img200/3141/img0259ye.jpg)
Title: Re: PSX Analog in and N64 Controller
Post by: Sharn on January 20, 2011, 03:09:03 PM
Post by: Sharn on January 20, 2011, 03:09:03 PM
That looks pretty amazing, public-pervert. Mine doesn't look half as good, plus it's not working yet. :P The white on clear blue is perfect -thumbs up-
I never got a properly-functioning port of the code working in C for my atmega328p. I know; it's waaaay overkill, but it's what sparkfun had... so anyway, I tried burning an arduino bootloader to my 328 yesterday and suddenly my usbtinyisp programmer won't recognize it. It works fine with the attiny2313, which I got for this project, but they don't have ADC.Go figure. I ordered an arduino board with my $30 sparkfun freeday cash that will hopefully get me up and going....
Oh - I would suggest imgur.com or min.us for pictures. Though imageshack isn't too bad if you link directly to the image.
Title: Re: PSX Analog in and N64 Controller
Post by: micro on January 20, 2011, 05:14:49 PM
Post by: micro on January 20, 2011, 05:14:49 PM
Congrats, the controller looks really great! 8)
Title: Re: PSX Analog in and N64 Controller
Post by: Richter on February 01, 2011, 03:34:22 AM
Post by: Richter on February 01, 2011, 03:34:22 AM
Somebody please helps me, I want the code for the pic16f876, it is that there are not those that use.
Title: Re: PSX Analog in and N64 Controller
Post by: kylejw on February 02, 2011, 03:02:53 PM
Post by: kylejw on February 02, 2011, 03:02:53 PM
Old hosting site has a policy of deleting web pages after 30 days of inactivity by the owner, and FTP access doesn't count as 'activity'. In light of this, I'm moving everything to Google Code:
http://code.google.com/p/n64-joystick-translator/ (http://code.google.com/p/n64-joystick-translator/)
http://code.google.com/p/n64-joystick-translator/ (http://code.google.com/p/n64-joystick-translator/)
Title: Re: PSX Analog in and N64 Controller
Post by: public-pervert on February 08, 2011, 07:59:59 AM
Post by: public-pervert on February 08, 2011, 07:59:59 AM
kylejw, will be really great if you make a tutorial on how to do" the analog C stick" on n64 controllers. or micro could try to do some too. :D
Title: Re: PSX Analog in and N64 Controller
Post by: micro on February 08, 2011, 05:47:39 PM
Post by: micro on February 08, 2011, 05:47:39 PM
Never tried to use an analog c-stick, but I think that guide covers everything: http://kyorune.com/modding/article.php?id=27 (http://kyorune.com/modding/article.php?id=27)
Title: Re: PSX Analog in and N64 Controller
Post by: public-pervert on February 09, 2011, 03:07:59 AM
Post by: public-pervert on February 09, 2011, 03:07:59 AM
can't believe how simple it is. ill try!! ;D
Title: Re: PSX Analog in and N64 Controller
Post by: public-pervert on February 09, 2011, 09:28:54 PM
Post by: public-pervert on February 09, 2011, 09:28:54 PM
haaa! i've got it!
the "analog C stick" are working perfectly! ill use at my portable first, and after i'll make on a n64 controler, maybe the same one i did the GC stick mod. thank you, micro! ;D
the "analog C stick" are working perfectly! ill use at my portable first, and after i'll make on a n64 controler, maybe the same one i did the GC stick mod. thank you, micro! ;D
Title: Re: PSX Analog in and N64 Controller
Post by: kylejw on February 10, 2011, 03:13:45 PM
Post by: kylejw on February 10, 2011, 03:13:45 PM
Mine was a little different, it was essentially two controllers combined into one. It would workwith Goldeneye, and I'm sure some other games too, which allowed you to control one character using two controllers. This way, you had one analog for movement and one for looking around. My dual controller technically has no C buttons.
Title: Re: PSX Analog in and N64 Controller
Post by: Fwirt on February 12, 2011, 05:52:15 PM
Post by: Fwirt on February 12, 2011, 05:52:15 PM
Hey there, you guys inspired me to finally join the forums... I've never registered but I've lurked around here grabbing modding ideas for a while now. ;D
Earlier this week I was playing Robotron 64 and noticing how bad my atomic purple's joystick had gotten. I had a spare controller so I swapped joysticks between them, but that still left me with a floppy thumbstick. I started thinking about those cool Hori pads that everyone talks about, but the price quickly pushed that idea out of my head, so I was thinking about replacing the joystick with something else, but then I ran into the signaling issue... and then about two days later this thread was featured on HackaDay. It was really weird...
Anyway, a couple days after that I decided to sit down and do the mod. It took me a while to get the code working, but I'm pretty happy with the results:

Instead of completely getting rid of the restrictor plate as micro and kylejw did, I decided to simply modify the existing one to make sure it matched up nicely with the rest of the controller. At first I tried to dremel out just enough to keep the original octagonal restrictor plate, but the PS2 thumbstick cap wouldn't fit through the hole, so I ended up just turning it into a circle. I picked a PS2 thumbstick because of all the thumbsticks I have laying around, it felt the nicest. Unfortunately, the thumbstick mechanism got glued in about 2mm too far up, so instead of hitting the restrictor, it bottoms out on the mechanism, which has kind of a nasty feeling... If it ever really starts bugging me I guess I can pry out the joystick and re-glue it, but I hope it never comes to that... Anyway, here's a picture of the innards:

In case you start wondering what the extra wires running around the pad are for, I did innovate a little bit... I figured that since the ATtiny24 that I used (I'm another AVR guy) had a few pins to spare, and the PS2 thumbpad had a built-in tactile switch, I might as well combine them to add turbo functionality. I dremeled the PCB a bit to isolate the A and B buttons' ground from the rest of the buttons, and then disconnected the trigger ground wires. I then wired them all up to a microcontroller pin. The pin is held at ground most of the time, but when the switch (connected to another pin) is activated, the AVR pulses the line about 15 times per second. The cool thing about this is that unlike most turbo functionality, you don't have to flip a switch or pause the game to activate it, since it's right under your thumb. (Although it's kind of a pain to hold the button and move the joystick at the same time...) I don't even like turbo really, but I guess this means I won't lose at Mario Party anymore. ;) I also wrote the firmware from scratch in C, and can post it if anyone's interested.
Thank you guys for documenting such a cool hack!
Earlier this week I was playing Robotron 64 and noticing how bad my atomic purple's joystick had gotten. I had a spare controller so I swapped joysticks between them, but that still left me with a floppy thumbstick. I started thinking about those cool Hori pads that everyone talks about, but the price quickly pushed that idea out of my head, so I was thinking about replacing the joystick with something else, but then I ran into the signaling issue... and then about two days later this thread was featured on HackaDay. It was really weird...
Anyway, a couple days after that I decided to sit down and do the mod. It took me a while to get the code working, but I'm pretty happy with the results:
Instead of completely getting rid of the restrictor plate as micro and kylejw did, I decided to simply modify the existing one to make sure it matched up nicely with the rest of the controller. At first I tried to dremel out just enough to keep the original octagonal restrictor plate, but the PS2 thumbstick cap wouldn't fit through the hole, so I ended up just turning it into a circle. I picked a PS2 thumbstick because of all the thumbsticks I have laying around, it felt the nicest. Unfortunately, the thumbstick mechanism got glued in about 2mm too far up, so instead of hitting the restrictor, it bottoms out on the mechanism, which has kind of a nasty feeling... If it ever really starts bugging me I guess I can pry out the joystick and re-glue it, but I hope it never comes to that... Anyway, here's a picture of the innards:
In case you start wondering what the extra wires running around the pad are for, I did innovate a little bit... I figured that since the ATtiny24 that I used (I'm another AVR guy) had a few pins to spare, and the PS2 thumbpad had a built-in tactile switch, I might as well combine them to add turbo functionality. I dremeled the PCB a bit to isolate the A and B buttons' ground from the rest of the buttons, and then disconnected the trigger ground wires. I then wired them all up to a microcontroller pin. The pin is held at ground most of the time, but when the switch (connected to another pin) is activated, the AVR pulses the line about 15 times per second. The cool thing about this is that unlike most turbo functionality, you don't have to flip a switch or pause the game to activate it, since it's right under your thumb. (Although it's kind of a pain to hold the button and move the joystick at the same time...) I don't even like turbo really, but I guess this means I won't lose at Mario Party anymore. ;) I also wrote the firmware from scratch in C, and can post it if anyone's interested.
Thank you guys for documenting such a cool hack!
Title: Re: PSX Analog in and N64 Controller
Post by: public-pervert on February 13, 2011, 08:02:39 AM
Post by: public-pervert on February 13, 2011, 08:02:39 AM
great work ;)
when i decide to do this mod i was think about these buton too, but it's no use, are very hard to make moves with analog and push it at the same time. aswell post the firmware. lets get toguether a lot of knowledge ;)
when i decide to do this mod i was think about these buton too, but it's no use, are very hard to make moves with analog and push it at the same time. aswell post the firmware. lets get toguether a lot of knowledge ;)
Title: Re: PSX Analog in and N64 Controller
Post by: Sharn on February 14, 2011, 09:30:39 AM
Post by: Sharn on February 14, 2011, 09:30:39 AM
Fwirt - that looks great. I noticed this post on Hackaday too. It was quite surprising since I've been frequenting the thread and was considering submitting it myself. :)
Anyway, I would love to see your code. Being a C newbie, I tried implementing the firmware for avr-gcc (linux...), but couldn't really figure it out. I bought an arduino to cheat and use that, but haven't got to it yet. I think I can make my attiny85 work for the project, which would be really awesome. I just don't have the know-how in the code area.. =\
Anyway, I would love to see your code. Being a C newbie, I tried implementing the firmware for avr-gcc (linux...), but couldn't really figure it out. I bought an arduino to cheat and use that, but haven't got to it yet. I think I can make my attiny85 work for the project, which would be really awesome. I just don't have the know-how in the code area.. =\
Title: Re: PSX Analog in and N64 Controller
Post by: Fwirt on February 14, 2011, 10:43:22 AM
Post by: Fwirt on February 14, 2011, 10:43:22 AM
The code is pretty short, so I'll just put it in a code block. I'll assume that you already have your toolchain setup to compile this... One quick caveat: I'm not entirely proud of this code as it's really touchy... I got my wires crossed so that the X axis was backwards and tried flipping signs (which should work if I'm doing my math correctly) but it made the AVR drop some steps and glitch out in other ways, so I just left it alone and flipped the wires. Also, make sure you set your fuses so that the AVR is running on the internal oscillator (at 8MHz) with no clock division, so that the timers and such work properly.
On a final note, I put some more thought into the turbo function and if you don't want to hold the button down, it would be a pretty trivial edit to have the button toggle turbo instead, but I'll leave that up to you guys.
Code Select
#include <avr/io.h>
#include <avr/interrupt.h>
#define F_CPU 8000000UL
#include <util/delay.h>

#define ADC_MULT 10
#define ADC_SCALE 50
#define E_LENGTH 4
#define OCR_ENCODE 25
#define OCR_TURBO 252
const char encoder[] = {0,1,3,2};

short x_steps, y_steps = 0;
short last_x, last_y = 0;
char axis = 0;

/** ADC interrupt interprets voltages from joystick and converts them
    to number of steps the AVR needs to fake **/
ISR(ADC_vect) {
    unsigned short data = (ADC * ADC_MULT) / ADC_SCALE;
    if (axis) {
        y_steps += last_y - data;
        last_y = data;
        ADMUX = 0;
        axis = 0;
    }
    else {
        x_steps += last_x - data;
        last_x = data;
        ADMUX = 1;
        axis = 1;
    }
}

/** Timer interrupt updates the output to fake rotary encoding
    and decreases the number of steps left **/
ISR(TIM0_COMPA_vect) {
    // Update the step counter
    if (x_steps > 0)
        x_steps -= 1;
    else if (x_steps < 0)
        x_steps += 1;

    if (y_steps > 0)
        y_steps -= 1;
    else if (y_steps < 0)
        y_steps += 1;

    // Update the encoder
    PORTA = (PORTA & ~(0x3C)) | ((encoder[(last_x + x_steps) % E_LENGTH] << 2) | (encoder[(last_y + y_steps) % E_LENGTH] << 4));
}

int main(void) {
    char turbo = 0; // Keep track of the turbo state

    // Setup outputs
    DDRA = 0x7C; // Enable outputs on pins 2 - 6 of port A
    PORTA = (1 << 7); // Enable pull-up on button

    // Setup ADC
    ADCSRA |= (1 << ADPS2) | (1 << ADPS1); // Set prescaler to 64 (Which gives us 125KHz ADC clock)
    ADCSRA |= (1 << ADEN); // Enable ADC

    // Initialize x and y (so the controller doesn't shoot to the upper right corner...)
    ADMUX = 0; // X axis
    ADCSRA |= (1 << ADSC);
    loop_until_bit_is_set(ADCSRA, ADIF);
    last_x = (ADC * ADC_MULT) / ADC_SCALE;
    ADMUX = 1; // Y axis
    ADCSRA |= (1 << ADSC);
    loop_until_bit_is_set(ADCSRA, ADIF);
    last_y = (ADC * ADC_MULT) / ADC_SCALE;
    ADMUX = 0;

    sei(); // Enable global interrupts

    // Setup timer for encoder
    TCCR0A |= (1 << WGM01); // Enable CTC
    TCCR0B |= (1 << CS02); // Set prescale to 100 and start timer
    OCR0A = OCR_ENCODE; // Set compare for timer 0
    TIMSK0 |= (1 << OCIE0A); // Enable interrupt

    // Setup timer for turbo
    TCCR1B |= (1 << WGM12); // Set CTC
    TCCR1B |= (1 << CS12) | (1 << CS10); // Set clock prescale to 1024 (and start timer)
    OCR1A = OCR_TURBO; // Set compare for timer 1

    // Start automatic ADC update
    ADCSRA |= (1 << ADATE); // Enable automatic trigger
    ADCSRA |= (1 << ADIE); // Enable ADC interrupt
    ADCSRA |= (1 << ADSC); // Start conversion

    for (;;) {
        if (bit_is_set(PINA, 7) && turbo) {
            // Deactivate turbo
            TCCR1A &= ~(1 << COM1A0); // Deactivate timer output
            PORTA &= ~(1 << 6); // Deactivate pin
            turbo = 0;
        }
        else if (bit_is_clear(PINA, 7) && !turbo){
            // Activate turbo
            TCCR1A |= (1 << COM1A0); // Activate timer output
            turbo = 1;
        }
        _delay_us(10);
    }
    return 0;
}
On a final note, I put some more thought into the turbo function and if you don't want to hold the button down, it would be a pretty trivial edit to have the button toggle turbo instead, but I'll leave that up to you guys.
Title: Re: PSX Analog in and N64 Controller
Post by: Grazfather on February 16, 2011, 04:58:20 AM
Post by: Grazfather on February 16, 2011, 04:58:20 AM
I'm actually the one who submitted it to HaD. Saw this a while ago, and I plan to do it myself (plus adding extra buttons... was actually going to use the analog button too, but someone beat me to it).
Unfortunately I left my n64 back home when I moved out, so I have to buy an n64 before I can try this.
Few Qs about the quadrature encoding... Looking at (kyle's) code, it looks like the states cycle through, always only jumping forward or back one state. I am not sure exactly how this allows for high-sensitivity, since it doesn't distinguish between a big jump between two X or Y values, and a small one, since it seems both only move the state by one? How is this handled? I'm guessing the sample rate is so high it doesn't really make a difference?
Title: Re: PSX Analog in and N64 Controller
Post by: Fwirt on February 16, 2011, 03:02:10 PM
Post by: Fwirt on February 16, 2011, 03:02:10 PM
The thing about quadrature encoding is that it can't handle "jumps". If you jumped from one position to another without going through the intermediate steps, the N64 controller would lose its place, and the software center of the joystick would move. (Which was the largest problem I had to overcome when writing my firmware.) You have to keep in mind that quadrature encoding is a relative positioning system, not an absolute one. A "big jump" is actually made up of a bunch of small steps right after one another. However, you have to slow down the rate at which the MCU feeds the quadrature values to the N64 controller, or it'll drop steps. I originally just tried taking the voltage level at the time of the ADC interrupt, scaling it, modding it by 4 and using it as the address in the step array, but that made it screw up. It wasn't until I looked at micro's Bascom AVR code that I saw how he was handling it, which is the method I switched to, more or less. (BTW, thanks a bunch for posting your firmware micro!)
Title: Re: PSX Analog in and N64 Controller
Post by: kylejw on February 16, 2011, 04:22:17 PM
Post by: kylejw on February 16, 2011, 04:22:17 PM
Grazfather,
I think I see what you're saying, but correct me if I'm wrong.
Are you asking if for example the joystick is at position 45 and you do a quick jump to 60 do I only increment the state by one?
If so, notice that I'm actually looping through the state transitions until I've done (for this example) 15 jumps. So this is the flow:
Read ADC -> Check if value is higher than current position -> Do a loop, incrementing the position counter (and change state) each iteration until the position counter equals the ADC value.
So using the 45/60 example:
Read 60 -> 60 is higher than 45 -> change state -> 60 is higher than 46 -> change state -> 60 is higher than 47 ..... and so on.
The code _used_ to work by doing an ADC read, then if the value is higher, jump by one and increment the current position (and change state), then repeat.
In this case if you jumped from 45 to 60 then after the first iteration the N64 would think you were at 46, then the next time I read the ADC it's still at 60 and I'm at 46, so it would jump again and again and again until I reached 60. At 8MHz this happened quite fast. When I did the big rewrite I decided that the ADC was probably slow enough that I would get a small performance improvement from doing all the increments at once.
Hope that makes sense, I can try to clarify if it doesn't.
Edit: Here is the code that accomplishes what I'm talking about:
... and looking at the code again I can see some obvious efficiency improvements I could make :p
I think I see what you're saying, but correct me if I'm wrong.
Are you asking if for example the joystick is at position 45 and you do a quick jump to 60 do I only increment the state by one?
If so, notice that I'm actually looping through the state transitions until I've done (for this example) 15 jumps. So this is the flow:
Read ADC -> Check if value is higher than current position -> Do a loop, incrementing the position counter (and change state) each iteration until the position counter equals the ADC value.
So using the 45/60 example:
Read 60 -> 60 is higher than 45 -> change state -> 60 is higher than 46 -> change state -> 60 is higher than 47 ..... and so on.
The code _used_ to work by doing an ADC read, then if the value is higher, jump by one and increment the current position (and change state), then repeat.
In this case if you jumped from 45 to 60 then after the first iteration the N64 would think you were at 46, then the next time I read the ADC it's still at 60 and I'm at 46, so it would jump again and again and again until I reached 60. At 8MHz this happened quite fast. When I did the big rewrite I decided that the ADC was probably slow enough that I would get a small performance improvement from doing all the increments at once.
Hope that makes sense, I can try to clarify if it doesn't.
Edit: Here is the code that accomplishes what I'm talking about:
Code Select
/* Our desired value is different from the current position index, so move in the direction of the desired value! */
void makeVertEqual( long *current, long target ){
        if( (*current) == target ){
                return;
        }
        while( ((*current) > target) && ((*current) > vertLimitLow) ){
                moveDown();
                (*current)--;
        }
        while( ((*current) < target) && ((*current) < vertLimitHigh) ){
                moveUp();
                (*current)++;
        }
        return;
}
... and looking at the code again I can see some obvious efficiency improvements I could make :p
Title: Re: PSX Analog in and N64 Controller
Post by: NFG on February 16, 2011, 05:20:52 PM
Post by: NFG on February 16, 2011, 05:20:52 PM
That's exactly how the quadrature encoding works, it has to be done in sequence. With a potentiometer you can just ask for the current value any time, but with quadrature you have to read every single movement, if you miss some you get skipping.
You guys may not remember the old days of serial mice, but if you moved those too quickly the cursor would suddenly change direction or zig-zag as the high-speed changes to the quadrature happened faster than the computer could sample them. We used to bump our PS/2 sampling rate from 40 to 80 or even 200 samples per second to compensate. That's why we have 'accelerators' for our mice, software that magnifies rapid changes even further so that a smooth, quick movement has a more drastic effect so we didn't have to move the mouse so quick and risk missing a reading. (There are other benefits for this sort of mouse control too of course)
You guys may not remember the old days of serial mice, but if you moved those too quickly the cursor would suddenly change direction or zig-zag as the high-speed changes to the quadrature happened faster than the computer could sample them. We used to bump our PS/2 sampling rate from 40 to 80 or even 200 samples per second to compensate. That's why we have 'accelerators' for our mice, software that magnifies rapid changes even further so that a smooth, quick movement has a more drastic effect so we didn't have to move the mouse so quick and risk missing a reading. (There are other benefits for this sort of mouse control too of course)
Title: Re: PSX Analog in and N64 Controller
Post by: Grazfather on February 17, 2011, 01:39:07 AM
Post by: Grazfather on February 17, 2011, 01:39:07 AM
Ah kyle, that makes perfect sense. I haven't read your code for a while so I guess I missed it/forgot about it.
Lawrence, makes sense about the sequence thing, jumping too far wouldn't allow for the chip reading the encoding to have any bearing on which direction it moved.
Does anyone know the rate at which the controller samples the joy stick's state? By my understanding the make*Equal function should be limited to this rate, to completely eliminate the chance of skipping.
Title: Re: PSX Analog in and N64 Controller
Post by: Fwirt on February 17, 2011, 06:31:18 AM
Post by: Fwirt on February 17, 2011, 06:31:18 AM
Grazfather, I don't know how you would go about finding the sampling rate of the controller... Correct me if I'm wrong, but I believe the signal would be internal to the controller IC, so there would be no way to measure it directly. However, at the speeds you're working with, an educated guess would probably suffice unless you're planning on moving your fingers around at 500MPH. ;D What I did to eliminate skipping was put the update routine in a timer interrupt. The interrupt updates the position by one step each time, so you can be sure that it won't update faster than the controller can handle and end up skipping. I think the timer interval I used is around 1/1000 of a second, but you could probably crank it up and see how fast you could get before it skips.
Title: Re: PSX Analog in and N64 Controller
Post by: kylejw on February 17, 2011, 11:57:13 AM
Post by: kylejw on February 17, 2011, 11:57:13 AM
The N64 doesn't read the encoder directly. It polls the controller for data in the form of two 8-bit numbers (one for vertical, one horizontal), as well as a whole bunch of other bits for all the buttons. The 8-bit numbers are where the theoretical limit of -127 to +128 counts come from (since 2^8 = 256).
I suspect that the encoder lines run to interrupts (or an interrupt tied to 4 ports?) on the N64 controller, so it isn't polled per se, rather every time I do an update the controller code jumps to update its value for the position. If I were to update too fast, I'd probably hit in the middle of the last interrupt (while the controller is still updating its value), and unless it allows nested interrupts which I doubt, my next movement may be ignored.
So you're correct that the function should be limited. However, I made the assumption (sue me) that the ADC conversion time would be long enough to prevent any issues.
Title: Re: PSX Analog in and N64 Controller
Post by: Grazfather on February 17, 2011, 12:19:07 PM
Post by: Grazfather on February 17, 2011, 12:19:07 PM
Hm, I might look into it for curiosities sake. I don't really see the controller tying the four stick signals to interrupts, it would be too much trouble, and you'd want them all to fire the same interrupt, and having four interrupt lines seems excessive..
Regardless, I will probably rewrite a bit of Kyle's code (and probably have it set a 'target' y and x value) then have the timer interrupt continuously change until it reaches that value.
Biggest thing is that I want to add the ability to program in macros, and rapid fire. I used to play SSB64 a TON and it would be cool (but very cheap) to have ness ddc'd d'airs coming out with one press. I also have a bunch of microswitched, and the controller seems to have a decent amount of spare room in there, so I think it would be a fun and feasible little project for me. I originally started writing it all in ASM (on an 18f1320) but I think I'll cave and do it in C.
Title: Re: PSX Analog in and N64 Controller
Post by: micro on February 27, 2011, 05:29:11 AM
Post by: micro on February 27, 2011, 05:29:11 AM
Quote from: TrekkiesUnite118 on September 20, 2010, 11:13:16 AM
I barely could get it open really. They didn't use screws the glued it shut. I had to use a scratch awl to break the seal and pop it open and I still couldn't get it to open very far (like half a centimeter) with out the fear of breaking it. From what I could tell it looked like the same kind of pot used in the 360 and Gamecube style controllers and it just came out with wires that connects directly into the N64 controller board.
Here are some pictures from the outside though:
If I can get it open better I'll take some internal pics.
I've just realized how damn small the octagonal gates are on these commercial stick replacements. So that's how the reduced the range, by restricting the stick travel mechanically? :D
Title: Re: PSX Analog in and N64 Controller
Post by: Link83 on April 01, 2011, 08:21:36 AM
Post by: Link83 on April 01, 2011, 08:21:36 AM
I tried to complete this mod in December but had a number of problems as I could not get my parallel port programmer to work :( I triple checked my wiring and tried all sorts of BIOS settings, but Bascom still would not recognise the chip. I then came across this thread saying there are some problems with the simple parallel port programmer design:-
http://www.avrfreaks.net/index.php?name=PNphpBB2&file=viewtopic&t=36591 (http://www.avrfreaks.net/index.php?name=PNphpBB2&file=viewtopic&t=36591)
In the end I gave up and ordered an Atmel AVR ISP MKII a few weeks ago. I had to build a new programming circuit with a 6 pin ISP header and use the official software (AVR Studio) as Bascom still didnt work, but it programmed the ATiny24 first time :) Now I just need to get a GameCube analog stick to complete it, so if anyones still interested i'll post pics when im done.
-------------------------------------------------------------------------------------------------------
As a side note, a while ago I began wondering if emulator authors took the N64 analog sticks 168 steps into account (I assumed they would have to for perfect compatibility) and in fact they do! If you load up Project64 with the N-Rage input plugin and select 'Configure Controller Plugin' then you can see that the default analog sticks range is set to 66%, and considering that most analog sticks have a resolution of 256 steps you can work out that 66% of 256 equals 168.96 steps - almost exactly what micro said was the upper limit.
-------------------------------------------------------------------------------------------------------
I posted these N64 Controller patent links in the thread mentioned below, but thought they might also be useful here:-
http://www.google.com/patents?id=XjoYAAAAEBAJ&printsec=abstract&zoom=4 (http://www.google.com/patents?id=XjoYAAAAEBAJ&printsec=abstract&zoom=4)
http://www.google.com/patents?id=jIEDAAAAEBAJ&printsec=abstract&zoom=4 (http://www.google.com/patents?id=jIEDAAAAEBAJ&printsec=abstract&zoom=4)
http://www.google.com/patents?id=mVgHAAAAEBAJ&printsec=abstract&zoom=4 (http://www.google.com/patents?id=mVgHAAAAEBAJ&printsec=abstract&zoom=4)
http://www.google.com/patents?id=bhQIAAAAEBAJ&printsec=abstract&zoom=4 (http://www.google.com/patents?id=bhQIAAAAEBAJ&printsec=abstract&zoom=4)
http://www.google.com/patents?id=7wcLAAAAEBAJ&printsec=abstract&zoom=4 (http://www.google.com/patents?id=7wcLAAAAEBAJ&printsec=abstract&zoom=4)
N64 Analog Stick:-
http://www.google.com/patents?id=NH4WAAAAEBAJ&printsec=abstract&zoom=4 (http://www.google.com/patents?id=NH4WAAAAEBAJ&printsec=abstract&zoom=4)
http://www.google.com/patents?id=rVUIAAAAEBAJ&printsec=abstract&zoom=4 (http://www.google.com/patents?id=rVUIAAAAEBAJ&printsec=abstract&zoom=4)
In particular on page 44 of the first patent the process of resetting the N64's Analog Stick using L+R+START says that:
-------------------------------------------------------------------------------------------------------
Lastly I thought some people here might also be interested in this project by DarthCloud called Cube64-DX:-
http://www.assemblergames.com/forums/showthread.php?t=32204 (http://www.assemblergames.com/forums/showthread.php?t=32204)
http://code.google.com/p/cube64-dx/ (http://code.google.com/p/cube64-dx/)
Its an improved version of the original Cube64 adaptor:-
http://cia.vc/stats/project/navi-misc/cube64 (http://cia.vc/stats/project/navi-misc/cube64)
This allows you to use GameCube controllers on the N64 :) I had seen the project before but it lacked WaveBird support which was one of the main reasons I would want to use it. However thanks to DarthCloud it now supports the WaveBird as well! ;D
I think its a perfect compliment to this project since you can now either improve the original N64 controllers analog stick for the more 'authentic' experience, or alternatively you could build the Cube64-DX GameCube controller adaptor if you want wireless.
The code is currently being updated by DarthCloud as I pointed out micro's earlier discovery about the N64 analog stick having an upper limit of 168 steps ;)
http://www.avrfreaks.net/index.php?name=PNphpBB2&file=viewtopic&t=36591 (http://www.avrfreaks.net/index.php?name=PNphpBB2&file=viewtopic&t=36591)
In the end I gave up and ordered an Atmel AVR ISP MKII a few weeks ago. I had to build a new programming circuit with a 6 pin ISP header and use the official software (AVR Studio) as Bascom still didnt work, but it programmed the ATiny24 first time :) Now I just need to get a GameCube analog stick to complete it, so if anyones still interested i'll post pics when im done.
-------------------------------------------------------------------------------------------------------
As a side note, a while ago I began wondering if emulator authors took the N64 analog sticks 168 steps into account (I assumed they would have to for perfect compatibility) and in fact they do! If you load up Project64 with the N-Rage input plugin and select 'Configure Controller Plugin' then you can see that the default analog sticks range is set to 66%, and considering that most analog sticks have a resolution of 256 steps you can work out that 66% of 256 equals 168.96 steps - almost exactly what micro said was the upper limit.
-------------------------------------------------------------------------------------------------------
I posted these N64 Controller patent links in the thread mentioned below, but thought they might also be useful here:-
http://www.google.com/patents?id=XjoYAAAAEBAJ&printsec=abstract&zoom=4 (http://www.google.com/patents?id=XjoYAAAAEBAJ&printsec=abstract&zoom=4)
http://www.google.com/patents?id=jIEDAAAAEBAJ&printsec=abstract&zoom=4 (http://www.google.com/patents?id=jIEDAAAAEBAJ&printsec=abstract&zoom=4)
http://www.google.com/patents?id=mVgHAAAAEBAJ&printsec=abstract&zoom=4 (http://www.google.com/patents?id=mVgHAAAAEBAJ&printsec=abstract&zoom=4)
http://www.google.com/patents?id=bhQIAAAAEBAJ&printsec=abstract&zoom=4 (http://www.google.com/patents?id=bhQIAAAAEBAJ&printsec=abstract&zoom=4)
http://www.google.com/patents?id=7wcLAAAAEBAJ&printsec=abstract&zoom=4 (http://www.google.com/patents?id=7wcLAAAAEBAJ&printsec=abstract&zoom=4)
N64 Analog Stick:-
http://www.google.com/patents?id=NH4WAAAAEBAJ&printsec=abstract&zoom=4 (http://www.google.com/patents?id=NH4WAAAAEBAJ&printsec=abstract&zoom=4)
http://www.google.com/patents?id=rVUIAAAAEBAJ&printsec=abstract&zoom=4 (http://www.google.com/patents?id=rVUIAAAAEBAJ&printsec=abstract&zoom=4)
In particular on page 44 of the first patent the process of resetting the N64's Analog Stick using L+R+START says that:
Quote from: Patent 5,963,196In order to correct the data from the analog joystick, a timer-interrupt routine shown in FIG. 31 is executed. The timer-interrupt routine is executed at every constant time period such as 1/30 secondsCould that mean the analog stick values are updated 1/30 second? Or perhaps its only refering to the analog stick reset combination? I know there was some question about how often the values were updated earlier, and just thought their might be some more helpful info in the above patents.
-------------------------------------------------------------------------------------------------------
Lastly I thought some people here might also be interested in this project by DarthCloud called Cube64-DX:-
http://www.assemblergames.com/forums/showthread.php?t=32204 (http://www.assemblergames.com/forums/showthread.php?t=32204)
http://code.google.com/p/cube64-dx/ (http://code.google.com/p/cube64-dx/)
Its an improved version of the original Cube64 adaptor:-
http://cia.vc/stats/project/navi-misc/cube64 (http://cia.vc/stats/project/navi-misc/cube64)
This allows you to use GameCube controllers on the N64 :) I had seen the project before but it lacked WaveBird support which was one of the main reasons I would want to use it. However thanks to DarthCloud it now supports the WaveBird as well! ;D
I think its a perfect compliment to this project since you can now either improve the original N64 controllers analog stick for the more 'authentic' experience, or alternatively you could build the Cube64-DX GameCube controller adaptor if you want wireless.
The code is currently being updated by DarthCloud as I pointed out micro's earlier discovery about the N64 analog stick having an upper limit of 168 steps ;)
Title: Re: PSX Analog in and N64 Controller
Post by: public-pervert on April 06, 2011, 10:40:18 PM
Post by: public-pervert on April 06, 2011, 10:40:18 PM
very interested! can't wait to see one of these working!
Title: Re: PSX Analog in and N64 Controller
Post by: GSM on April 30, 2011, 12:43:58 AM
Post by: GSM on April 30, 2011, 12:43:58 AM
Quote from: micro on February 27, 2011, 05:29:11 AM
I've just realized how damn small the octagonal gates are on these commercial stick replacements. So that's how the reduced the range, by restricting the stick travel mechanically? :D
I got myself a handfull of those. The octagonal gate don't restrict the movement actually. The stick is a lot thinner compared to a Gamecube or Wii stick. But they definitely do have a problem with the range... it is WAY to sensitive to play games like golden eye etc.. BIG letdown :( found this site researching how the hell i could make the stick less sensitive :P
 (http://s572.photobucket.com/albums/ss162/gsm2k/?action=view¤t=IMG_0719.jpg)
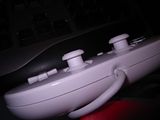 (http://s572.photobucket.com/albums/ss162/gsm2k/?action=view¤t=IMG_0724.jpg)
Here is an inside pic btw. I forgot to take a photo of the underside, but there is an unmarked chip and a handfull of other components. Guess i have to open the controller again ::)

I
Title: Re: PSX Analog in and N64 Controller
Post by: kylejw on April 30, 2011, 10:14:30 AM
Post by: kylejw on April 30, 2011, 10:14:30 AM
Could most likely reduce sensitivity by placing resistors in two places:
1. Between ground and where the joystick X and Y potentiometers connect to ground
2. Between power and where the joystick X and Y potentiometers connect to power
It also should be possible to adjust X sensitivity separately from Y sensitivity using 4 resistors.
1. Between ground and where the joystick X and Y potentiometers connect to ground
2. Between power and where the joystick X and Y potentiometers connect to power
It also should be possible to adjust X sensitivity separately from Y sensitivity using 4 resistors.
Title: Re: PSX Analog in and N64 Controller
Post by: GSM on May 03, 2011, 09:28:32 AM
Post by: GSM on May 03, 2011, 09:28:32 AM
Here are a few better pix of the china stick internals if anyone is interested =)
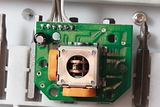 (http://s572.photobucket.com/albums/ss162/gsm2k/?action=view¤t=IMG_2034.jpg)
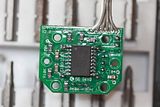 (http://s572.photobucket.com/albums/ss162/gsm2k/?action=view¤t=IMG_2031.jpg)
(http://s572.photobucket.com/albums/ss162/gsm2k/?action=view¤t=IMG_2034.jpg) (http://s572.photobucket.com/albums/ss162/gsm2k/?action=view¤t=IMG_2031.jpg)
Title: Re: PSX Analog in and N64 Controller
Post by: DarkSunL on June 16, 2011, 12:01:16 PM
Post by: DarkSunL on June 16, 2011, 12:01:16 PM
Hi everybody, im was so happy when i read about this mod, :D
The problems are:
1.- I couldn´t find the Atmel Micro or Tiny Micro...
2.- And the pic 16f684... the same story, i couldn´t find it
But i found the 16f616 it´s similar to 684, but it only has twice capacity than the 884, so i was thinking how to change the program to the 616
Is there any way to change it?
I don´t know a lot of pic, just took a short course...
Thanks
Title: Re: PSX Analog in and N64 Controller
Post by: micro on June 19, 2011, 06:40:12 PM
Post by: micro on June 19, 2011, 06:40:12 PM
Darksun, where are you from, if I may ask? :)
Title: Re: PSX Analog in and N64 Controller
Post by: kylejw on June 22, 2011, 11:54:15 AM
Post by: kylejw on June 22, 2011, 11:54:15 AM
It already is for 16f616.
Title: Re: PSX Analog in and N64 Controller
Post by: DarkSunL on July 21, 2011, 02:52:33 PM
Post by: DarkSunL on July 21, 2011, 02:52:33 PM
Quote from: micro on June 19, 2011, 06:40:12 PM
Darksun, where are you from, if I may ask? :)
I´m from Mexico :)
Quote from: kylejw on June 22, 2011, 11:54:15 AM
It already is for 16f616.
Sorry i mesed up! :P
i found only the pic16f684 u.u
Sorry
Title: Re: PSX Analog in and N64 Controller
Post by: Richter on October 29, 2011, 11:01:52 PM
Post by: Richter on October 29, 2011, 11:01:52 PM
for PIC16F876 or PIC16F877, please
Title: Re: PSX Analog in and N64 Controller
Post by: micro on January 17, 2012, 07:09:35 AM
Post by: micro on January 17, 2012, 07:09:35 AM
So I bought such a professionally-made replacement stick for 8$ as shown above because I was curious how good the stick really was. After some tests I must say this stick is absolute shit!
1.) The range of the stick is slightly higher (196 176 steps per axis) than it should be (160 to 170 steps). But that's not the real problem...
2.) Instead increasing/decreasing the +/- 88 steps one by one the program on the IC is skipping steps! When in neutral position, the x- and y-axis got the value 0. When slowly moving the stick to the right, that x-axis' value should increase by one: 0,1,2,3,4,5,...,87,88.
But this shitty stick is skipping most of the steps. At first it increases the value by 2, afterwards the value is increased by 4!
0,2,4,6,8,10,12,16,20,24,28,32,36,40,44,48,52,56,60,64,68,72,76,80,84,88. W T F ?
When moving the stick to the left it get's even a little bit weirder:
0,-2,-4,-6,-8,-10,-12,-15,-19,-23,-27,-31,-35,-39,-43,-47,-51,-55,-59,-63,-67,-71,-75,-79,-83,-87,-88
That means the real resolution is only about 50 or 52 steps / axis; and these steps are whether 2 or 4 steps worth.
3.) That replacement stick is also SLOW when making those steps. Here's a pic showing the XA and XB lines. http://i.imgur.com/BHMak.png (http://i.imgur.com/BHMak.png)
At the beginning, the x-axis voltage was about 2V and has been pulled to GND in an instant. Notice the long time the stick stays in neutral position.
Also notice how much freaking time it takes for the stick to make it's way from neutral position to all the way left.
You can also see the steps are made very irregularly. Most of the time nothing happens, then 2 or 4 steps are made at once in a very short period of time.
For comparison here's a pic showing how the program for the Atmel microcontroller is handling the steps:
http://i.imgur.com/QfdXf.png (http://i.imgur.com/QfdXf.png)
You can see it's much, much faster and much more regular, too.
I really don't know what the designers of the stick were thinking. Did they even test it?
With that replacement stick some special moves in Smash Brother can't be executed properly. The spin attack in Zelda OOT doesn't work, too.
If you remove all the parts on the pcb except for the potentiometer you can install an Atmel microcontroller. That will solve the problems described.
Here's a little video showing the stick skipping most of the steps:
problems with N64 replacement stick (http://www.youtube.com/watch?v=o0VO46SWo2M#)
1.) The range of the stick is slightly higher (
2.) Instead increasing/decreasing the +/- 88 steps one by one the program on the IC is skipping steps! When in neutral position, the x- and y-axis got the value 0. When slowly moving the stick to the right, that x-axis' value should increase by one: 0,1,2,3,4,5,...,87,88.
But this shitty stick is skipping most of the steps. At first it increases the value by 2, afterwards the value is increased by 4!
0,2,4,6,8,10,12,16,20,24,28,32,36,40,44,48,52,56,60,64,68,72,76,80,84,88. W T F ?
When moving the stick to the left it get's even a little bit weirder:
0,-2,-4,-6,-8,-10,-12,-15,-19,-23,-27,-31,-35,-39,-43,-47,-51,-55,-59,-63,-67,-71,-75,-79,-83,-87,-88
That means the real resolution is only about 50 or 52 steps / axis; and these steps are whether 2 or 4 steps worth.
3.) That replacement stick is also SLOW when making those steps. Here's a pic showing the XA and XB lines. http://i.imgur.com/BHMak.png (http://i.imgur.com/BHMak.png)
At the beginning, the x-axis voltage was about 2V and has been pulled to GND in an instant. Notice the long time the stick stays in neutral position.
Also notice how much freaking time it takes for the stick to make it's way from neutral position to all the way left.
You can also see the steps are made very irregularly. Most of the time nothing happens, then 2 or 4 steps are made at once in a very short period of time.
For comparison here's a pic showing how the program for the Atmel microcontroller is handling the steps:
http://i.imgur.com/QfdXf.png (http://i.imgur.com/QfdXf.png)
You can see it's much, much faster and much more regular, too.
I really don't know what the designers of the stick were thinking. Did they even test it?
With that replacement stick some special moves in Smash Brother can't be executed properly. The spin attack in Zelda OOT doesn't work, too.
If you remove all the parts on the pcb except for the potentiometer you can install an Atmel microcontroller. That will solve the problems described.
Here's a little video showing the stick skipping most of the steps:
problems with N64 replacement stick (http://www.youtube.com/watch?v=o0VO46SWo2M#)
Title: Re: PSX Analog in and N64 Controller
Post by: public-pervert on January 21, 2012, 08:16:09 PM
Post by: public-pervert on January 21, 2012, 08:16:09 PM
incredible work as always dude! ;D
Title: Re: PSX Analog in and N64 Controller
Post by: maverickh on April 25, 2012, 01:13:01 PM
Post by: maverickh on April 25, 2012, 01:13:01 PM
hello fellas, I'm really excited about this mod but I have some dubts and I think you guys can handle them.
The thing is that in this country I can't get the ATtiny24 or the ATmega8 for the mod, but I can get the Attiny2313, ATTINY45-20PU
and ATTINY13-20PU, and I don't know if the code that micro wrote for the ATtiny24 works with that one and I only have
to replace one line of code or it's not possible to do the mode with those microcontrolers.
thankz for the advices!!
Title: Re: PSX Analog in and N64 Controller
Post by: micro on May 08, 2012, 04:20:00 AM
Post by: micro on May 08, 2012, 04:20:00 AM
No, it's not possible with these microcontrollers because they got no ADC's. Which country are you from?
Maybe you can get some free samples from Atmel directly...
Maybe you can get some free samples from Atmel directly...
Title: Re: PSX Analog in and N64 Controller
Post by: maverickh on May 10, 2012, 01:44:17 PM
Post by: maverickh on May 10, 2012, 01:44:17 PM
Well, I'm from Colombia, I have been checking the technical information of the microcontrollers, and I think the ATTINY45-20PU has 4 chanel to ADC, check this link:
http://avnetexpress.avnet.com/store/em/EMController/Microcontroller/Atmel/ATTINY45-20PU/_/R-3592013/A-3592013/An-0?action=part&catalogId=500201&langId=-1&storeId=500201 (http://avnetexpress.avnet.com/store/em/EMController/Microcontroller/Atmel/ATTINY45-20PU/_/R-3592013/A-3592013/An-0?action=part&catalogId=500201&langId=-1&storeId=500201)
http://avnetexpress.avnet.com/store/em/EMController/Microcontroller/Atmel/ATTINY45-20PU/_/R-3592013/A-3592013/An-0?action=part&catalogId=500201&langId=-1&storeId=500201 (http://avnetexpress.avnet.com/store/em/EMController/Microcontroller/Atmel/ATTINY45-20PU/_/R-3592013/A-3592013/An-0?action=part&catalogId=500201&langId=-1&storeId=500201)
Title: Re: PSX Analog in and N64 Controller
Post by: micro on May 11, 2012, 01:38:41 AM
Post by: micro on May 11, 2012, 01:38:41 AM
You're right BUT you'd need to use the reset pin as a normal input/output pin. This means no further (re-)programming of the microcontroller is possible.
In the past I tried to port the program to the small attiny12 which also got only 8 pins. The program worked, but only after resetting/recalibrating the N64 controller (L+R+Start). Because I couldn't reflash the microcontroller without the reset pin I couldn't really work on it... So I'd stick to the Attiny24.
In the past I tried to port the program to the small attiny12 which also got only 8 pins. The program worked, but only after resetting/recalibrating the N64 controller (L+R+Start). Because I couldn't reflash the microcontroller without the reset pin I couldn't really work on it... So I'd stick to the Attiny24.
Title: Re: PSX Analog in and N64 Controller
Post by: maverickh on May 12, 2012, 01:28:57 PM
Post by: maverickh on May 12, 2012, 01:28:57 PM
So a mistake is equal to death, ok but as I said before I can't get the ATtiny24, maybe another microcontroller not from Atmel would work? if yes, which one?
thanks anyway for the help
thanks anyway for the help
Title: Re: PSX Analog in and N64 Controller
Post by: micro on May 12, 2012, 08:11:46 PM
Post by: micro on May 12, 2012, 08:11:46 PM
I guess there are tons of different microcontrollers that are suited for the mod...
If you have paypal then you can just order some ATMega8's on ebay:
http://www.ebay.com/itm/Atmel-ATmega8A-PU-ATMega8-DIP28-/160525058715?pt=Bauteile&hash=item25600a029b (http://www.ebay.com/itm/Atmel-ATmega8A-PU-ATMega8-DIP28-/160525058715?pt=Bauteile&hash=item25600a029b)
http://www.ebay.com/itm/10PCS-NEW-IC-ATMEL-DIP-28-ATMEGA8-16PU-/140730966675?pt=LH_DefaultDomain_0&hash=item20c4382293 (http://www.ebay.com/itm/10PCS-NEW-IC-ATMEL-DIP-28-ATMEGA8-16PU-/140730966675?pt=LH_DefaultDomain_0&hash=item20c4382293)
The Atmega8 is supposed to be very common....
Title: Re: PSX Analog in and N64 Controller
Post by: maverickh on May 22, 2012, 12:35:16 PM
Post by: maverickh on May 22, 2012, 12:35:16 PM
thanks micro for the information, I've already ordered the 10 microcontrollers that you talk before, because it was imposible to get those in Colombia
I think that in a month I will be doing yhe mod so I'll post the results if possitive or asking for more help if needed
the good thing is that there are 10 posibilities of doing it right
I think that in a month I will be doing yhe mod so I'll post the results if possitive or asking for more help if needed
the good thing is that there are 10 posibilities of doing it right
Title: Re: PSX Analog in and N64 Controller
Post by: duo_r on July 19, 2012, 06:26:13 AM
Post by: duo_r on July 19, 2012, 06:26:13 AM
amazing work here!
Title: Re: PSX Analog in and N64 Controller
Post by: wwwyzzerdd on July 23, 2012, 06:17:39 PM
Post by: wwwyzzerdd on July 23, 2012, 06:17:39 PM
Just finished my controller using the atmega8. I took a solid green controller, and put the jungle green back on it. Also added some blue LEDs just for fun. Not sure if I like the blue, but I think it's sweet. Thanks a ton for all the info here.
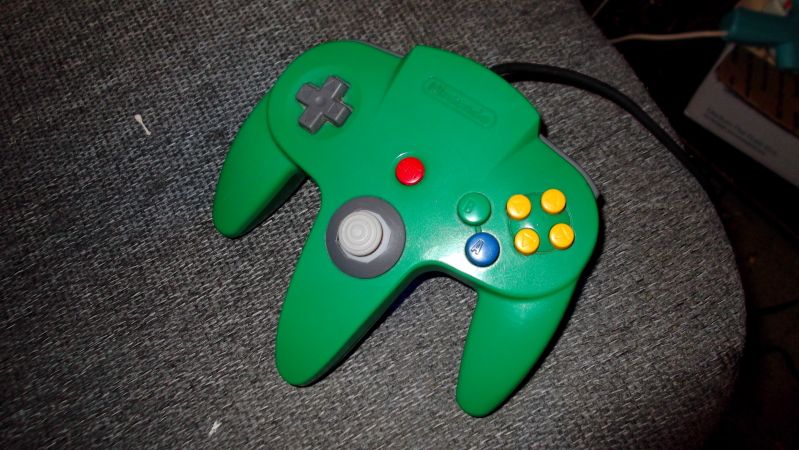
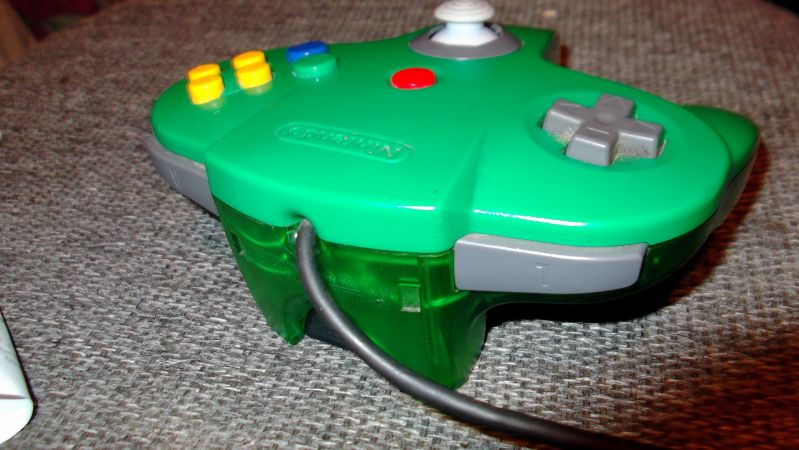

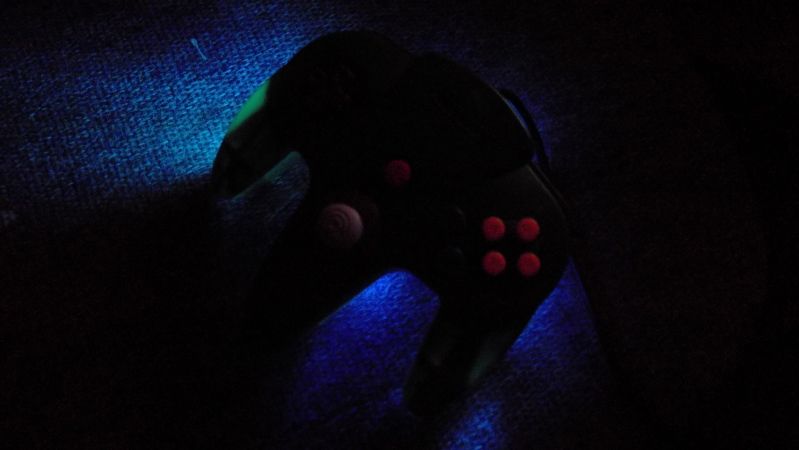
Title: Re: PSX Analog in and N64 Controller
Post by: public-pervert on July 26, 2012, 11:55:51 PM
Post by: public-pervert on July 26, 2012, 11:55:51 PM
That's amazing! Really great job! 8)
Title: Re: PSX Analog in and N64 Controller
Post by: Ace on October 05, 2012, 11:49:08 AM
Post by: Ace on October 05, 2012, 11:49:08 AM
Quote from: wwwyzzerdd on July 23, 2012, 06:17:39 PM
Just finished my controller using the atmega8.
If I may ask, which AtMega8 did you use for the analog stick? I have two AtMega8-16PUs laying around, though I'm doubtful of whether they'll work or not as only the AtMega8L chips would work at 3.3V. Did anyone get the AtMega8-16PU working in the Nintendo 64 controller?
Another thing: is the AtMega8 code compatible with the AtMega328? I know that chip can work no problem at 3.3V, but I'm not entirely sure if the code for the AtMega8 would work on the AtMega328.
Title: Re: PSX Analog in and N64 Controller
Post by: micro on October 07, 2012, 05:52:01 PM
Post by: micro on October 07, 2012, 05:52:01 PM
Usually ATMega8-16P MCUs work at 3.3 V without any problems. Just give it a try!
Title: Re: PSX Analog in and N64 Controller
Post by: Ace on October 10, 2012, 09:44:21 AM
Post by: Ace on October 10, 2012, 09:44:21 AM
Quote from: micro on October 07, 2012, 05:52:01 PM
Usually ATMega8-16P MCUs work at 3.3 V without any problems. Just give it a try!
Well, I did give it a try, but I guess the chip was either programmed wrong or doesn't like working at 3.3V because all I got was very sluggish response from the analog stick, and when I moved the analog stick just a little bit, if there was a cursor on the screen (say the hand in the character select screen in Super Smash Bros.), it would drift all the way to one side of the screen and never return to normal. Now, I need to try a Serial programmer (I do have a fairly recent Lenovo PC that does have a Serial port) as on my Parallel programmer, one of my AtMega8s goes unrecognized and the second only gets random data written to it from 0 up to about 3F.
As a side note, I did get one of those pre-made GameCube-style replacement analog sticks to give it a try, and I honestly don't really understand all the b****ing and moaning about the stick. Okay, it does have some delay issues, but on my particular stick, they're not severe at all, and the stick itself, while being more sensitive than the original Nintendo analog stick (as expected), works a lot a better than the analog sticks on my Tomee, RetroBit and TTX Tech Nintendo 64 controllers. The Tomee stick is poorly calibrated (MASSIVE deadzone and highly oversensitive), the RetroBit controller has a huge deadzone and the TTX Tech controller is INSANELY oversensitive (all controllers use POT-based analog sticks, by the way), but the analog stick on this controller is not insanely oversensitive nor does it have a massive deadzone. I may still throw in one of my AtMega8s into this analog stick as Super Smash Bros. is a bit more difficult to play when using this analog stick, and this is a game myself and my buddies play A LOT on the Nintendo 64.
Title: Re: PSX Analog in and N64 Controller
Post by: Ace on October 15, 2012, 04:13:19 AM
Post by: Ace on October 15, 2012, 04:13:19 AM
Success! Turns out the problem was due to the power source I was using while programming the AtMega8 being inadequate.
However, I do still have some issues with the stick itself. The sensitivity (I'm using a GameCube analog stick) is very low, so low that my controllers with tight analog sticks have a wider range of motion than the controller in which I installed the GameCube analog stick. Is there some way of making the analog stick more sensitive other than using bigger POTs, like something I can tweak in the code?
However, I do still have some issues with the stick itself. The sensitivity (I'm using a GameCube analog stick) is very low, so low that my controllers with tight analog sticks have a wider range of motion than the controller in which I installed the GameCube analog stick. Is there some way of making the analog stick more sensitive other than using bigger POTs, like something I can tweak in the code?
Title: Re: PSX Analog in and N64 Controller
Post by: micro on October 21, 2012, 02:57:38 AM
Post by: micro on October 21, 2012, 02:57:38 AM
Hmm... To say the sensitivity is very low is not right imo. The range is +-80 steps and that is the same range an original stick in good condition will give you. As you've said in your previous post other sticks are highly oversensitive.
If you flash the microcotroller with my program you should get a stick that is not too sensitive. At the same time you should be able to get a full range in all games, for example running at full speed in Mario 64.
One thing about the pre-made GC-style replacement sticks: I love how easy the installation is and I like its look and feel. But imo they really suck. Every person has its own preferences and some may be annoyed by its lag and high sensitivity more than other persons. But when that lag and sensitivity are the causing some moves to be not executeable any longer (quick whirlwind attack in Zelda OOT), then that stick just sucks...
Title: Re: PSX Analog in and N64 Controller
Post by: wwwyzzerdd on November 06, 2012, 03:18:30 PM
Post by: wwwyzzerdd on November 06, 2012, 03:18:30 PM
hi ace. I'm glad I found your post. I actually used the atmega8-16pu myself and it works great.. not that it matters now that you've figured it out, lol.
I actually came back to scan this thread for clues as to why the joystick I just "finished" doesn't work right. I'm also using super smash bros to test it and it behaves exactly like you said yours did.
I won't go into details, but my power source during programming was.. less than adequate, lol.. which leads me to believe that I may have to reprogram the chip. I did NOT want to do that, but oh well.
The point of this post is really to thank you for posting back how you fixed it as I'm almost sure it will fix my problem, I hope, and although I couldn't help you in time, you saved me from a bit of painful searching.
Title: Re: PSX Analog in and N64 Controller
Post by: micro on November 07, 2012, 11:59:29 PM
Post by: micro on November 07, 2012, 11:59:29 PM
So what's exactly your preoblem, wwwyzzerdd?
Do you also think the sensitivity is too low?
Or dou you also have the weird problem with the cursor drifting to one side?
Do you also think the sensitivity is too low?
Or dou you also have the weird problem with the cursor drifting to one side?
Title: Re: PSX Analog in and N64 Controller
Post by: Ace on November 15, 2012, 11:15:06 AM
Post by: Ace on November 15, 2012, 11:15:06 AM
Quote from: micro on October 21, 2012, 02:57:38 AM
Hmm... To say the sensitivity is very low is not right imo. The range is +-80 steps and that is the same range an original stick in good condition will give you. As you've said in your previous post other sticks are highly oversensitive.
If you flash the microcotroller with my program you should get a stick that is not too sensitive. At the same time you should be able to get a full range in all games, for example running at full speed in Mario 64.
Apparently not. I've installed AtMega8s in two controllers, one which has a GameCube analog stick and the other with a pre-made replacement analog stick, and the limits of the range are never reached on the GameCube analog stick, but the pre-made analog stick actually reaches the full range of motion. It also requires much less movement, which is my big complaint with the GameCube analog stick. Not only is the full range never reached, but the sensitivity of the stick itself is very low, meaning I have to move the analog stick quite a bit before I reach the limits of the range.
I personally use Star Wars Shadows of the Empire (Hoth mission), Star Wars Rogue Squadron, San Francisco Rush 2049 and Super Smash Bros. (character select screen) to test the analog sticks. This is the result I get with each analog stick:
Original Nintendo stick:
-Shadows of the Empire: The Snowspeeder turns from side to side at a perfect 90-degree angle
-Rogue Squadron: Using an X-Wing, turning from side to side is very quick and tight turns are easy to pull off
-San Francisco Rush 2049: A clear separation between the tire marks from the front and rear wheels is visible when smashing the analog stick.
-Super Smash Bros.: Relatively fast cursor
GameCube stick:
-Shadows of the Empire: The Snowspeeder doesn't quite turn from side to side at a perfect 90-degree angle (slightly below 90 degrees)
-Rogue Squadron: Using an X-Wing, turning is a lot more sluggish and tight turns are much more difficult to pull off
-San Francisco Rush 2049: No separation between tire marks whatsoever, requires considerably more movement to reach the limit
-Super Smash Bros.: Cursor is noticeably slower in all directions
Pre-made replacement stick:
-Shadows of the Empire: The snowspeeder turns just like it does with an original Nintendo analog stick
-Rogue Squadron: Using an X-Wing, turning is just like on an original Nintendo analog stick
-San Francisco Rush 2049: Visible separation between tire marks
-Super Smash Bros.: Cursor is about as fast as it is on an original Nintendo analog stick
Either I've done something wrong or the POTs on a GameCube analog stick are not sensitive enough for use in a Nintendo 64 controller.
Quote from: micro on October 21, 2012, 02:57:38 AMOne thing about the pre-made GC-style replacement sticks: I love how easy the installation is and I like its look and feel. But imo they really suck. Every person has its own preferences and some may be annoyed by its lag and high sensitivity more than other persons. But when that lag and sensitivity are the causing some moves to be not executeable any longer (quick whirlwind attack in Zelda OOT), then that stick just sucks...
Honestly, I would much rather buy one of those replacement sticks and throw in an AtMega8 to replace the crappy microcontroller already on the sticks. Yes, they are more sensitive, but I prefer the higher sensitivity of those sticks (except when stock as the skipping of steps is a big problem in Goldeneye; it's a pain to aim properly without using an AtMega8 or AtTiny24 on the sticks).
Sometimes, I think someone should actually sell pre-made analog sticks with AtTiny24s programmed with your code on it (and you'll get a cut of the profits, obviously). I was actually thinking about this myself, but I don't have to means to make such a thing.
Title: Re: PSX Analog in and N64 Controller
Post by: micro on November 15, 2012, 05:46:08 PM
Post by: micro on November 15, 2012, 05:46:08 PM
Ace, now I think I know what you mean :D
When I did my mod the first time I used the stick of a 3rd party GC controller. Public-pervert also successfully used several sticks from GC controllers, but I think those were unofficial/3rd party ones too...
So you're using the stick from an official Nintendo GC controller?
Normally potentiometer-based joysticks give out 0V to Vcc (3.3V in our case) when pushed all the way left or right. It's possible that your stick doesn't get all the way up or down voltage-wise. That effect may also be boosted by the restrictor gate. You can check if I'm right: Take a multimeter and measure the voltage at the potentiometer's middle terminal pin terminal pin while pushing the stick all the way left and right. Because you said you don't get full range I predict the voltage won't vary between 0V and 3.3V, but between 0.6V and 2.7V or something like that.
If that's the case then you can fix your range by simply tweaking the code a tiny bit:
Find the line that says "R = 20". Replace the "20" by a higher number like 30 or 35. ;D
If you can tell me the voltages you've measured at the potentiometer's middle terminals while pushing the stick to its boundaries then I can give you an exact number so your stick will have full range without beeing too over-sensitive.
When I did my mod the first time I used the stick of a 3rd party GC controller. Public-pervert also successfully used several sticks from GC controllers, but I think those were unofficial/3rd party ones too...
So you're using the stick from an official Nintendo GC controller?
Normally potentiometer-based joysticks give out 0V to Vcc (3.3V in our case) when pushed all the way left or right. It's possible that your stick doesn't get all the way up or down voltage-wise. That effect may also be boosted by the restrictor gate. You can check if I'm right: Take a multimeter and measure the voltage at the potentiometer's middle terminal pin terminal pin while pushing the stick all the way left and right. Because you said you don't get full range I predict the voltage won't vary between 0V and 3.3V, but between 0.6V and 2.7V or something like that.
If that's the case then you can fix your range by simply tweaking the code a tiny bit:
Code Select
'R will affect the range of X- and Y-axis (1024 * R / 128)
'R=20 means the range of each axis will be 160 steps (1024*20/128=160)
'If you drive Pinb.5 low (Pin 19), R will be 21 resulting in a slightly higher range of 168 steps
Dim R As Byte
R = 20
If Pinb.5 = 0 Then R = 21
Find the line that says "R = 20". Replace the "20" by a higher number like 30 or 35. ;D
If you can tell me the voltages you've measured at the potentiometer's middle terminals while pushing the stick to its boundaries then I can give you an exact number so your stick will have full range without beeing too over-sensitive.
Title: Re: PSX Analog in and N64 Controller
Post by: micro on November 15, 2012, 06:13:08 PM
Post by: micro on November 15, 2012, 06:13:08 PM
Quote from: Ace on November 15, 2012, 11:15:06 AMHonestly, I would much rather buy one of those replacement sticks and throw in an AtMega8 to replace the crappy microcontroller already on the sticks. Yes, they are more sensitive, but I prefer the higher sensitivity of those sticks (except when stock as the skipping of steps is a big problem in Goldeneye; it's a pain to aim properly without using an AtMega8 or AtTiny24 on the sticks).
Sometimes, I think someone should actually sell pre-made analog sticks with AtTiny24s programmed with your code on it (and you'll get a cut of the profits, obviously). I was actually thinking about this myself, but I don't have to means to make such a thing.
What a coincidence you made that remark ;)
I made a little PCB that will fit into the GC style replacement stick housing, have a look:
 (http://imgur.com/JpXXh)
  (http://imgur.com/6Ec4C)
  (http://imgur.com/il7WY)
I used a different microcontroller and the code is different too (also written in C, not Basic). I also found a source for the potentiometer based joysticks so I can offer sets consisting of the PCB (microcontroller already pre-programmed and soldered on the PCB) and a new joystick (the orange part). This set is aimed at the people that are not satisfied with their GC replacement sticks but don't want to buy a programmer and fiddle with microcontrollers.
Installation into the replacement stick housing is quite easy. From the GC replacement stick you only need the plastic parts (housing and plastic cap) and the 6-wire cable which has to be soldered on the new PCB.
Title: Re: PSX Analog in and N64 Controller
Post by: Ace on November 16, 2012, 08:10:22 AM
Post by: Ace on November 16, 2012, 08:10:22 AM
Quote from: micro on November 15, 2012, 05:46:08 PMSo you're using the stick from an official Nintendo GC controller?
It's actually a mix of two different controllers' analog sticks. The actual stick assembly is from a TTX Tech GameCube controller that broke (it was the only assembly I had that wasn't loose and I made sure to put a good bit of silicone grease on it so it doesn't loosen), but the POTs are from original Nintendo GameCube controllers. Off-brand controllers use more sensitive POTs.
Quote from: micro on November 15, 2012, 05:46:08 PMNormally potentiometer-based joysticks give out 0V to Vcc (3.3V in our case) when pushed all the way left or right. It's possible that your stick doesn't get all the way up or down voltage-wise. That effect may also be boosted by the restrictor gate. You can check if I'm right: Take a multimeter and measure the voltage at the potentiometer's middle terminal pin terminal pin while pushing the stick all the way left and right. Because you said you don't get full range I predict the voltage won't vary between 0V and 3.3V, but between 0.6V and 2.7V or something like that.
If that's the case then you can fix your range by simply tweaking the code a tiny bit:Code Select'R will affect the range of X- and Y-axis (1024 * R / 128)
'R=20 means the range of each axis will be 160 steps (1024*20/128=160)
'If you drive Pinb.5 low (Pin 19), R will be 21 resulting in a slightly higher range of 168 steps
Dim R As Byte
R = 20
If Pinb.5 = 0 Then R = 21
Find the line that says "R = 20". Replace the "20" by a higher number like 30 or 35. ;D
If you can tell me the voltages you've measured at the potentiometer's middle terminals while pushing the stick to its boundaries then I can give you an exact number so your stick will have full range without beeing too over-sensitive.
Thanks for this. I still need to cut off a bit of the controller's original analog stick module as I get even horizontal range, but uneven vertical range (more range down than up), so once I'm done with that, I will measure the voltages I get out of the analog stick and report back. I will then desolder the AtMega8, reprogram it with the modified code and solder it back into the controller.
Quote from: micro on November 15, 2012, 06:13:08 PMWhat a coincidence you made that remark ;)
I made a little PCB that will fit into the GC style replacement stick housing, have a look:
I used a different microcontroller and the code is different too (also written in C, not Basic). I also found a source for the potentiometer based joysticks so I can offer sets consisting of the PCB (microcontroller already pre-programmed and soldered on the PCB) and a new joystick (the orange part). This set is aimed at the people that are not satisfied with their GC replacement sticks but don't want to buy a programmer and fiddle with microcontrollers.
Installation into the replacement stick housing is quite easy. From the GC replacement stick you only need the plastic parts (housing and plastic cap) and the 6-wire cable which has to be soldered on the new PCB.
Now that is awesome. All you need now is a mold for the actual analog module and you can sell pre-made replacement analog sticks with this PCB in it. And if you have any of those boards for sale, once I get more of the existing pre-made replacement analog sticks, I'll be sure to buy a few boards from you. I do like to mess around with various bits of electronics, but I like to keep things simple as well, so anything that would make it easier for me is welcome.
Title: Re: PSX Analog in and N64 Controller
Post by: public-pervert on November 18, 2012, 01:42:39 AM
Post by: public-pervert on November 18, 2012, 01:42:39 AM
Micro, you keep blowing my mind! These boards looks so beatiful!
Also, I'm a lot curious if you'll make the new code available and what microcontroller is that?
Also, I'm a lot curious if you'll make the new code available and what microcontroller is that?
Title: Re: PSX Analog in and N64 Controller
Post by: Paar on November 29, 2012, 09:05:40 PM
Post by: Paar on November 29, 2012, 09:05:40 PM
Quote from: micro on November 15, 2012, 06:13:08 PMQuote from: Ace on November 15, 2012, 11:15:06 AMHonestly, I would much rather buy one of those replacement sticks and throw in an AtMega8 to replace the crappy microcontroller already on the sticks. Yes, they are more sensitive, but I prefer the higher sensitivity of those sticks (except when stock as the skipping of steps is a big problem in Goldeneye; it's a pain to aim properly without using an AtMega8 or AtTiny24 on the sticks).
Sometimes, I think someone should actually sell pre-made analog sticks with AtTiny24s programmed with your code on it (and you'll get a cut of the profits, obviously). I was actually thinking about this myself, but I don't have to means to make such a thing.
What a coincidence you made that remark ;)
I made a little PCB that will fit into the GC style replacement stick housing, have a look:
I used a different microcontroller and the code is different too (also written in C, not Basic). I also found a source for the potentiometer based joysticks so I can offer sets consisting of the PCB (microcontroller already pre-programmed and soldered on the PCB) and a new joystick (the orange part). This set is aimed at the people that are not satisfied with their GC replacement sticks but don't want to buy a programmer and fiddle with microcontrollers.
Installation into the replacement stick housing is quite easy. From the GC replacement stick you only need the plastic parts (housing and plastic cap) and the 6-wire cable which has to be soldered on the new PCB.
That looks promising. Could it be used together with your original thumbstick mod? Gluing the PCB to the plastic housing is a bit clumsy. One more question - I already have a JDM programmer and don't want to buy another if not necessary. Is it possible to somehow use your code with JDM compatible microcontroller?
Title: Re: PSX Analog in and N64 Controller
Post by: wwwyzzerdd on December 20, 2012, 09:25:35 AM
Post by: wwwyzzerdd on December 20, 2012, 09:25:35 AM
Sweet pcb boards, are you selling?
The cursor was going crazy.
It was the power source I used during programming, reprogrammed it with a good battery hooked up and all is good now, I did have problems with sensitivity, but that was just the hole for the stick not being big enough
Quote from: micro on November 07, 2012, 11:59:29 PM
So what's exactly your preoblem, wwwyzzerdd?
Do you also think the sensitivity is too low?
Or dou you also have the weird problem with the cursor drifting to one side?
The cursor was going crazy.
It was the power source I used during programming, reprogrammed it with a good battery hooked up and all is good now, I did have problems with sensitivity, but that was just the hole for the stick not being big enough
Title: Re: PSX Analog in and N64 Controller
Post by: micro on December 27, 2012, 03:48:10 AM
Post by: micro on December 27, 2012, 03:48:10 AM
Quote from: wwwyzzerdd on December 20, 2012, 09:25:35 AM
Sweet pcb boards, are you selling?
Yes I am. :) Send me a PM for detailed infos.
Title: Re: PSX Analog in and N64 Controller
Post by: Kupolski on January 29, 2013, 08:01:00 PM
Post by: Kupolski on January 29, 2013, 08:01:00 PM
Hello! I've been following this thread for a while and seem to have the worst timing imaginable. On the same day micro's PCBs were sold out, later I had a chance to grab two of these chinese pre-made Sticks. I'm currently waiting for them to arrive, and will test them out. Although I'm looking forward to having them, I have a feeling that I won't be completely satisfied, based on the research you all have done.
Ace, you tried to directly replace the microcontroller on these pre-made sticks, correct? How much work was it to do so, and from a beginner's perspective, would this be a feasible project? It would mean a lot if I could get some initial assistance :)
From what I gathered, this would mean to grab an AtTiny24 or AtMega8, desolder the microcontroller from the prefabbed PCB, program the new microcontroller with the code from this thread and then, using wires, solder it to the right connectors on the pcb?
Which brings me to my next question: Which code did you use, and did you have to modify it to accomodate the different microcontrollers?
Thanks in advance :)
Title: Re: PSX Analog in and N64 Controller
Post by: ste2425 on December 04, 2015, 08:41:58 PM
Post by: ste2425 on December 04, 2015, 08:41:58 PM
Hey guys signed thanks to this brilliant thread.
I know its incredibly old now and usually i refrain from posting on such old threads but wanted to ask. Does 'kylejw' have his source up on GitHub or something of the like?
I've seen his Google Code repo and that is rather old without any updates, plus it doesn't have any actual source, just the built HEX.
Half way through the first page he posted his refactored code and a slightly different pinout to use it. I was thinking of creating a GitHub repo referencing this thread and his Google Code repo but include the refactored source he included as well as the newer pinout.
Seem's a waste to put so much effort into creating this for it to just get lost in a forum post. Especially if this place cleans up old threads, or moves servers etc and it gets lost.
So yea, its great having a analogue stick that actually works now!
Title: Re: PSX Analog in and N64 Controller
Post by: kylejw on December 12, 2020, 10:56:17 AM
Post by: kylejw on December 12, 2020, 10:56:17 AM
ste2425, my apologies for this reply 5 years later - but in case you're still interested, or someone else comes looking:
https://github.com/kylejw1/n64-joystick-translator
I have some of the ebay replacement sticks and in my very biased opinion the DIY solutions (not just mine) are better.
https://github.com/kylejw1/n64-joystick-translator
I have some of the ebay replacement sticks and in my very biased opinion the DIY solutions (not just mine) are better.